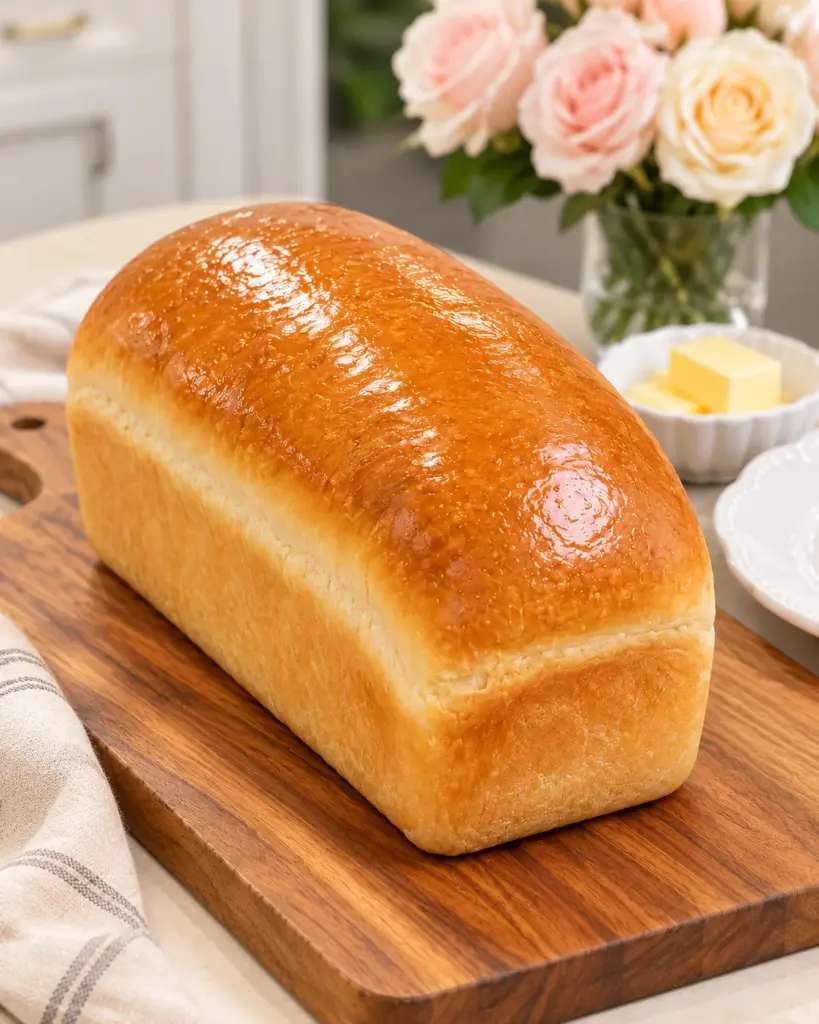
Classic Homemade White Bread is a soft, milk-enriched loaf with a rounded golden top and a light butter finish. Made with bread flour, instant yeast, sugar, salt, milk, and butter, it is a straightforward everyday bread for sandwiches, toast, or a simple slice with your favorite spread.
A Soft Everyday Loaf with a Golden Buttered Top
This loaf takes its visual cue from the supplied photo: a smooth, rounded crown, pale tender sides, and a light sheen from melted butter. It is not a crusty artisan loaf and does not need a Dutch oven, steam tray, sourdough starter, or an egg wash. A standard metal loaf pan supports the dough as it rises into its sandwich-bread shape.
Ingredients
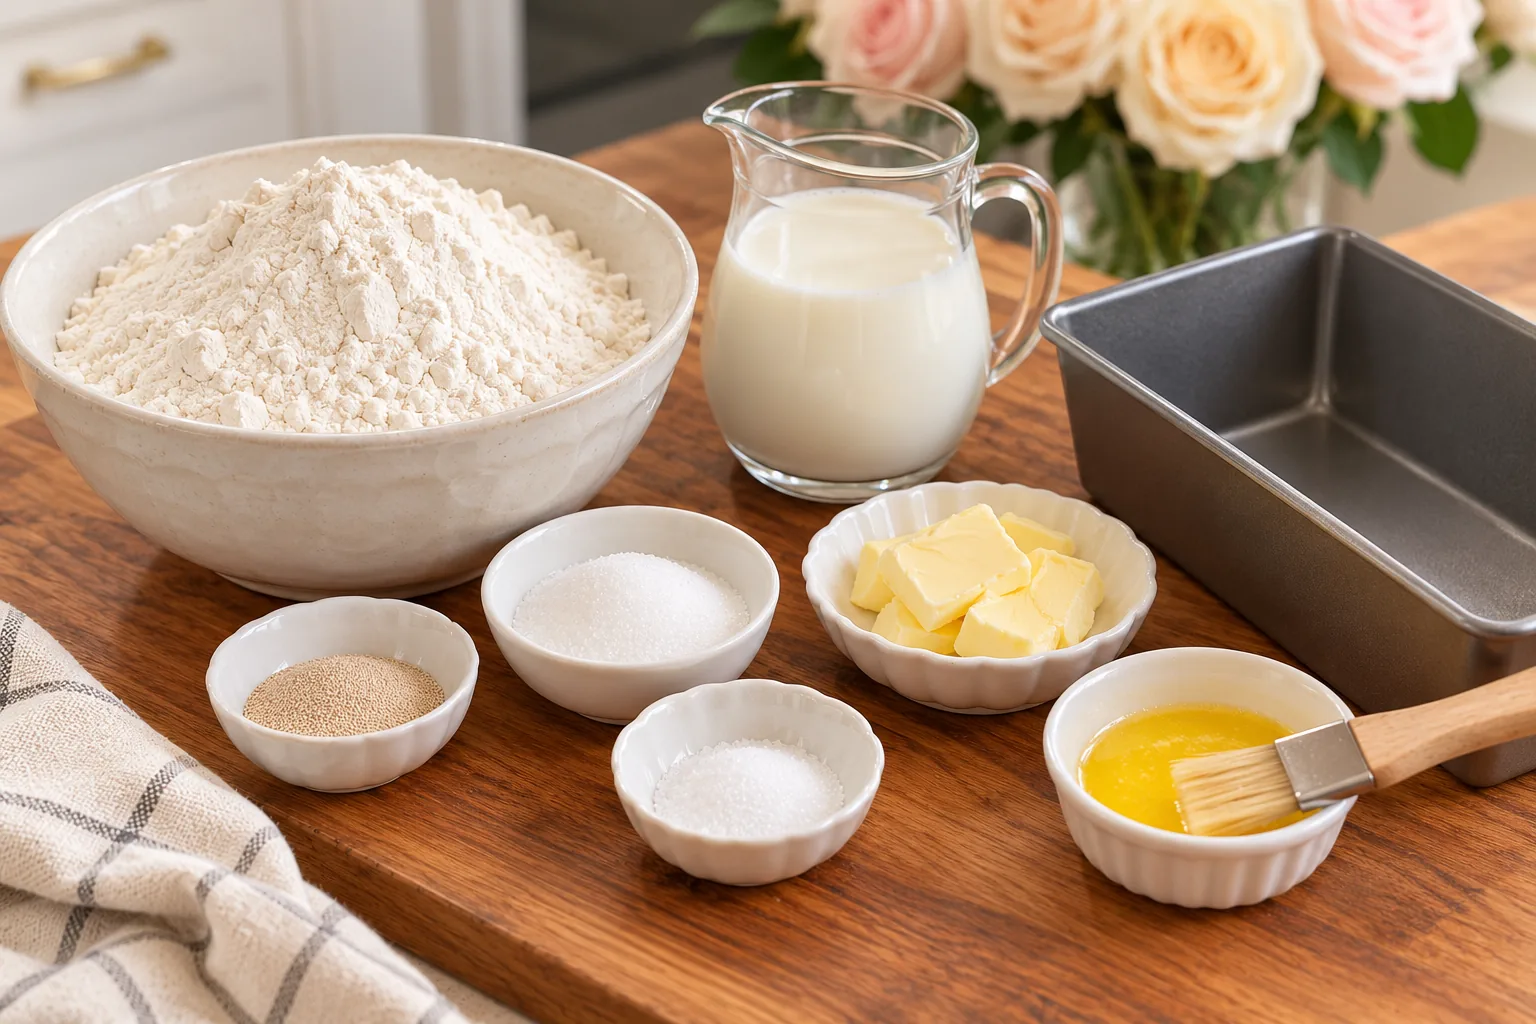
For the Bread
- 500 g bread flour
- 300 ml lukewarm milk
- 7 g instant yeast
- 30 g sugar
- 8 g salt
- 40 g softened butter
For Finishing
- Melted butter, for finishing (about 10–15 g, as needed)
Ingredient Details That Matter
Bread flour provides structure for a tall loaf, while milk and butter give the crumb a richer, softer bite. Whole milk is a useful choice, but the recipe does not require a special milk product. The sugar adds mild sweetness and helps the crust color; the bread is not intended to taste like a dessert. Use softened, pliable butter for the dough, not hot melted butter. The finishing butter is a separate small amount brushed on after baking. Unsalted butter makes the measured 8 g salt easier to control.
Equipment
- Kitchen scale
- Large mixing bowl and sturdy spoon
- Dough scraper
- Optional stand mixer with dough hook
- 9-by-5-inch metal loaf pan
- Oven-rated parchment paper
- Foil and oven mitts
- Pastry brush
- Wire cooling rack
- Serrated bread knife
- Optional instant-read thermometer
Instructions
-
Mix and rest: Whisk the bread flour, instant yeast, sugar, and salt in a large bowl. Add the lukewarm milk, about 95–105°F (35–41°C), and stir until the flour is moistened and a rough dough forms. Scrape the bowl well, cover, and rest for 10 minutes. Keep all 40 g softened butter aside for the next step. The separate melted butter is for finishing after baking.
-
Knead in the butter: Knead the dough for about 3–4 minutes, then work in the softened butter in small pieces. Continue kneading for another 6–8 minutes by hand, until smooth, supple, and elastic. If using a stand mixer, use the dough hook on low according to the manufacturer's guidance and check the dough frequently. It may look slippery as the butter goes in; keep working gently until it comes together. Avoid adding handfuls of flour.
-
First rise: Return the dough to the bowl and cover. Leave in a comfortably warm, draft-free spot for about 60–90 minutes, until roughly doubled. A cooler kitchen may need longer. The dough should look expanded and feel airy rather than simply warm to the touch.
-
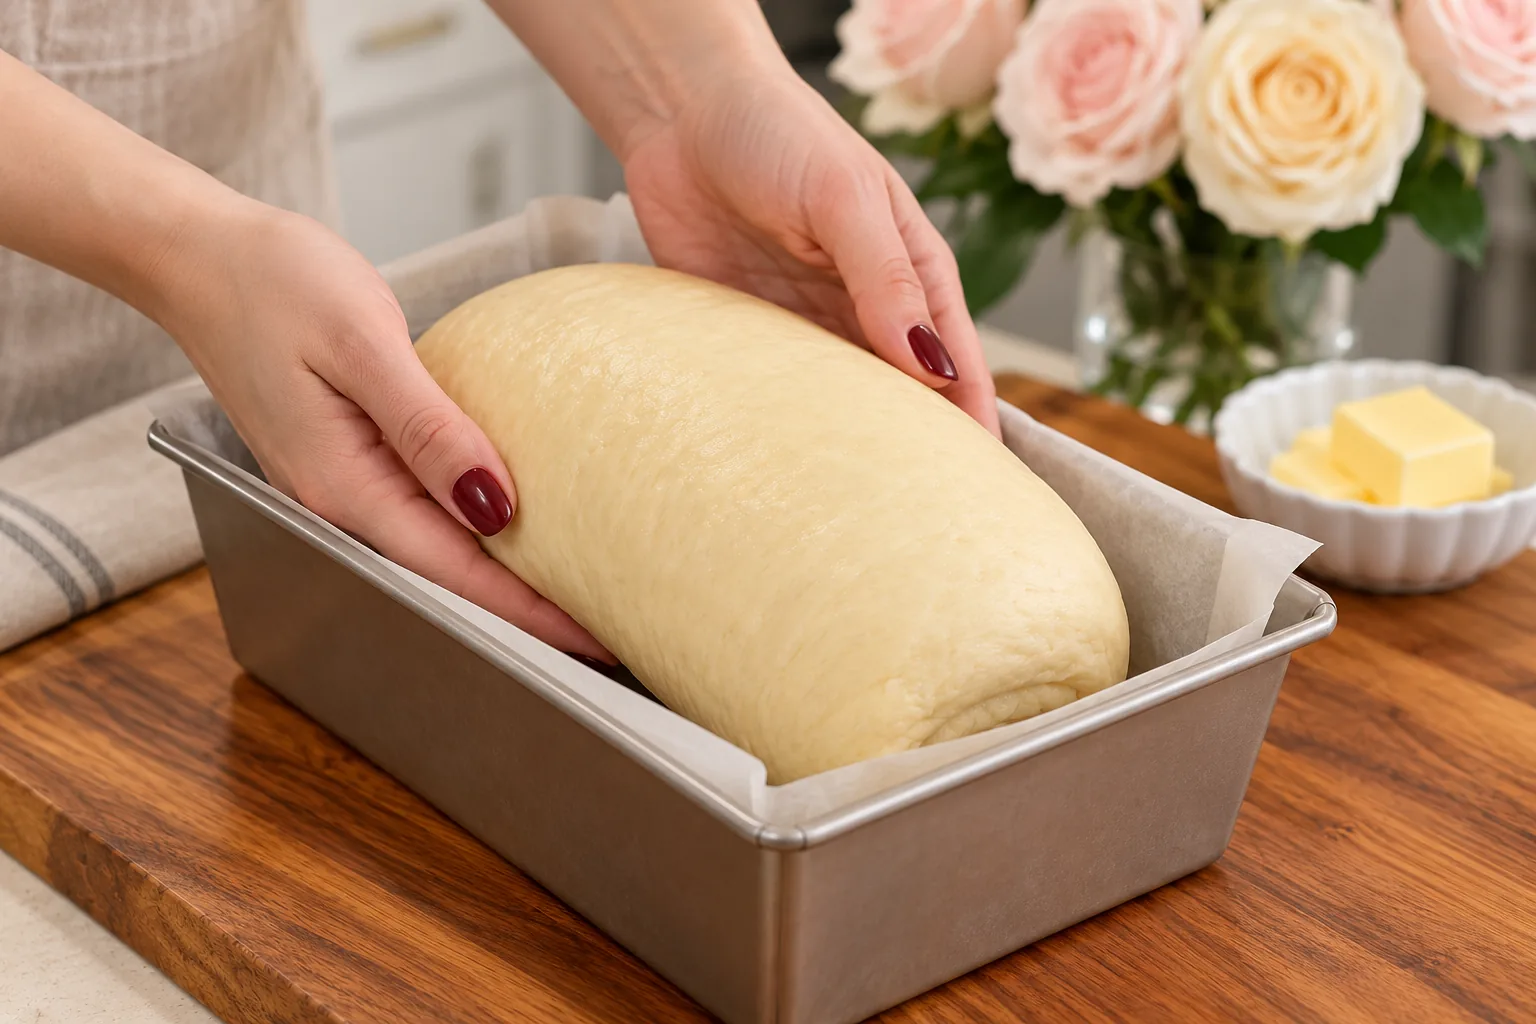
Shape: Line a 9-by-5-inch (23-by-13-cm) metal loaf pan with parchment, keeping the paper safely away from heating elements. Gently deflate the dough on a clean work surface and pat it into a rectangle about 8 inches wide and 10 inches long. Roll snugly from a short end into an 8-inch log, pinch the seam closed, and tuck the ends slightly underneath. Put it seam-side down in the pan. If the dough keeps springing back, cover for 5 minutes before continuing.
-
Second rise: Cover loosely and let rise for about 35–60 minutes, until the middle of the loaf is about 1 inch (2.5 cm) above the pan rim and the dough looks puffy. A very light fingertip impression should return slowly. During this rise, preheat the oven to 350°F (175°C), with a rack slightly below the middle. Do not score the top or brush with egg; this loaf bakes with a plain, smooth surface.
-
Bake: Bake for 35–45 minutes, until the top is evenly golden and the loaf is baked through. Check after about 25 minutes and tent loosely with foil if the top is browning too quickly. A thermometer inserted into the center should read about 190–195°F (88–91°C). If the middle is not ready, continue baking under the loose foil rather than relying only on crust color.
-
Butter and cool: Leave in the pan for 5 minutes, then lift the loaf out, remove the parchment, and place on a wire rack. Brush a thin layer of melted butter for finishing over the warm top; about 10–15 g is usually enough, and this is additional to the 40 g in the dough. Cool for about 1½–2 hours, until the center is no longer warm, before slicing with a serrated knife.
Helpful Tips
- Weigh the bread flour; densely packed cups can make the dough dry.
- Use lukewarm milk rather than hot milk, which can damage the yeast.
- The short rest after mixing makes the dough easier to knead without extra flour.
- Add the softened butter gradually so it incorporates evenly.
- Aim for a smooth, elastic dough that feels slightly tacky, not a wet batter or a hard dry ball.
- Roll the loaf snugly and seal the underside to reduce large tunnels beneath the crust.
- Let the shaped loaf rise until puffy, but do not leave it until it starts to sag.
- Brush with butter after baking, then cool on a rack rather than leaving the loaf to steam inside the pan.
Troubleshooting
If the dough seems stiff immediately after mixing, give it the full covered rest before judging it. Flour absorption varies, but adding more flour to a firm dough will only make it drier. Dense bread can also result from insufficient kneading, old yeast, or a shortened rise. A long tunnel just under the top often comes from a loose shaping roll or trapped large bubbles. A browned crust with an underbaked center needs more time under foil. If the loaf wrinkles or collapses noticeably, overproofing or underbaking may be involved; watch the dough during the second rise and check the center before removing it.
Serving Ideas
Slice only once the center has cooled. The loaf makes about fourteen medium slices, depending on thickness, and works well for everyday sandwiches or toast. For neat sandwich slices, use a serrated knife with a gentle sawing motion rather than pressing straight down on the soft top. Any butter, jam, or sandwich filling served with it is optional and separate from the bread formula.
Timing and Yield
Plan on about 25 minutes of hands-on preparation, a 10-minute initial rest, approximately 75 minutes for the first rise, 45 minutes for the second rise, 40 minutes baking, and at least 90 minutes cooling. That is around 4 hours 45 minutes from mixing to slicing. The rises and cooling may take longer, especially in a cool kitchen or with a particularly tall loaf. Follow the dough and doneness cues rather than treating the clock as exact.
Simple Variations
- Keep the supplied flour, milk, and butter amounts for the first loaf so you can learn the dough's texture.
- Use a thinner brushing of finishing butter for a less glossy surface; it does not change the dough formula.
- The same dough can be shaped into rolls, but roll size, yield, and baking time would need to be adjusted; the instructions here are for one loaf.
Storage
Cool completely before placing the unfilled loaf in a bread bag or airtight container. Keep at cool room temperature for up to 2–3 days, or freeze for longer storage. Slice before freezing and separate portions if helpful, then wrap well and freeze for up to 2 months for best quality. Avoid bagging warm bread, which traps condensation. Discard bread that develops mold.
Reheating
Toast slices straight from frozen, or let wrapped portions thaw at room temperature. To warm a larger thawed piece without making the crust hard, wrap loosely in foil and place in a 300°F (150°C) oven for about 10–15 minutes. Warm only what you plan to eat; repeated reheating dries the crumb.
Allergen Notes
Contains wheat and milk. No eggs or seeds are added, but check ingredient labels and kitchen cross-contact when cooking for someone with allergies.
FAQ
Does this white bread contain eggs?
No. There is no egg in the dough and no egg wash. Milk, butter, and the sugar help the crust brown; the glossy finish comes from melted butter brushed on afterward.
Are the 40 g butter and the finishing butter the same amount?
No. All 40 g softened butter goes into the dough. Use a separate small amount of melted butter to brush the baked loaf; about 10–15 g is a practical guide rather than a change to the dough recipe.
Do I need to activate instant yeast in the milk first?
No. Instant yeast can be whisked directly into the flour. Use fresh, properly stored yeast and milk that is comfortably lukewarm, not hot.
Why does the dough look slippery after adding butter?
That can happen while the butter is being incorporated. Add it in small pieces and continue kneading gently until the dough becomes smooth again. Do not immediately add more flour to absorb the butter.
Can I use a smaller loaf pan?
This amount of dough makes one substantial loaf. A 9-by-5-inch pan is the intended size; a smaller pan can crowd the dough and encourage overflowing. A larger pan produces a lower loaf.
Should I cut a slash across the top?
No scoring is needed for the smooth domed appearance shown here. Shape neatly, proof adequately, and bake with the plain top.
Why wait before slicing?
The soft interior continues to set as it cools. Cutting while hot can compress the crumb and leave a gummy-looking slice, even if the crust is already golden.
Can I leave the dough out overnight?
This recipe uses 7 g instant yeast and is designed for two same-day rises. Do not leave it at room temperature overnight; a longer fermentation needs a different schedule.
Conclusion
A smooth, well-kneaded dough, a snug shaping roll, and two properly timed rises give this Classic Homemade White Bread its tall, soft shape. Finish the warm loaf with a light brushing of butter, then let it cool before cutting your first slices.
Print
Classic Homemade White Bread
- Prep Time: 25 minutes
- Cook Time: 40 minutes
- Total Time: 4 hours 45 minutes
- Yield: 1 large loaf (about 14 slices) 1x
- Category: Breakfast
- Method: Baking
Description
One soft homemade white sandwich loaf made with milk and butter, baked in a loaf pan and brushed with melted butter while warm.
Ingredients
- 500 g bread flour
- 300 ml lukewarm milk
- 7 g instant yeast
- 30 g sugar
- 8 g salt
- 40 g softened butter
- Melted butter, for finishing (about 10–15 g, as needed)
Instructions
Step 1 Mix and rest: Whisk the bread flour, instant yeast, sugar, and salt in a large bowl. Add the lukewarm milk, about 95–105°F (35–41°C), and stir until the flour is moistened and a rough dough forms. Scrape the bowl well, cover, and rest for 10 minutes. Keep all 40 g softened butter aside for the next step. The separate melted butter is for finishing after baking.
Step 2 Knead in the butter: Knead the dough for about 3–4 minutes, then work in the softened butter in small pieces. Continue kneading for another 6–8 minutes by hand, until smooth, supple, and elastic. If using a stand mixer, use the dough hook on low according to the manufacturer's guidance and check the dough frequently. It may look slippery as the butter goes in; keep working gently until it comes together. Avoid adding handfuls of flour.
Step 3 First rise: Return the dough to the bowl and cover. Leave in a comfortably warm, draft-free spot for about 60–90 minutes, until roughly doubled. A cooler kitchen may need longer. The dough should look expanded and feel airy rather than simply warm to the touch.
Step 4 Shape: Line a 9-by-5-inch (23-by-13-cm) metal loaf pan with parchment, keeping the paper safely away from heating elements. Gently deflate the dough on a clean work surface and pat it into a rectangle about 8 inches wide and 10 inches long. Roll snugly from a short end into an 8-inch log, pinch the seam closed, and tuck the ends slightly underneath. Put it seam-side down in the pan. If the dough keeps springing back, cover for 5 minutes before continuing.
Step 5 Second rise: Cover loosely and let rise for about 35–60 minutes, until the middle of the loaf is about 1 inch (2.5 cm) above the pan rim and the dough looks puffy. A very light fingertip impression should return slowly. During this rise, preheat the oven to 350°F (175°C), with a rack slightly below the middle. Do not score the top or brush with egg; this loaf bakes with a plain, smooth surface.
Step 6 Bake: Bake for 35–45 minutes, until the top is evenly golden and the loaf is baked through. Check after about 25 minutes and tent loosely with foil if the top is browning too quickly. A thermometer inserted into the center should read about 190–195°F (88–91°C). If the middle is not ready, continue baking under the loose foil rather than relying only on crust color.
Step 7 Butter and cool: Leave in the pan for 5 minutes, then lift the loaf out, remove the parchment, and place on a wire rack. Brush a thin layer of melted butter for finishing over the warm top; about 10–15 g is usually enough, and this is additional to the 40 g in the dough. Cool for about 1½–2 hours, until the center is no longer warm, before slicing with a serrated knife.
Notes
All 40 g softened butter goes into the dough. Melted butter for finishing is additional, about 10–15 g as needed. No egg wash or scoring. Use a 9-by-5-inch metal loaf pan. Total time includes a 10-minute initial rest, both rises, and at least 90 minutes cooling; actual timing varies. Cool completely before placing the unfilled loaf in a bread bag or airtight container. Keep at cool room temperature for up to 2–3 days, or freeze for longer storage. Slice before freezing and separate portions if helpful, then wrap well and freeze for up to 2 months for best quality. Avoid bagging warm bread, which traps condensation. Discard bread that develops mold.