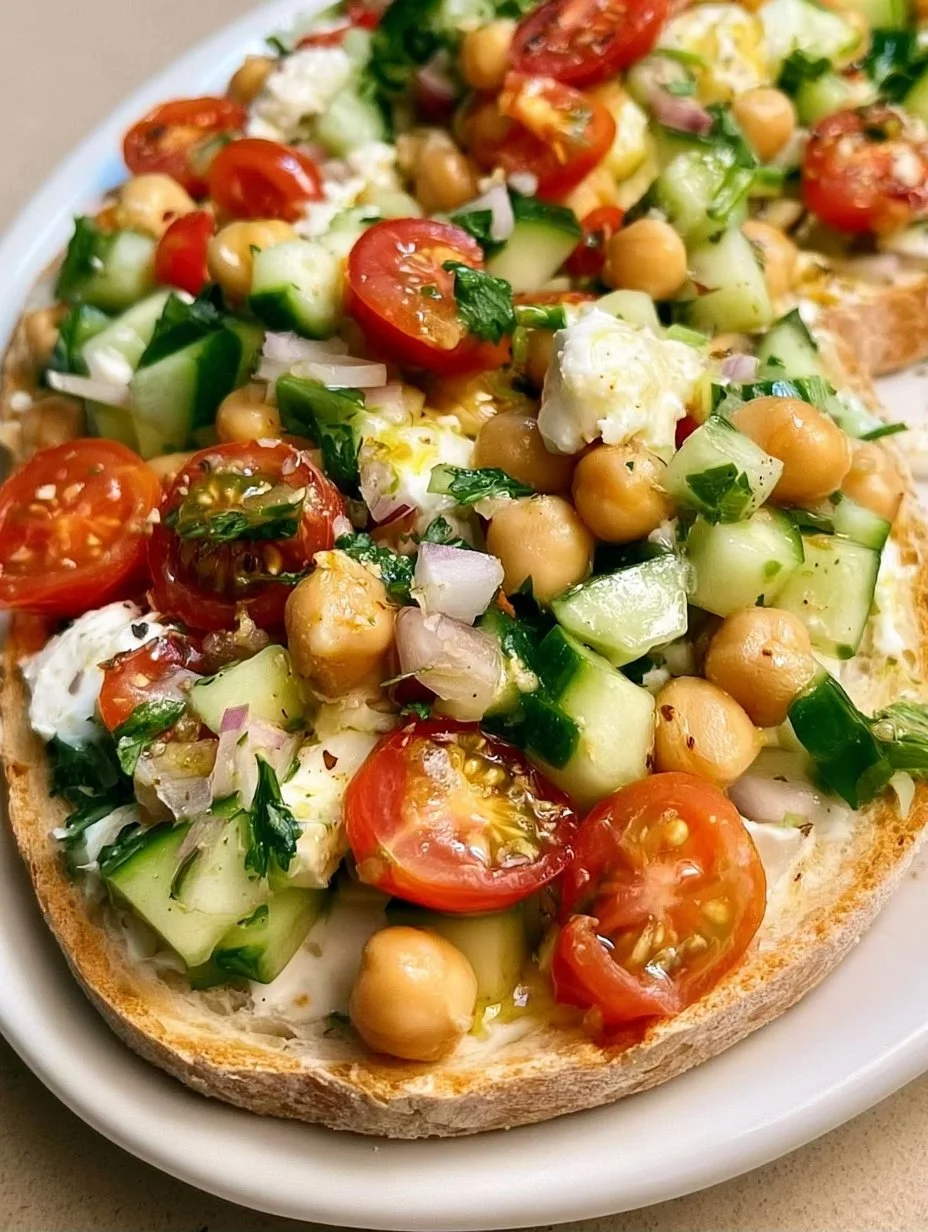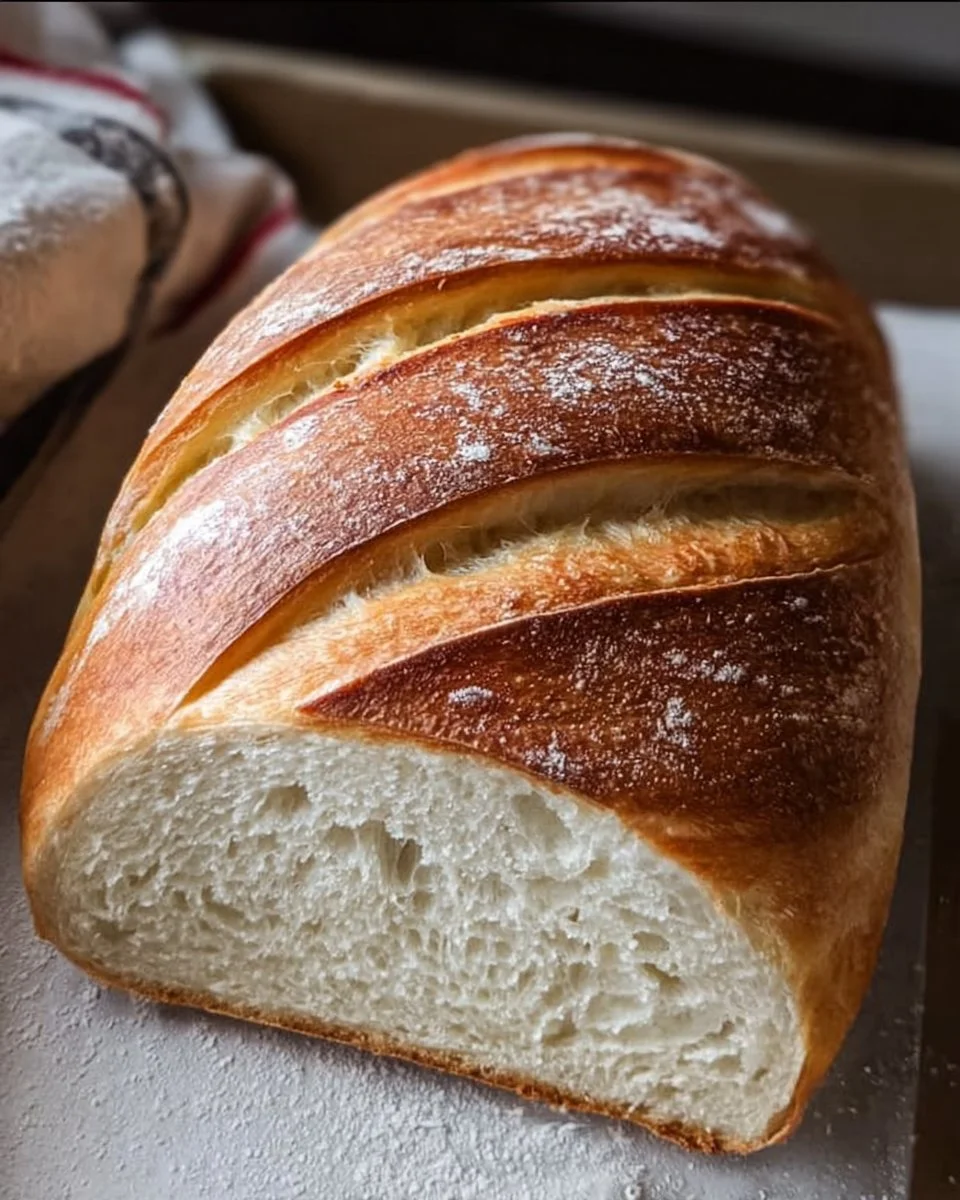
Sinking your teeth into a slice of fresh-baked sourdough sandwich bread feels like a warm embrace on a chilly day. The bread’s crust crackles gently when you press it, releasing a symphony of aromas that whisk you away to a cozy bakery filled with the scent of yeasty goodness. As your knife glides through its enchanted golden crust, you reveal the soft, pillowy interior — a canvas just waiting to cradle your favorite fillings. Each bite offers delightful contrast: the crisp outer layer gives way to a tender, airy crumb that’s perfectly tangy from the sourdough starter, leaving a whisper of complex flavors dancing on your palate.
Imagine layering this bread with creamy, ripe avocado, or perhaps a generous spread of homemade hummus paired with fresh veggies. The possibilities are endless, each bite providing comfort while elevating even the simplest of sandwiches to gourmet status. As the bread cools on your countertop, it beckons you to custom-make the ultimate sandwich, one that tells your unique flavor story.
Why You’ll Love This Sourdough Sandwich Bread
This sourdough sandwich bread stands out with its unique tangy flavor and delightful texture, making it a sensational addition to any meal. Perfectly versatile, it serves as a beautiful base for sandwiches, toast, or simply slathered with butter and jams. Its robust crust adds a satisfying crunch, while the soft, airy crumb invites you to relish every bite. Imagine packing a lunch for a picnic or hosting a brunch, where your friends and family gather around, marveling at a loaf of this golden goodness.
Beyond its delightful taste and texture, homemade sourdough bread embodies the art of cooking. You’ll control every aspect of the process, creating a loaf that aligns perfectly with your preferences. You may find solace in the ritual of bread-making, and the satisfaction of enjoying the fruits of your labor makes every step worthwhile.
Preparation Phase & Tools to Use
Creating an extraordinary loaf of sourdough sandwich bread requires a few essential tools. Here’s what you’ll need:
- Large Mixing Bowl: This will be the vessel where your ingredients come together, allowing you to mix and knead with ease.
- Floured Surface: A clean surface helps you shape and knead the dough without it sticking.
- Loaf Pan: A standard 9×5-inch loaf pan ensures consistent baking results for that perfect sandwich shape.
- Clean Cloth: Use this to cover your dough while it rises, trapping moisture that promotes a beautiful rise.
- Instant Read Thermometer (optional): To accurately check the internal temperature of your bread, guaranteeing it’s thoroughly baked.
Preparation Tips:
- Always ensure your sourdough starter is active and bubbly before using it.
- Measure your flour correctly — consider using a kitchen scale for added precision.
- Warm the water slightly to help the yeast activate and flourish.
Ingredients for Sourdough Sandwich Bread
-
1 cup active sourdough starter: This is your bread’s foundation, imparting that signature tang and a fluffy rise. If you lack a starter, you can either make your own or purchase a healthy one from a reliable source.
-
3 cups all-purpose flour: The backbone of your dough. For a whole grain twist, substitute half for whole wheat flour for added nutrition and flavor.
-
1 cup water: Provides moisture to the dough. Adjust temperature based on your starter; warm water can help if your starter is active and bubbly.
-
2 teaspoons salt: Enhances flavor while strengthening the dough structure during fermentation.
-
1 tablespoon sugar: This small amount assists yeast activity, helping your dough to rise and developing a subtle sweetness.
-
1 tablespoon olive oil: Adds richness, keeping the crumb tender while enhancing flavor. You can replace it with melted butter for additional richness.
How to Make Sourdough Sandwich Bread
-
In a large bowl, combine the active sourdough starter, warm water, and sugar. Stir gently until thoroughly mixed, ensuring the sugar dissolves.
-
Gradually sprinkle the flour and salt into the mixture. Stir with a wooden spoon or your hands until a shaggy dough begins to form.
-
Flour your work surface and transfer the dough. Knead for about 10 minutes, or until the dough becomes smooth and elastic. If it’s too sticky, lightly dust with more flour as needed.
-
Place the kneaded dough in a greased bowl. Cover with a clean cloth and set aside in a warm spot to rise for 4-6 hours, or until it has doubled in size.
-
Preheat your oven to 375°F (190°C).
-
Gently deflate the dough and shape it into a loaf. Place it into a greased loaf pan, taking care not to damper the air pockets you’ve created.
-
Cover again and let it rise for another hour or until it has once again visibly expanded.
-
Bake your dough for 30-35 minutes, watching for a golden-brown crust. Tap the bread’s base; it should sound hollow when fully cooked.
-
Once out of the oven, cool the loaf on a rack before slicing. This allows the crumb to set properly, ensuring each slice holds together beautifully.
Chef’s Notes & Helpful Tips
- Make-Ahead Tips: Prepare the dough in advance and refrigerate it overnight during the second rise for a deeper flavor.
- Cooking Alternatives: You can utilize an air fryer if you want a quick fix. Adjust the time based on your fryer’s features.
- Customization Ideas: Consider adding seeds, herbs, or spices to the dough for extra flavor. Chia seeds or rosemary create delightful variations.
Common Mistakes to Avoid
- Ignoring Dough Temperature: Too hot or too cold environments can hinder your dough’s rise. Aim for a cozy 75-80°F (24-27°C) to achieve an optimal environment.
- Overworking the Dough: Kneading is essential, but overdoing it can produce dense bread. Mix just until it’s smooth and elastic.
- Skipping the Rise Times: Allow your dough to grow! Rushing the rise will lead to collapsed or gummy bread.
What to Serve With Sourdough Sandwich Bread
Pair your freshly baked sourdough sandwich bread with:
- Classic BLT: Crispy bacon, fresh lettuce, and garden tomatoes create a textural masterpiece.
- Avocado Toast: Creamy avocado mashed with lime, topped with seeds and chili flakes, becomes a gourmet breakfast.
- Turkey and Cranberry Sandwich: A delightful combination for lunch that echoes festive flavors year-round.
- Handmade Grilled Cheese: The gooey melty cheese contrasts beautifully with the crusty bread; a childhood favorite elevated!
- Peanut Butter and Jelly: Nostalgic and satisfying, this combination makes any childhood heart swell with joy.
- Egg Salad: Creamy with a touch of crunch from celery makes a refreshing filling, perfect for lunch.
- Mediterranean Veggie Sandwiches: Roasted peppers, artichokes, and feta bring a world of flavor between your slices.
Storage & Reheating Instructions
Store your bread wrapped in a clean cloth or in a paper bag at room temperature for up to three days. For longer storage, slice and freeze it in an airtight container; it can last up to three months. To reheat, pop slices directly in a toaster or warm a whole loaf in the oven at 350°F (175°C) for about 10 minutes, reviving its freshness.
Estimated Nutrition Information
Each slice of sourdough sandwich bread has approximately:
- Calories: 120
- Protein: 4g
- Carbohydrates: 22g
- Fat: 2g
- Fiber: 1g
(Note: These values may vary based on specific ingredients and portions used.)
FAQs
1. Why does my sourdough bread not rise?
If your sourdough starter isn’t active, it can affect the rise. Ensure that it’s bubbly and at its peak before using it, and try letting the dough rise in a warmer spot.
2. Can I use whole wheat flour in this recipe?
Absolutely! Whole wheat flour can be substituted for half of the all-purpose flour for a nuttier flavor and added fiber, but it may need a bit of extra water.
3. What if I don’t have a loaf pan?
You can shape your dough into a free-form round loaf and bake it on a baking sheet. Just remember to adjust the baking time as needed, keeping an eye on the browning.
4. How do I know when my bread is done baking?
Tap the bottom of the loaf; it should sound hollow. An internal temperature of 190-210°F (88-99°C) indicates your bread has fully baked.
5. Can I add other ingredients like seeds?
Yes, consider adding seeds like flax or sunflower for extra crunch and nutrition. Mix them in during the kneading step for an even distribution.
As you embark on this journey of baking sourdough sandwich bread, remember that each step not only creates a delicious loaf but also a connection to those you share it with. Feel the thrill of the kneading, the anticipation of the rise, and ultimately the joy of serving something made with love. So grab your tools, roll up your sleeves, and dive into the enchanting world of homemade sourdough bread. It’s not just about the end product; it’s about the experience — one that is bound to fill your kitchen with laughter, warmth, and the unforgettable aroma of fresh-baked bread. Enjoy every bite!
Print
Sourdough Sandwich Bread
- Prep Time: 30 minutes
- Cook Time: 35 minutes
- Total Time: 255 minutes
- Yield: 12 servings 1x
- Category: Bread
- Method: Baking
- Cuisine: American
- Diet: Vegetarian
Description
Delight in the tangy flavor and airy texture of homemade sourdough sandwich bread, perfect for any meal.
Ingredients
- 1 cup active sourdough starter
- 3 cups all-purpose flour
- 1 cup warm water
- 2 teaspoons salt
- 1 tablespoon sugar
- 1 tablespoon olive oil
Instructions
- Combine the active sourdough starter, warm water, and sugar in a large bowl and stir gently until mixed.
- Sprinkle the flour and salt gradually into the mixture and stir until a shaggy dough forms.
- Flour your work surface and transfer the dough. Knead for about 10 minutes until smooth and elastic.
- Place the kneaded dough in a greased bowl, cover with a clean cloth, and let it rise in a warm spot for 4-6 hours until doubled.
- Preheat your oven to 375°F (190°C).
- Deflate the dough gently and shape it into a loaf. Place in a greased loaf pan.
- Cover again and let it rise for another hour until visibly expanded.
- Bake for 30-35 minutes until golden brown and sounds hollow when tapped.
- Cool the loaf on a rack before slicing to set the crumb.
Notes
Make sure your sourdough starter is active and bubbly before use. Consider refrigerating the dough overnight for deeper flavor.
Nutrition
- Serving Size: 1 slice
- Calories: 120
- Sugar: 1g
- Sodium: 400mg
- Fat: 2g
- Saturated Fat: 0g
- Unsaturated Fat: 1g
- Trans Fat: 0g
- Carbohydrates: 22g
- Fiber: 1g
- Protein: 4g
- Cholesterol: 0mg