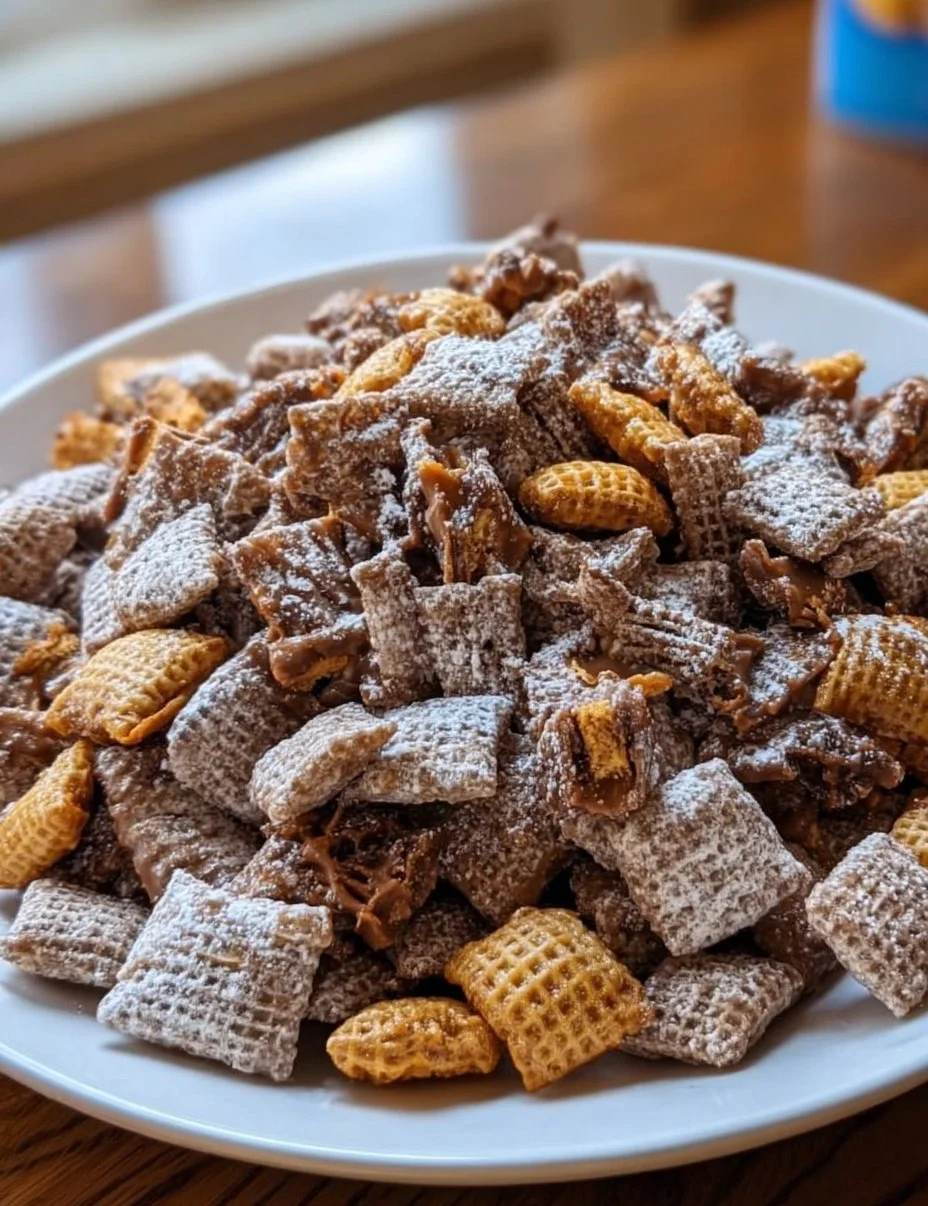
Picture this: it’s a breezy afternoon, and the aroma of melted chocolate drifts through your kitchen, intertwining with the rich nuttiness of peanut butter. You catch the scent of crunchy morsels mixed with sweet, crumbly Butterfinger, a symphony of flavors that dance around your senses. As you dig your hands into a bowl brimming with Butterfinger Puppy Chow, the sweet, creamy, and slightly salty notes explode in your mouth, each bite a delightful crunch that leaves you craving more. The wonderfully textured blend transports you to a nostalgic bliss, reminding you of carefree childhood days filled with snacks and laughter.
This delightful concoction, often found at parties or family gatherings, brings a sense of joy that is hard to replicate. Each handful is not just a treat; it’s an experience—a crunch that teases your teeth, a sweetness that lingers on your tongue, and a texture that hugs your palate with creamy richness. The loving simplicity of this recipe beckons both adults and children alike, creating moments of togetherness over bowls brimming with pure snackable happiness. So, let’s dive in, shall we? You’re going to want to whip this up today!
Why You’ll Love This Butterfinger Puppy Chow
Butterfinger Puppy Chow stands out for several reasons that make it not just a snack, but a true crowd-pleaser. It combines familiar favorites—chocolate, peanut butter, and the iconic Butterfinger bar—into a delightful mixture that never fails to impress. The blend of creamy peanut butter and rich chocolate envelops each rice cereal piece, creating a perfect canvas for Butterfinger bits that add both texture and flavor.
Whether you’re preparing for a cozy movie night, hosting a birthday bash, or simply indulging a sweet tooth, this sweet and salty mix guarantees smiles all around. Besides its delectable taste, this no-bake recipe comes together quickly, allowing for minimal effort and maximum pleasure—a win-win for any busy cook aiming to satisfy cravings.
Preparation Phase & Tools to Use
Before you embark on this delightful culinary adventure, gather a few essential tools that will make your experience smooth and enjoyable. For an effortless preparation, consider having the following:
- Large Mixing Bowl: A big bowl provides ample space to mix the cereal and Butterfinger bars without creating a mess.
- Microwave-Safe Bowl: Opt for one with a spout for easy pouring while melting your chocolate and peanut butter.
- Spatula: A soft spatula helps to gently coat the cereal in your chocolate blend without breaking it apart.
- Baking Sheet: Use a large baking sheet lined with parchment paper to cool your Puppy Chow evenly.
- Measuring Cups: Precision ensures every ingredient harmonizes beautifully.
Practical Preparation Tips
- Allow your chocolate and peanut butter mixture to cool slightly before pouring it over the cereal; this helps maintain the crunchiness.
- Use a light touch while mixing to avoid crushing the cereal—remember, texture is key!
Ingredients for Butterfinger Puppy Chow
Gather these simple yet crucial ingredients to create your delightful snack:
- 4 cups rice cereal: This serves as the base, providing that perfect satisfying crunch. You can substitute with gluten-free cereal for a gluten-free variant.
- 1 cup chocolate chips: Opt for semi-sweet for a balanced flavor, while dark chocolate can lend a slightly richer taste.
- 1 cup creamy peanut butter: This ingredient gives creaminess and a wonderful nutty flavor. You can use crunchy peanut butter if you prefer extra texture.
- 1 cup powdered sugar: This sweet dusting gives the Puppy Chow its signature sweet coating, balancing the richness of the chocolate and peanut butter.
- 1/2 cup Butterfinger candy bars, crushed: The star of the show! If you’d like to experiment, try substituting with other candy bars or even crushed cookies for a unique twist.
How to Make Butterfinger Puppy Chow
- In a large mixing bowl, combine the rice cereal and crushed Butterfinger bars, ensuring they’re evenly distributed for a consistent flavor in every bite.
- In a microwave-safe bowl, melt the chocolate chips and creamy peanut butter together in 30-second intervals, stirring well after each interval until the mixture is smooth and silky.
- Pour the melted chocolate and peanut butter blend over the cereal, gently folding with a spatula until every piece is generously coated.
- In another bowl, add the powdered sugar. Once your cereal mixture is well-coated, transfer it to the bowl with powdered sugar. Toss gently to coat everything evenly for that classic Puppy Chow finish.
- Spread the mixture out onto a baking sheet lined with parchment paper to cool completely, allowing the chocolate to set.
- Once cooled, serve in bowls and watch as your loved ones savor every last crunchy morsel!
Chef’s Notes & Helpful Tips
- Make-Ahead Tips: Prepare your Butterfinger Puppy Chow a day in advance. It stores beautifully and tastes even better as the flavors meld together.
- Cooking Alternatives: While this recipe shines as a no-bake treat, you can experiment with a stovetop method—just melt the chocolate and peanut butter in a saucepan over low heat, stirring continuously.
- Customization Ideas: Consider adding a sprinkle of sea salt on top for a hint of savory delight or swap the Butterfinger for your favorite candy bars for endless variations.
Common Mistakes to Avoid
- Overheating the Chocolate: Avoid scorching your chocolate by melting it on low heat and stirring frequently.
- Not Coating Well: Make sure each piece of cereal gets coated by pouring the chocolate mixture gradually, mixing as you go.
- Crushing the Cereal: Use a gentle folding motion when mixing to keep that crunchy texture intact.
What to Serve With Butterfinger Puppy Chow
This sensational snack pairs beautifully with various treats, elevating any occasion. Here are some delightful serving ideas:
- Ice Cream: Having a bowl of vanilla bean or chocolate ice cream beside your Puppy Chow creates a dessert dream come true.
- Milk: A cold glass of milk complements the sweetness perfectly, enhancing the flavors in every bite.
- Fruit Salad: The freshness of fruits contrasts nicely with the richness of the Puppy Chow, providing a refreshing element.
- Hot Chocolate: Cozy up on a chilly evening with a mug of hot chocolate and a bowl of Puppy Chow for the ultimate comfort snack.
- Trail Mix: Mix your Puppy Chow with nuts and dried fruit to create a delectable trail mix that’s great for on-the-go snacking.
- Cookies: Pair with chewy chocolate chip cookies for a double dose of sweetness.
- S’mores: Host a s’mores night and offer Puppy Chow as a crunchy topping option for a fun twist!
- Popcorn: Create a movie night spread with buttered popcorn and your Puppy Chow for the ultimate binge-watching experience.
Storage & Reheating Instructions
Store your Butterfinger Puppy Chow in an airtight container at room temperature. It will stay crunchy for about a week—if it lasts that long! For longer storage, keep it in the freezer, and it can last up to three months. Just make sure to let it thaw at room temperature before enjoying. No need to reheat; it’s perfect at room temp or chilled from the fridge!
Estimated Nutrition Information
Each serving of Butterfinger Puppy Chow contains approximately:
- Calories: 200
- Total Fat: 10g
- Saturated Fat: 3g
- Carbohydrates: 27g
- Sugars: 15g
- Protein: 3g
(These values are estimates and can vary based on the specific ingredients used.)
FAQs
1. Can I use other cereals instead of rice cereal?
Absolutely! Feel free to substitute with corn Chex, wheat Chex, or even granola for a twist on texture.
2. Is there a way to make this recipe healthier?
You can use dark chocolate chips, reduce the amount of powdered sugar, or incorporate protein powder if you want to increase the nutritional value.
3. Can I store this in the fridge?
While you can store it in the fridge, it’s best kept at room temperature to maintain its delightful crunch.
4. How can I make this treat festive?
Add seasonal toppings such as colored sprinkles or edible glitter to enhance its appeal for holidays and celebrations.
5. What if I can’t find Butterfinger bars?
If Butterfinger bars are unavailable, consider using any crunchy chocolate bar or your favorite candy bar with a similar texture!
Conclusion
Buttterfinger Puppy Chow offers not just a delicious snack, but a chance to make delightful memories, whether it’s at a movie night, a holiday gathering, or simply enjoyed on a quiet afternoon with a loved one. The rich combination of creamy peanut butter, smooth chocolate, and that unmistakable Butterfinger crunch captures the essence of a sweet treat that evokes happiness. So, roll up your sleeves and give this recipe a try! Let every bite take you back to the joys of childhood, crafting moments that you’ll cherish long after the last crunchy morsel has disappeared. Enjoy your culinary adventure!
Print
Butterfinger Puppy Chow
- Prep Time: 15 minutes
- Cook Time: 10 minutes
- Total Time: 25 minutes
- Yield: 8 servings 1x
- Category: Snack
- Method: No-Bake
- Cuisine: American
- Diet: Vegetarian
Description
Delightfully crunchy Butterfinger Puppy Chow, combining chocolate, peanut butter, and Butterfinger bars for a sweet and salty snack.
Ingredients
- 4 cups rice cereal
- 1 cup chocolate chips
- 1 cup creamy peanut butter
- 1 cup powdered sugar
- 1/2 cup Butterfinger candy bars, crushed
Instructions
- Combine the rice cereal and crushed Butterfinger bars in a large mixing bowl.
- Melt the chocolate chips and creamy peanut butter together in a microwave-safe bowl in 30-second intervals, stirring until smooth.
- Pour the melted mixture over the cereal and gently fold until coated.
- Add the powdered sugar to another bowl and transfer the coated cereal mixture, tossing to coat evenly.
- Spread the mixture on a baking sheet lined with parchment paper to cool completely.
- Serve in bowls when cooled and enjoy the crunch!
Notes
Great for parties or family gatherings, this easy no-bake treat can be made ahead of time.
Nutrition
- Serving Size: 1 serving
- Calories: 200
- Sugar: 15g
- Sodium: 100mg
- Fat: 10g
- Saturated Fat: 3g
- Unsaturated Fat: 5g
- Trans Fat: 0g
- Carbohydrates: 27g
- Fiber: 1g
- Protein: 3g
- Cholesterol: 0mg