Quick Homemade Hot Dog Buns bring a soft, lightly sweet crumb and a glossy sesame-topped crust to your next sandwich. This same-day dough uses instant yeast, an egg, avocado oil, and maple syrup, with no overnight starter or preferment.
Soft Sesame Buns Made the Same Day
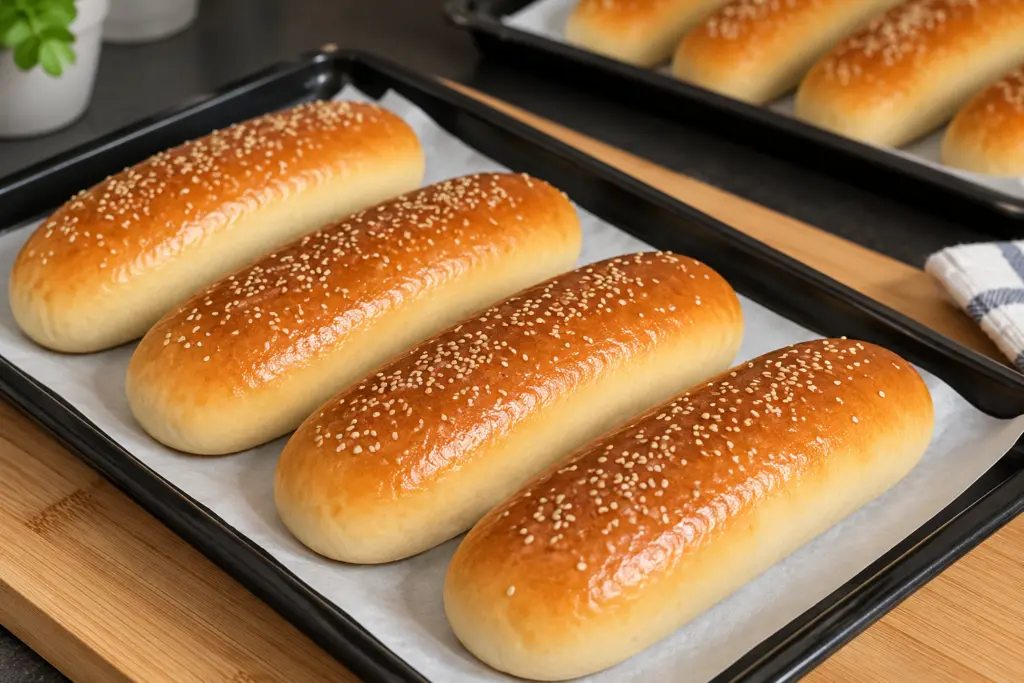
These buns have the long, rounded shape and shiny golden finish shown in the reference photo. They are meant to be split along the side, with a small hinge holding everything together. The recipe yields eight buns; the four-bun tray pictured represents half a batch.
Here, quick means a straightforward same-day method without an overnight fermentation. Yeast still needs time to work. Allow roughly 2–2 1/2 hours, with most of that time devoted to rising and cooling rather than hands-on work.
Ingredients
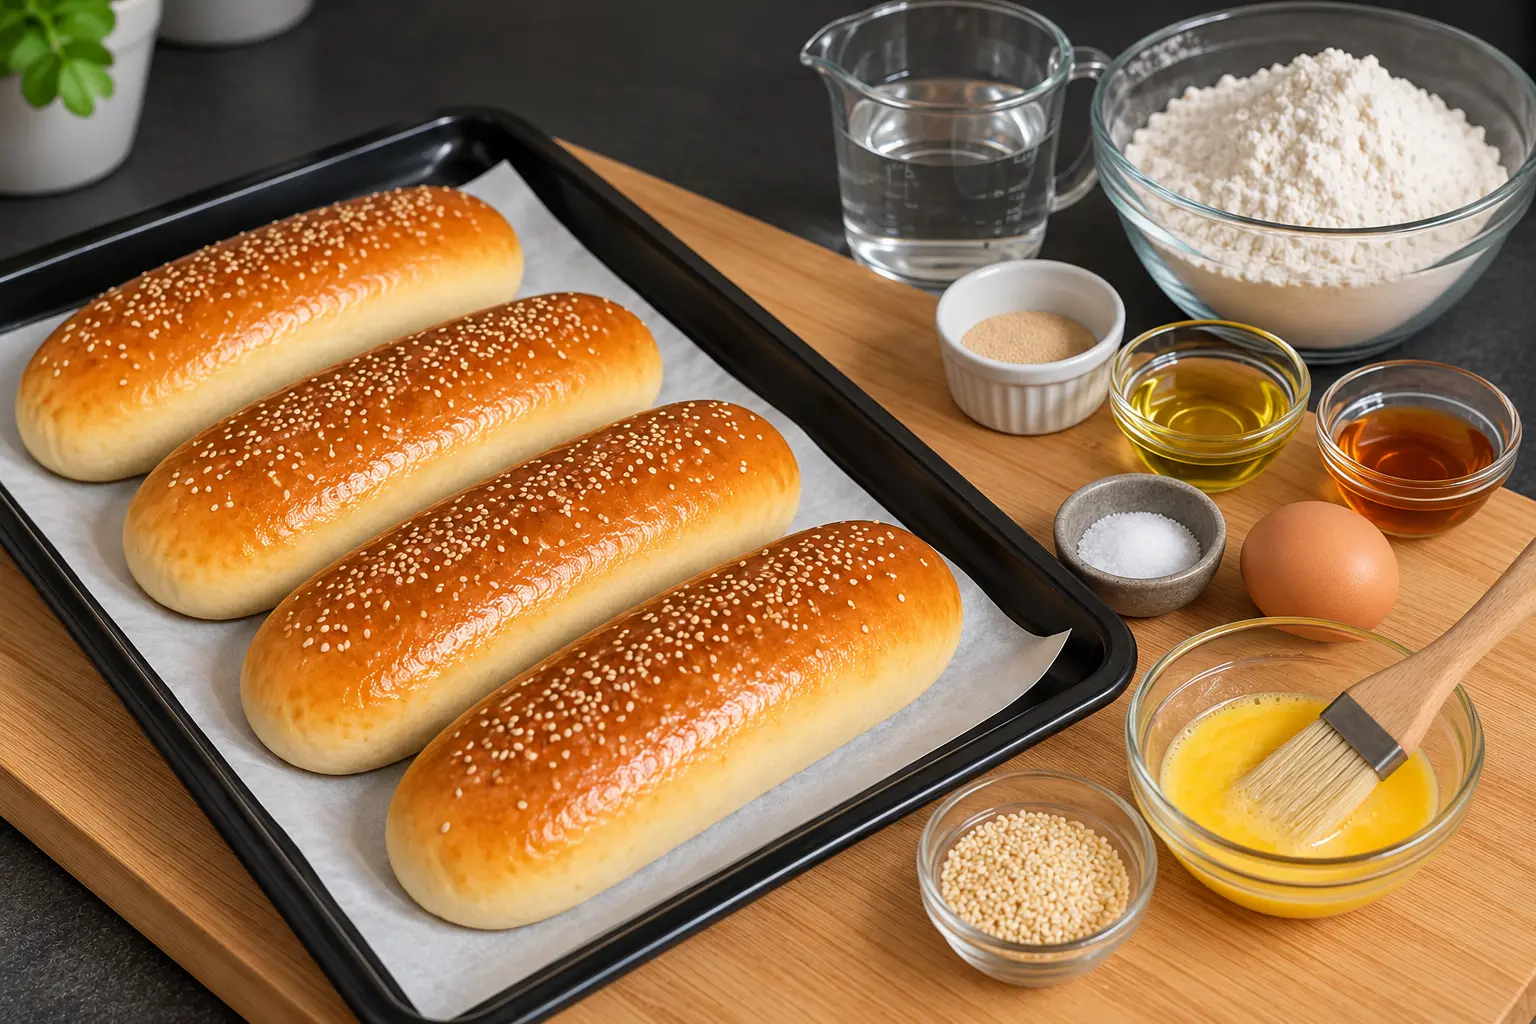
For the Dough
- 360 g all-purpose flour
- 180 ml warm water
- 7 g instant yeast
- 1 large egg
- 30 g avocado oil
- 30 g maple syrup
- 6 g fine salt
For the Topping
- 1 beaten egg
- 1 tablespoon sesame seeds
Why These Ingredients Work
All-purpose flour gives the buns enough structure while keeping the bite tender. The egg and avocado oil enrich the dough, and maple syrup adds mild sweetness and helps the crust color. Fine salt balances the flavor. Instant yeast can be mixed directly with the flour, so a separate activation step is unnecessary.
There are two eggs altogether: one in the dough and one for brushing. The egg wash produces the glossy surface and helps the sesame seeds stick. No milk, butter, or additional granulated sugar is needed for the supplied formula.
Equipment
- Kitchen scale
- Large mixing bowl
- Small bowl and whisk
- Dough scraper
- Large baking sheet or two smaller trays
- Parchment paper
- Clean cover or kitchen towel
- Pastry brush
- Wire cooling rack
Instructions: Mix, Knead, and Rise
-
Mix the dough: In a large bowl, whisk the all purpose flour, instant yeast, and fine salt. In another bowl, whisk the 180 ml warm water, 1 large egg, avocado oil, and maple syrup. Use comfortably warm water, about 100–110°F (38–43°C), not hot. Stir the wet mixture into the flour until no dry patches remain. The separate beaten egg is reserved for brushing later.
-
Knead: Knead by hand for 8–10 minutes, or with a dough hook on low for about 5–7 minutes, following your mixer's guidance. The dough should become smooth, elastic, and slightly tacky rather than wet and smearing. Scrape the work surface as needed. If it is difficult to handle, cover and rest for 5 minutes before continuing; avoid adding handfuls of extra flour.
-
First rise: Return the dough to the bowl, cover, and let rise in a comfortably warm, draft-free place for about 45–60 minutes, until roughly doubled. A cool kitchen can take longer. Use the dough's volume rather than the clock as your main guide.
Shape the Hot Dog Buns
-
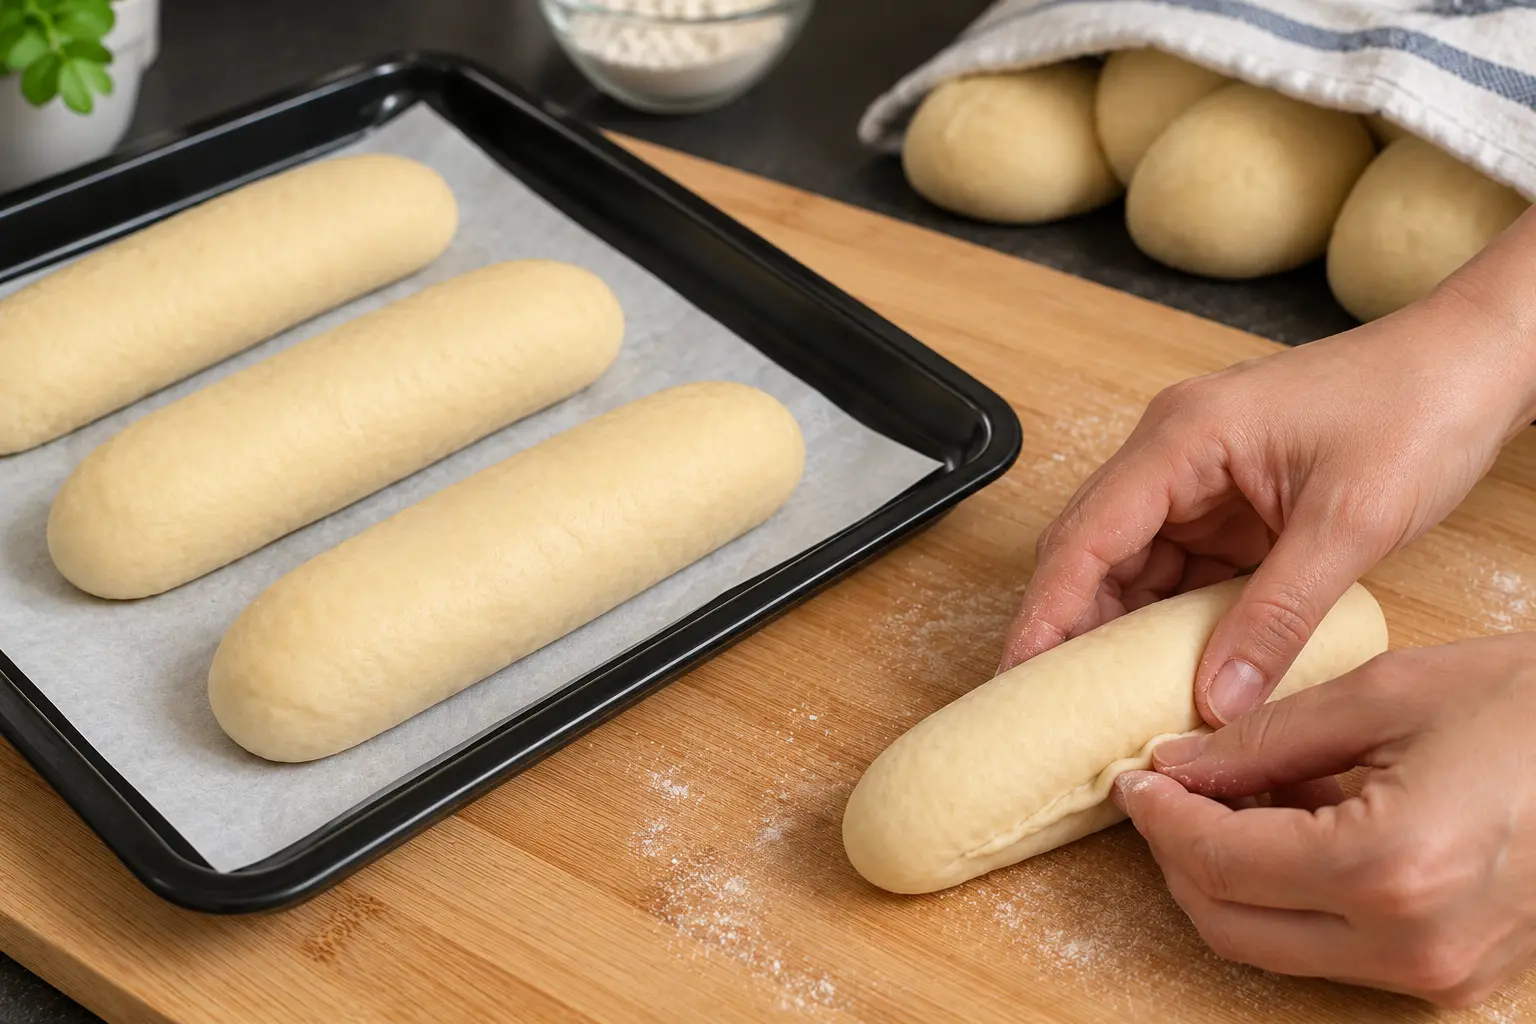
Shape 8 buns: Line a large baking sheet with parchment, or use two trays for four buns each. Gently press the air from the dough and divide into 8 equal portions, roughly 83 g each. Flatten each portion into a small rectangle, roll it snugly into a log, and pinch the seam closed. Gently roll to about 5–5 1/2 inches (13–14 cm) long with rounded ends. If the dough springs back, cover and rest for 5–10 minutes. Place seam-side down, leaving about 2 inches between buns where possible.
-
Second rise: Cover loosely without pressing on the dough and let rise for about 25–40 minutes, until visibly puffy. A light fingertip impression should return slowly rather than immediately. During this rise, preheat the oven to 375°F (190°C), with a rack in the middle. Do not brush the buns until the oven is ready.
Brush and Bake
-
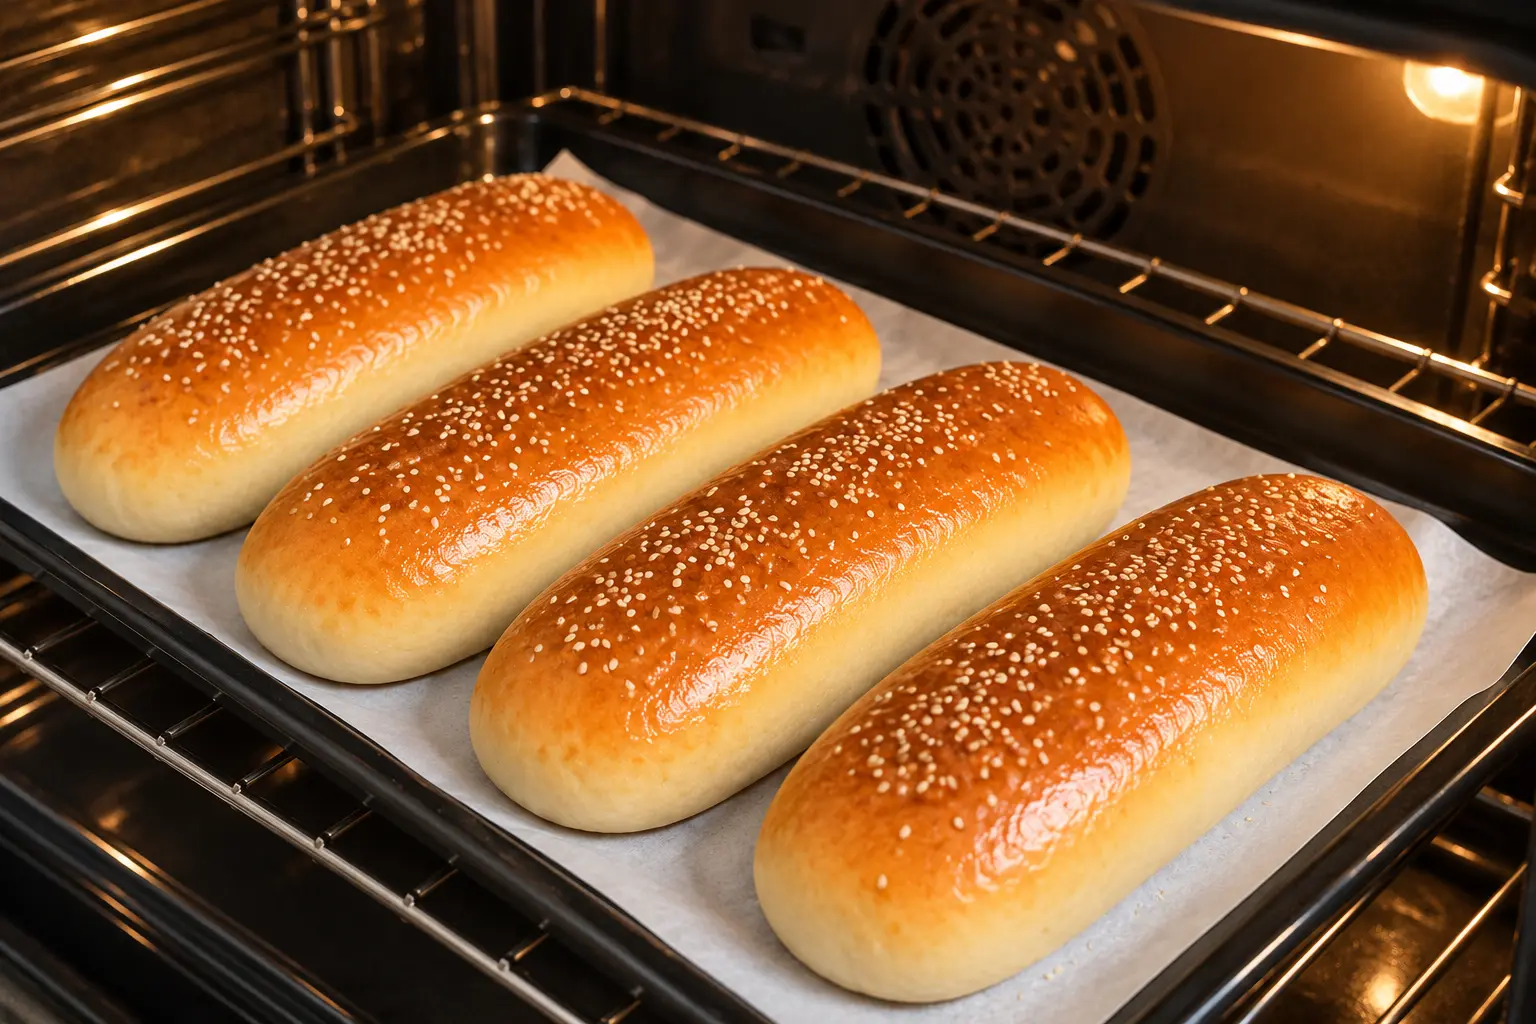
Top and bake: Brush the tops gently with a thin layer of the reserved beaten egg, avoiding pools around the bases. Scatter the sesame seeds evenly across all 8 buns. Bake on the middle rack for 16–20 minutes, until evenly golden brown with lightly browned bottoms. If checking with a thermometer, aim for about 190°F (88°C) in the center of a bun. Dark trays may brown sooner. If using two trays, bake one at a time and keep the second batch covered in a cooler spot while it waits; do not let it overproof. Discard unused egg wash.
Cool and Serve
-
Cool and split: Move the buns to a wire rack and cool for at least 20 minutes before cutting. Slice along one side lengthwise, leaving the opposite edge attached as a hinge. Add your chosen fillings only when ready to serve, or cool completely before storing.
Getting Smooth, Even Shapes
Divide the dough by weight so the buns bake at a similar pace. A snug roll builds a smooth outer surface, while a pinched seam helps the log stay closed. Keep the ends rounded rather than pointed. If a portion resists stretching, a brief covered rest is more effective than pulling harder.
Leave room between the logs so air can circulate. A large half-sheet pan can accommodate the batch in two rows if your buns and spacing fit comfortably; otherwise use two trays. Light contact after rising is fine if you like softer sides, but tightly crowded dough will not brown in the same way as separate buns.
Helpful Tips for a Soft Crumb
- Weigh the flour rather than packing it into a measuring cup.
- Keep the water comfortably warm, not hot enough to damage the yeast.
- The dough needs one egg; the topping uses a second egg, beaten separately.
- A slightly tacky dough gives softer buns than a stiff dough loaded with extra flour.
- Let tight dough relax briefly instead of pulling the logs until they tear.
- Pinch seams closed and place them underneath so the tops stay smooth.
- Proof until puffy before brushing; egg wash does not replace the second rise.
- Use a light touch with the pastry brush to avoid deflating the risen buns.
- Check early on a dark baking sheet because the bottoms can color quickly.
- Cool before splitting so the soft crumb has time to set.
Simple Variations
- Leave off the sesame seeds for plain glazed buns; this changes only the topping.
- Make the same eight portions a little shorter for smaller sandwiches, keeping their thickness reasonably even.
- For a softer eating texture after freezing, rewarm gently under foil rather than toasting until crisp.
Serving Ideas
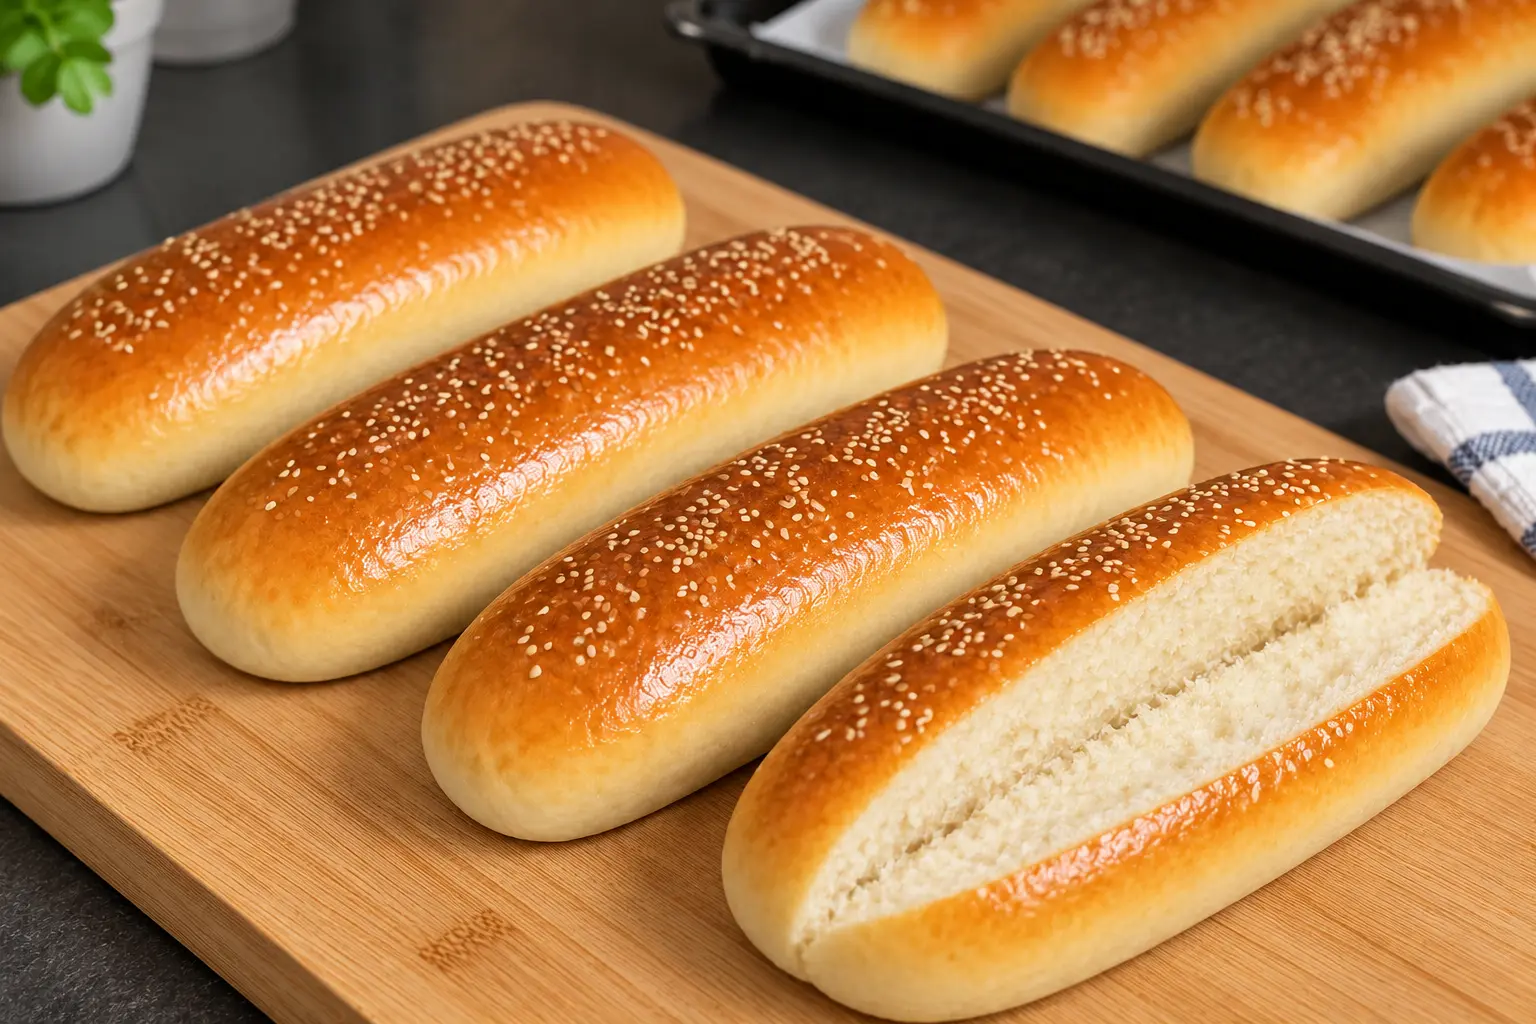
Slice along one side, keeping the opposite side connected. Serve with your preferred hot dog or use the buns for small sandwiches. Fillings and condiments are serving suggestions, not ingredients in this dough. For a toasted option, briefly toast the cut faces while leaving the rounded tops soft.
Timing and Yield
Makes 8 buns. Budget about 25 minutes for hands-on preparation and shaping, approximately 75 minutes for the two rises, 20 minutes baking, and 20 minutes cooling: around 2 hours 20 minutes overall. These are planning estimates. Dough temperature, room temperature, and baking trays can change the schedule; baking two trays separately adds time.
Storage
Cool completely, then keep the unfilled buns in an airtight container or bag at cool room temperature for up to 2 days. For longer storage, wrap individually and freeze in a freezer bag for up to 2 months for best quality. Do not seal warm buns, which creates condensation. Discard bread that develops mold.
Reheating
Thaw frozen buns at room temperature while wrapped. Rewarm thawed buns, loosely wrapped in foil, in a 300°F (150°C) oven for about 5–8 minutes. Split just before filling, or toast the cut sides briefly if you prefer a crisp interior.
Allergen Notes
This recipe contains wheat, eggs, and sesame. Check all ingredient labels if managing an allergy. The recipe does not include dairy ingredients, but that alone does not establish that every packaged ingredient is free of dairy cross-contact.
FAQ
How quick are these homemade hot dog buns?
They are a same-day recipe, not a 30-minute or no-rise bread. Plan on roughly 2–2 1/2 hours including kneading, two rises, baking, and a short cooling period. A cool room may extend the rises.
Do I need to activate instant yeast first?
No. Instant yeast can be whisked straight into the flour for this method. Check its date and storage instructions, and avoid hot water. If your dough does not rise, old yeast or an overly cold environment may be the cause.
Are there one or two eggs in the recipe?
There are two eggs in total: one large egg goes into the dough, and a separate beaten egg is used to brush the tops. You may not need every drop of egg wash; discard what remains.
Will the maple syrup make the buns taste like dessert?
The 30 g amount provides gentle sweetness and supports browning without turning the dough into a dessert bun. Its flavor is balanced by the flour and salt.
Why did my buns turn out dense?
Common causes include adding too much flour, inactive yeast, insufficient kneading, or baking before the second rise is complete. Look for a smooth elastic dough and puffy shaped buns, not just an elapsed number of minutes.
Why do the logs keep shrinking while shaping?
The dough is tight. Cover the portions and rest them for 5–10 minutes, then roll gently again. Forcing them longer can tear the surface.
Can I bake four buns per tray like the photos?
Yes. The recipe makes eight buns, and a four-bun tray represents half the batch. Bake the trays one at a time for more predictable browning, keeping the waiting tray covered in a cooler place.
Can I freeze these buns?
Yes. Freeze them once completely cool, ideally wrapped individually. Thaw while wrapped and warm gently before serving. Freeze unfilled buns rather than assembled hot dogs.
Conclusion
For soft Quick Homemade Hot Dog Buns, keep the dough supple, give both rises enough time, and brush gently before baking. The golden sesame crust and hinged slice make these eight same-day buns ready for your favorite fillings.
Print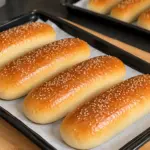
Quick Homemade Hot Dog Buns
- Prep Time: 25 minutes
- Cook Time: 20 minutes
- Total Time: 2 hours 20 minutes
- Yield: 8 buns 1x
- Category: Breakfast
- Method: Baking
Description
Eight soft homemade hot dog buns made with instant yeast, avocado oil, and maple syrup, finished with an egg wash and sesame seeds.
Ingredients
- 360 g all-purpose flour
- 180 ml warm water
- 7 g instant yeast
- 1 large egg
- 30 g avocado oil
- 30 g maple syrup
- 6 g fine salt
- 1 beaten egg
- 1 tablespoon sesame seeds
Instructions
Step 1 Mix the dough: In a large bowl, whisk the all purpose flour, instant yeast, and fine salt. In another bowl, whisk the 180 ml warm water, 1 large egg, avocado oil, and maple syrup. Use comfortably warm water, about 100–110°F (38–43°C), not hot. Stir the wet mixture into the flour until no dry patches remain. The separate beaten egg is reserved for brushing later.
Step 2 Knead: Knead by hand for 8–10 minutes, or with a dough hook on low for about 5–7 minutes, following your mixer's guidance. The dough should become smooth, elastic, and slightly tacky rather than wet and smearing. Scrape the work surface as needed. If it is difficult to handle, cover and rest for 5 minutes before continuing; avoid adding handfuls of extra flour.
Step 3 First rise: Return the dough to the bowl, cover, and let rise in a comfortably warm, draft-free place for about 45–60 minutes, until roughly doubled. A cool kitchen can take longer. Use the dough's volume rather than the clock as your main guide.
Step 4 Shape 8 buns: Line a large baking sheet with parchment, or use two trays for four buns each. Gently press the air from the dough and divide into 8 equal portions, roughly 83 g each. Flatten each portion into a small rectangle, roll it snugly into a log, and pinch the seam closed. Gently roll to about 5–5 1/2 inches (13–14 cm) long with rounded ends. If the dough springs back, cover and rest for 5–10 minutes. Place seam-side down, leaving about 2 inches between buns where possible.
Step 5 Second rise: Cover loosely without pressing on the dough and let rise for about 25–40 minutes, until visibly puffy. A light fingertip impression should return slowly rather than immediately. During this rise, preheat the oven to 375°F (190°C), with a rack in the middle. Do not brush the buns until the oven is ready.
Step 6 Top and bake: Brush the tops gently with a thin layer of the reserved beaten egg, avoiding pools around the bases. Scatter the sesame seeds evenly across all 8 buns. Bake on the middle rack for 16–20 minutes, until evenly golden brown with lightly browned bottoms. If checking with a thermometer, aim for about 190°F (88°C) in the center of a bun. Dark trays may brown sooner. If using two trays, bake one at a time and keep the second batch covered in a cooler spot while it waits; do not let it overproof. Discard unused egg wash.
Step 7 Cool and split: Move the buns to a wire rack and cool for at least 20 minutes before cutting. Slice along one side lengthwise, leaving the opposite edge attached as a hinge. Add your chosen fillings only when ready to serve, or cool completely before storing.
Notes
Use one large egg in the dough and a separate beaten egg for brushing. The dough makes eight buns, approximately 83 g each before baking. Total time includes about 75 minutes rising and 20 minutes cooling; proofing varies with room temperature. A four-bun tray is half the batch. Baking two trays separately adds time. Discard unused egg wash. Cool completely, then keep the unfilled buns in an airtight container or bag at cool room temperature for up to 2 days. For longer storage, wrap individually and freeze in a freezer bag for up to 2 months for best quality. Do not seal warm buns, which creates condensation. Discard bread that develops mold.