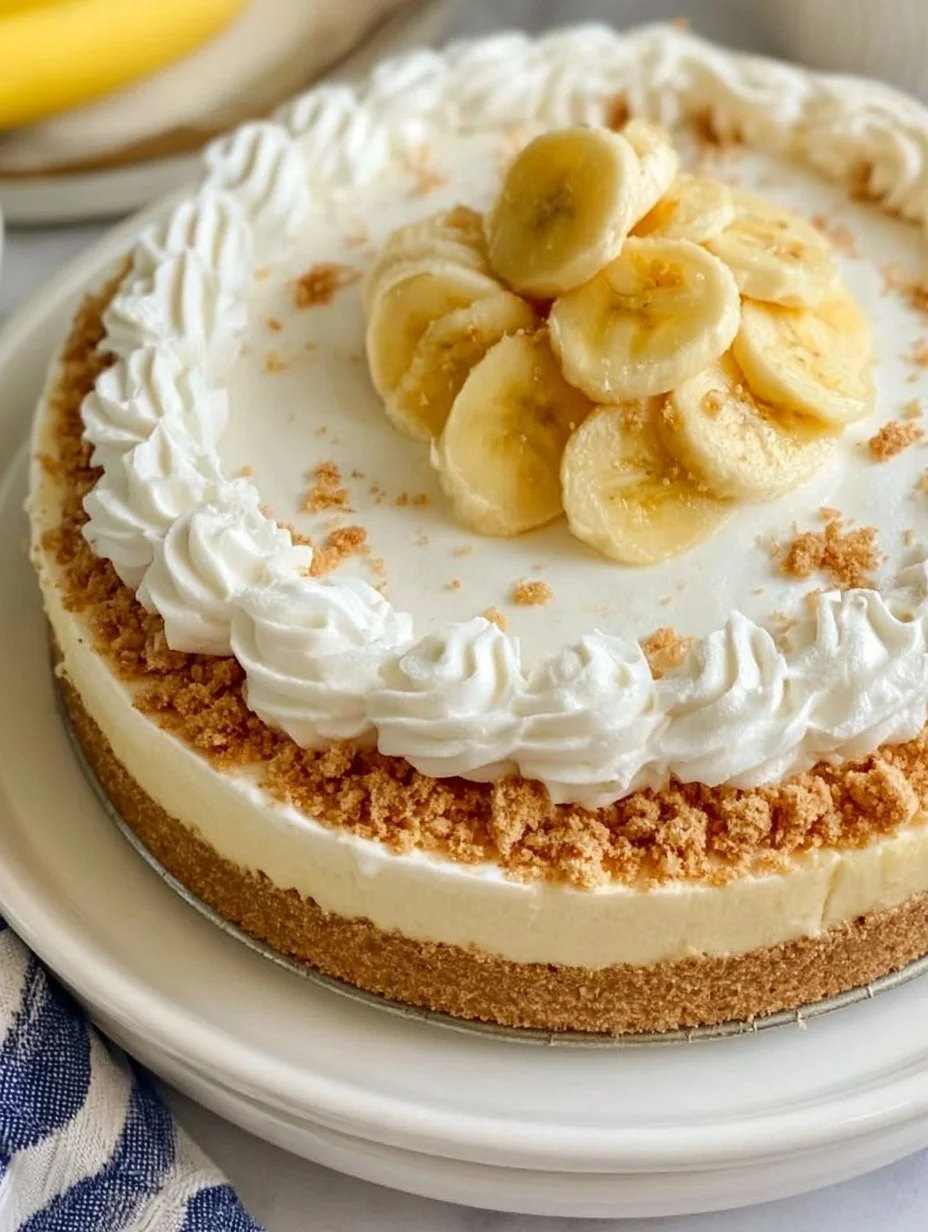
When you think of summertime desserts that bring smiles and memories, No Bake Banana Pudding Cheesecake stands in a league of its own. Imagine sinking your fork into a creamy, luscious layer of banana-flavored goodness, each bite transporting you straight to childhood days filled with carefree laughter and family gatherings. The flavor profile dances perfectly between the smooth richness of cream cheese and the sweet, comforting essence of ripe bananas. The gentle crunch of vanilla wafers provides just the right contrast to the creamy filling, while the aroma of freshly sliced bananas wafts through the air, making it impossible to resist.
This no-bake cheesecake not only satisfies your sweet tooth but also uplifts your spirit. The moment you set it on the table, anticipation fills the room. It’s not merely a dessert; it’s an experience, a joyful union of flavors that evokes nostalgia and elicits the warmth of cherished memories. Each forkful bursts with banana goodness, tempered by a subtle sweetness, creating a texture that is both silky and decadent. Deliciously indulgent and effortlessly simple, this No Bake Banana Pudding Cheesecake has a special place in the hearts of many.
Why You’ll Love This No Bake Banana Pudding Cheesecake
This dessert shines for numerous reasons. First and foremost, the flavor is a showstopper, mingling the natural sweetness of ripe bananas with the rich, creamy texture of cheesecake and the nostalgic crunch of vanilla wafers. It tastes like a classic banana pudding but elevated to a luxurious level that feels special enough for any occasion, from casual summer picnics to elegant dinner parties.
What’s more, this No Bake Banana Pudding Cheesecake is incredibly versatile. You can whip it up quickly, with no oven required, making it a fantastic choice for those hot days when you want dessert but don’t want to heat up the kitchen. Plus, it hugs the spirit of indulgence while still feeling light, perfect for satisfying sweet cravings without leaving you feeling weighed down. You’ll find it stands out at any gathering, filling both your heart and belly with its creamy delight.
Preparation Phase & Tools to Use
Diving into the world of banana pudding cheesecake calls for a few essential tools. Here’s why each one matters:
- Mixing Bowls: A couple of good-sized mixing bowls will help you combine your ingredients smoothly and easily. Both the cream cheese mixture and the pudding need a space to come to life.
- Hand Mixer or Stand Mixer: This tool is crucial for whipping the cream cheese and sweetened condensed milk to a luscious smoothness. If you’re really feeling labor of love, you can whip by hand, but be prepared for a workout!
- Rubber Spatula: This handy tool helps fold ingredients gently, ensuring you maintain that ideal creamy texture without deflating the mixture.
- 9×13 Inch Dish: A quintessential vessel for layering your dessert; it also allows for a generous serving size, making it perfect for gatherings.
Preparation tips expand the joy of making this dessert. Make sure to leave your cream cheese out to soften well; you want it to be smooth and creamy to blend nicely with the other ingredients. Also, using ripe bananas will elevate the flavor significantly, so choose those that have a few brown spots—this is where the sweetness lives!
Ingredients for No Bake Banana Pudding Cheesecake
- 1 package of vanilla wafers: The classic base that adds the perfect crunch.
- 4 ripe bananas, sliced: These add a fresh, fruity sweetness and are the heart of the flavor.
- 1 (8 oz) package cream cheese, softened: Essential for that creamy cheesecake texture, ensuring each bite is silken smooth.
- 1 (14 oz) can sweetened condensed milk: This ingredient sweetens the cake and gives it an irresistible creamy richness.
- 1 (5 oz) package instant banana pudding mix: The star flavor enhancer that gives the cheesecake depth and that unmistakable banana taste.
- 2 cups cold milk: Helps combine the pudding mix into a thick, luscious consistency.
- 1 (8 oz) container whipped topping: This adds a light fluffiness that crowns off your dessert beautifully.
- Optional: additional banana slices and vanilla wafers for garnish: They not only enhance the presentation but further entice the senses.
Key ingredients like ripe bananas and sweetened condensed milk are non-negotiable if you want to capture that divine flavor balance. If you’re exploring substitutions, consider using dairy-free cream cheese or whipped topping to make this dessert suitable for those with dietary restrictions.
How to Make No Bake Banana Pudding Cheesecake
-
In a mixing bowl, combine the softened cream cheese and sweetened condensed milk until the mixture is smooth and creamy. Using a hand mixer makes this process a breeze—just a few minutes will do the trick!
-
In a separate bowl, whisk together the instant banana pudding mix and the cold milk until it thickens, forming a luxuriously creamy pudding.
-
Gently fold the pudding mixture into the cream cheese mixture until well-combined. Keep the mixture light and airy for that perfect cheesecake texture.
-
In a 9×13 inch dish, layer half of the vanilla wafers at the bottom, followed by half of the banana slices, and half of the creamy pudding mixture. Repeat the layers, allowing the flavors to meld together.
-
Top everything off with a generous dollop of whipped topping. For an extra touch, garnish with additional banana slices and a sprinkle of vanilla wafers atop the cheesecake.
-
Chill the dish in the refrigerator for at least 4 hours (or ideally overnight) to let the flavors harmonize and to firm up the cake.
Chef’s Notes & Helpful Tips
-
Make-Ahead Tips: This cheesecake is the perfect make-ahead dessert. Prepare it the night before your event, allowing time for the layers to meld beautifully together.
-
Cooking Alternatives: Though this is a no-bake treat, if you’re itching to bring some warmth to the kitchen, you can bake your vanilla wafers for a slightly caramelized contrast.
-
Customization Ideas: Swap in different flavors of pudding mix or add a sprinkle of cinnamon to your cream cheese mixture for an unexpected flavor twist. You could even use crushed nuts for a delightful crunch throughout.
Common Mistakes to Avoid
One common pitfall is not allowing the cream cheese to soften appropriately, which can lead to lumps in the cheesecake. Set it out for at least an hour before you start mixing. Another mistake is layering too quickly—allow each layer to set for a few minutes to enhance the textures. Lastly, don’t skip the refrigeration time; letting it chill helps meld the flavors and set the cheesecake properly.
What to Serve With No Bake Banana Pudding Cheesecake
This decadent dessert pairs beautifully with a variety of options, enhancing the overall experience:
- Fresh Berries: Strawberries, blueberries, or raspberries add a tart contrast that complements the sweet banana flavors.
- Coffee/Tea: A warm cup of coffee or herbal tea balances the sweetness, offering a comforting closure to your meal.
- Ice Cream: A scoop of vanilla bean or caramel ice cream creates a creamy addition that elevates the dessert experience.
- Nutty Cookies: Serve alongside biscotti or nut-based cookies to introduce an added crunch and natural sweetness.
- Milkshakes: Why not make a banana milkshake to enjoy alongside? The more banana, the better!
- Whipped Cream: Extra whipped cream is always a welcome addition for those who appreciate a light and airy texture with every bite.
Storage & Reheating Instructions
Store any leftovers in an airtight container in the refrigerator, where it keeps well for up to five days. While this cheesecake is remarkable cold, trying it slightly warmed can yield a different experience—just a few seconds in the microwave should do the trick! For long-term storage, consider freezing the un-garnished cheesecake. Wrap it tightly and it can last up to three months. When ready to enjoy, simply thaw in the refrigerator overnight and garnish just before serving.
Estimated Nutrition Information
This recipe offers approximately:
- Calories: 320 per serving
- Fat: 18g
- Carbohydrates: 40g
- Protein: 6g
Note: Nutritional values may vary based on specific ingredients and portions used.
FAQs
1. Can I use regular pudding mix instead of instant?
Using regular pudding mix requires cooking, so the texture might change in the cheesecake. Stick with instant for a smooth, creamy result.
2. How can I make this recipe gluten-free?
Substituting traditional vanilla wafers with gluten-free cookies allows those with dietary restrictions to partake in the enjoyment.
3. How long can I store this dessert in the refrigerator?
When stored in an airtight container, your No Bake Banana Pudding Cheesecake will stay fresh in the fridge for up to five days.
4. Can I use flavored cream cheese?
Absolutely! A flavored cream cheese can introduce a delightful twist to the classic flavor profile, but make sure it complements the bananas.
5. Is it okay to use frozen bananas?
While fresh bananas yield the best flavor and texture, frozen ones can work in a pinch. Just ensure they’re thawed and well-drained before slicing.
With its creamy textures and delightful banana flavor, No Bake Banana Pudding Cheesecake invites you into a world of sweetness, nostalgia, and joy. It’s a simple yet elegant creation, beaming with love and warmth that elevates any gathering. Gather your ingredients, embrace the magic of no-bake goodness, and prepare to delight your taste buds and your loved ones. Your own masterpiece of banana bliss awaits!
Print
No Bake Banana Pudding Cheesecake
- Prep Time: 15 minutes
- Cook Time: 240 minutes
- Total Time: 255 minutes
- Yield: 8 servings 1x
- Category: Dessert
- Method: No-Bake
- Cuisine: American
- Diet: Vegetarian
Description
A creamy, luscious no-bake cheesecake layered with banana-flavored goodness, perfect for summer gatherings.
Ingredients
- 1 package of vanilla wafers
- 4 ripe bananas, sliced
- 1 (8 oz) package cream cheese, softened
- 1 (14 oz) can sweetened condensed milk
- 1 (5 oz) package instant banana pudding mix
- 2 cups cold milk
- 1 (8 oz) container whipped topping
- Optional: additional banana slices and vanilla wafers for garnish
Instructions
- Combine the softened cream cheese and sweetened condensed milk in a mixing bowl until smooth.
- Whisk together the instant banana pudding mix and cold milk until thickened.
- Fold the pudding mixture into the cream cheese mixture until well-combined.
- Layer half of the vanilla wafers at the bottom of a 9×13 inch dish, followed by half of the banana slices and half of the creamy pudding mixture. Repeat the layers.
- Top with whipped topping and garnish with banana slices and vanilla wafers.
- Chill in the refrigerator for at least 4 hours or overnight.
Notes
Use ripe bananas for the best flavor and allow cream cheese to soften properly before mixing.
Nutrition
- Serving Size: 1 serving
- Calories: 320
- Sugar: 24g
- Sodium: 210mg
- Fat: 18g
- Saturated Fat: 10g
- Unsaturated Fat: 5g
- Trans Fat: 0g
- Carbohydrates: 40g
- Fiber: 2g
- Protein: 6g
- Cholesterol: 30mg