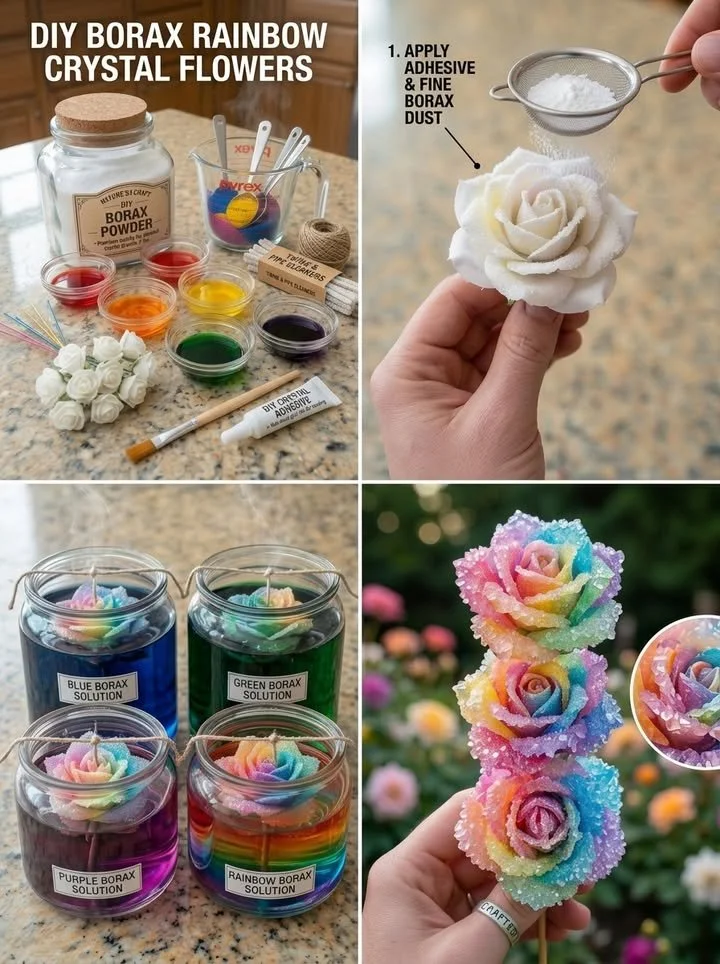
The allure of a colorful garden sprawls before us, vibrant petals dancing in the sunlight, beckoning to be picked and admired. Now, imagine a captivating blend of artistry and science, transforming ordinary materials into a kaleidoscope of sparkling floral beauty that stands still in time. DIY Rainbow Crystal Flower Blooms invite you to explore your creative side while manifesting a delightful mix of vivid colors and shimmering crystals. As you embark on this whimsical adventure, prepare to be enchanted by a multi-sensory experience, one that delights your eyes and sparks joy in your heart.
As each delicate flower emerges from the crystal-laden solution, they dazzle with a prism of colors reflecting the world around them. They capture the magic of nature in a jar, holding secret wonders within their sparkling formations. Every bloom tells a story—a story of patience, imagination, and the joy of crafting something truly unique. Whether you display them as a centerpiece, gift them to a loved one, or keep them as a cherished reminder of your creativity, these crystal blooms will undoubtedly delight and inspire.
Why You’ll Love This DIY Rainbow Crystal Flower Blooms
You will absolutely adore creating DIY Rainbow Crystal Flower Blooms because they blend an artistic project with the thrill of scientific discovery. Not only do these blooms add a pop of enchanting color to any space, but they also offer the satisfaction of making something beautiful from scratch. Their dazzling appearance makes them suitable for any occasion, be it a heartfelt gift or a whimsical decoration for your home.
Imagine showcasing these crystal creations at a summer garden party, dazzling your guests and sparking conversations about the fascinating process that brought them to life. Their unique crystalline structure provides captivating textures that draw the eye and raise curiosity. The act of making them is as rewarding as the final product itself—a fun craft suitable for kids, adults, or anyone in between. Stand out from typical floral arrangements; these majestic crystal flowers are sure to leave a lasting impression.
Preparation Phase & Tools to Use
Creating these stunning crystal blooms requires a few basic tools, each with a specific purpose that contributes to the final masterpiece. Here’s what you’ll need:
- Glass Jar: A medium-sized jar ensures the perfect environment for crystal growth. It needs to be clear, allowing you to marvel at the creation process as the crystals form.
- Pencil or Stick: This simple item helps suspend your flower above the solution, allowing the crystals to form evenly without obstruction.
- String: A sturdy string attaches the flower to the pencil securely, adding a necessary connection to prevent dipping too deep into the solution.
- Pipe Cleaners: These are the backbone of your radiant flowers, ready to be sculpted into beautiful shapes that attract vibrant crystals.
- Borax Powder: This magical ingredient acts as the crystal-forming agent. It’s essential for creating those glistening blooms.
- Food Coloring: A symphony of colors unfolds when you add drops of this to your crystal solution; various hues bring your imagination to life.
- Very Hot Water: Using hot water ensures that the borax dissolves faster, making for more efficient crystal growth.
Preparation tips to elevate your crafting experience include ensuring all materials are clean and dry. Gather all your components before beginning; this way, you can focus solely on the creative process without distraction.
Ingredients for DIY Rainbow Crystal Flower Blooms
To recreate these stunning crystal blooms, you’ll need the following ingredients:
- Borax Powder: This is the star of the show. It creates the crystals that cling to your flower. Ensure purity by avoiding any scented or mixed versions.
- Very Hot Water: The hotter the water, the quicker the borax dissolves and forms good-quality crystals. Aim for just below boiling.
- Glass Jar: Choose a clear jar with enough height to accommodate the size of your flowers.
- Pipe Cleaners: These come in various colors; feel free to get creative! Their softness allows for easy shaping into flower forms.
- Food Coloring: Select vibrant colors or experiment with pastel shades. This is your chance to bring your imagination to life!
- String: A simple piece of string will hold your creation in place during the crystallization process.
- Pencil or Stick: This will serve as a stabilizing beam for hanging your flowers in the solution.
- Artificial Flowers or Floral Stems: You can use any artificial flowers, but darker colors tend to absorb more crystals, creating a dramatic effect.
How to Make DIY Rainbow Crystal Flower Blooms
Ready to transform those basic materials into stunning crystal creations? Follow these simple steps for your own Rainbow Crystal Flower Blooms:
- Shape the Flowers: Take your pipe cleaners and twist them into flower shapes. This process allows the crystals to cling to many surfaces, enhancing their look.
- Secure the Flowers: Tie a strong piece of string around the base of your flower. Secure the other end to a pencil or stick so the flower hangs freely above the jar’s bottom.
- Prepare the Solution: Fill your glass jar with very hot water, leaving some space at the top.
- Dissolve the Borax: Slowly add borax powder to the hot water, stirring constantly. Keep adding until no more powder dissolves, confirming the water is saturated with borax.
- Add Colors: Drop in various food coloring until you achieve your desired rainbow effect. Watch closely as colors blend and swirl!
- Lower the Flower: Gently dip your flower into the solution, ensuring it doesn’t touch the jar’s sides or bottom. This positioning allows for optimal crystal growth.
- Let it Grow: Leave the jar undisturbed overnight. Patience is key; moving the jar could disrupt the crystal formation.
- Finish Up: After 24 hours, gently remove the flower from the solution and let it air dry on a sheet of paper towel. The vibrant crystals should glisten with beauty.
Consider using deeper jars for larger blooms or adding more borax for thicker crystals. Try different flower shapes or create a bouquet of various colors for an even more breathtaking display!
Chef’s Notes & Helpful Tips
While this craft is fairly straightforward, here are some extra pointers to ensure success:
- Make-Ahead Tips: Prepare your flowers a day in advance, allowing the crystals to develop overnight. The longer the flowers remain in the solution, the thicker and more vibrant the crystals will be!
- Experimentation: Mix and match different color combinations and flower shapes. For instance, a blue and purple flower can mimic the enchantment of indigo blooms.
- Customization Ideas: Use glitter or metallic spray on the flowers before submerging them for an extra magical touch!
Common Mistakes to Avoid
Even simple recipes can have pitfalls! Here are a few common mistakes, along with their remedies:
- Not Using Enough Borax: If the water isn’t fully saturated, crystals may be sparse. Always ensure no more borax dissolves before proceeding.
- Moving the Jar: Shaking or moving the jar can lead to uneven crystal growth. Find a secure location for your setup.
- Too Much Water: If the water level is too high, it might touch the flower in areas that don’t need crystals, resulting in an uneven look.
By avoiding these common errors, you create stunning blooms that will inspire awe.
What to Serve With DIY Rainbow Crystal Flower Blooms
While these crystal flowers may not be edible, they create a beautiful ambiance when paired with delightful treats at any occasion. Consider serving them alongside:
- Colorful Fruit Platters: Bright and refreshing fruits can harmonize beautifully with your vibrant blooms, adding a fresh touch to your presentation.
- Cheese and Charcuterie Boards: Elevate elegance with a platter full of assorted cheeses and cured meats, complementing the artistry of your flowers.
- Delicate Teas: Serve herbal or floral teas that match the colors of your flowers, enhancing the theme while providing warmth and comfort.
- Cupcakes with Floral Themes: Decorate cupcakes with edible flowers that resonate with your crystal blooms; the visual entertainment will be delightful.
- Pâtisserie Treats: Luxurious pastries or macarons can add sophistication and charm, perfectly balancing the whimsical feel of your crafted blooms.
- Seasonal Cocktails: Surprise guests with vibrant cocktails that echo the colors of your rainbow florals, creating a fun and festive atmosphere.
Storage & Reheating Instructions
While these vibrant blooms are not consumable, they are a spectacular display. If you’re interested in preserving your creations, consider the following:
- Storage: Keep your crystal flowers in a cool, dry place away from direct sunlight to prevent fading and damage.
- Display Tips: Place them in clear vases or jars, allowing light to filter through and illuminate the sparkling crystals. Create themed displays for various holidays or seasons for added charm.
Estimated Nutrition Information
As this delightful craft does not involve consuming any portion of the project, there are no nutrition values to disclose. However, the joy and creativity you’ll experience far surpass any culinary measurements!
FAQs
1. Can I use real flowers instead of artificial ones?
Real flowers won’t work well since they will wilt in hot water and may not provide a stable structure for crystals to adhere.
2. How long will the crystals last?
With proper care, these crystal flowers can last for many months. Just keep them out of direct moisture and sunlight.
3. Is it safe for children to make these?
Yes! However, adult supervision is essential, especially during the hot water stage and when handling borax.
4. What colors work best for food coloring?
All colors can create unique effects, yet deeper tones like blue, red, and purple generally yield more striking results.
5. Can I add glitter to the mix?
Absolutely! For a magical touch, sprinkle some edible glitter on before placing your flower in the solution. It’ll add an enchanting shimmer!
Conclusion
Engaging in the enchanting world of DIY Rainbow Crystal Flower Blooms is not merely a creative venture; it’s an invitation to embrace your inner artist. As you follow the blend of artistic and scientific processes, you’ll uncover the delightful joy of making something beautiful and unique from simple materials. So gather your supplies today and let your imagination run wild! Crafting these sparkling blooms is a little journey of joy that culminates in breathtaking beauty, enriching both your space and your spirit. Dive into this delightful project and watch as magic unfolds before your eyes!
Print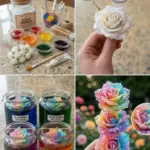
DIY Rainbow Crystal Flower Blooms
- Prep Time: 15 minutes
- Cook Time: 1 day
- Total Time: 1 day 15 minutes
- Yield: 1 crystal flower
- Category: Craft
- Method: Crafting
- Cuisine: N/A
- Diet: N/A
Description
Create stunning crystal flower blooms using simple materials in a colorful and imaginative way.
Ingredients
- Borax Powder
- Very Hot Water
- Glass Jar
- Pipe Cleaners
- Food Coloring
- String
- Pencil or Stick
- Artificial Flowers or Floral Stems
Instructions
- Shape the Flowers: Take your pipe cleaners and twist them into flower shapes.
- Secure the Flowers: Tie a strong piece of string around the base of your flower.
- Prepare the Solution: Fill your glass jar with very hot water, leaving some space at the top.
- Dissolve the Borax: Slowly add borax powder to the hot water, stirring constantly.
- Add Colors: Drop in various food coloring until you achieve your desired rainbow effect.
- Lower the Flower: Gently dip your flower into the solution.
- Let it Grow: Leave the jar undisturbed overnight.
- Finish Up: After 24 hours, gently remove the flower from the solution and let it air dry.
Notes
Experiment with different flower shapes and colors for unique results. Make sure to supervise children during the hot water stage.
Nutrition
- Serving Size: 1 flower
- Calories: 0
- Sugar: 0g
- Sodium: 0mg
- Fat: 0g
- Saturated Fat: 0g
- Unsaturated Fat: 0g
- Trans Fat: 0g
- Carbohydrates: 0g
- Fiber: 0g
- Protein: 0g
- Cholesterol: 0mg