Opening Description
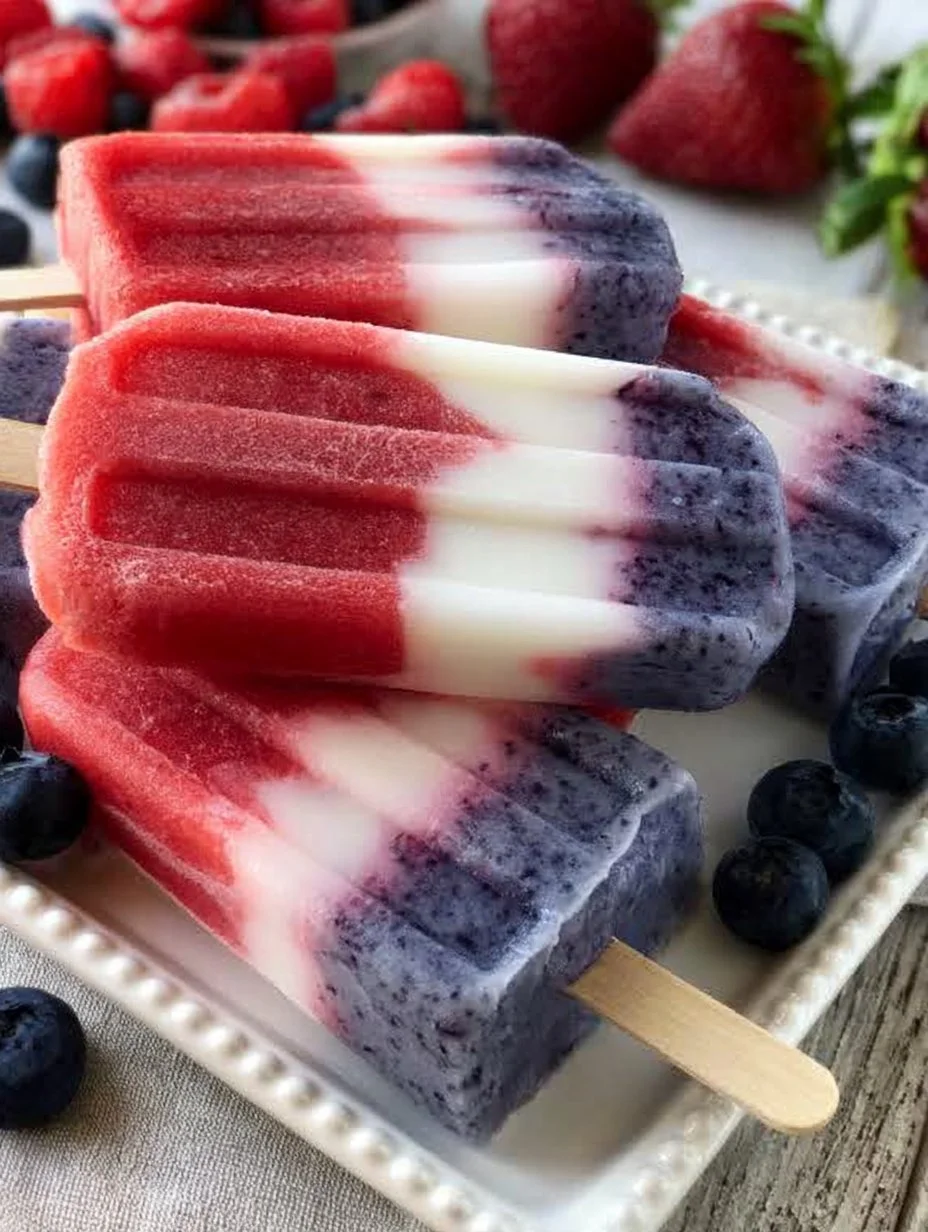
As summer sun ignites the sky in a brilliant cascade of vibrant colors, nothing says “refreshing” quite like a popsicle. Imagine sinking your teeth into a tri-layered treat that bursts with the juicy sweetness of sun-ripened strawberries, silky coconut creaminess, and the tart delight of fresh blueberries. Each lick unlocks the essence of summer, transporting you to sun-drenched picnics and cheerful barbecues, where laughter fills the air and the fragrance of freshly cut grass weaves through the warm breeze.
The Red, White, and Blue Popsicles aren’t just about the playful colors and the cooling effect. They offer an experience that encapsulates celebration—be it Independence Day, a family gathering, or simply a moment of joy on a hot afternoon. The layers meld with one another, creating a delightful contrast in flavor and texture; the initial fruity tang of the strawberries dances on your palate before giving way to the creamy, cooling embrace of coconut milk, perfectly concluding with the rich burst of blueberries. Each bite offers a stunning contradiction of textures—the smoothness of the creamy layer against the gratifying slight grain of the pureed fruit.
Your heart fills with nostalgia as you savor each bite, reminding you of summer days spent outdoors, running wild and free. These popsicles are not only visually striking but are also a nourishing and wholesome treat for both kids and adults alike. Dive into the art of making these captivating Red, White, and Blue Popsicles and rediscover what it means to enjoy a classic summer indulgence with a twist!
Why You’ll Love This Red, White, and Blue Popsicles
The Red, White, and Blue Popsicles radiate joy and celebration, which is why they deserve a special place in your summer repertoire. Made with all-natural ingredients, these popsicles offer a healthier alternative to their store-bought counterparts without sacrificing taste. Perfectly sweet and delightfully refreshing, each layer brings something unique to the table.
You’ll fall in love with these pop’s vibrant colors—a visual delight that is perfect for any festive occasion. Whether you’re hosting a BBQ, celebrating the Fourth of July, or simply wanting to impress your children with a treat, these popsicles are sure to steal the show. Not only do they look amazing, but they also provide a medley of flavors that harmonize beautifully. Their creamy texture combined with the fresh fruity layers creates a satisfying indulgence that keeps you coming back for more.
And the best part? You can control the sweetness! Adjust the honey or maple syrup to suit your taste, making this recipe adaptable to your family’s preferences. There’s something magical about enjoying these popsicles while basking under the sun, so let them be part of your summer storytelling!
Preparation Phase & Tools to Use
As you embark on the delicious journey of making these popsicles, a few essential tools will pave the way for a smooth process and stunning results.
- Blender: A powerful blender is paramount for achieving that perfectly smooth fruit puree. A mini blender can work as well, especially for small batches.
- Popsicle Molds: Investing in good quality molds ensures easy removal and beautiful presentation. Opt for silicone molds for easy popsicle retrieval.
- Mixing Bowls: A couple of medium-sized mixing bowls provide ample space to combine your creamy mixture and your fruit purees without any spills.
- Spatula: Use a spatula to help layer your mixtures without disrupting the other flavors, ensuring each pop maintains its beautiful design.
- Ice Cream Sticks: Choose sturdy sticks that won’t bend or break while freezing, enhancing the structural integrity of your pops.
Preparation tips:
- Select ripe and fresh strawberries and blueberries for the best flavors; their natural sweetness and juiciness really shine through in the popsicles.
- If you prefer an added creaminess, try using full-fat coconut milk or yogurt for a thicker texture.
Ingredients for Red, White, and Blue Popsicles
Gather these simple yet refreshing ingredients, and get ready to embrace a wave of deliciousness:
- 2 cups strawberries, pureed: The sweet and tangy essence of strawberries creates a fruity base that awakens the senses.
- 2 cups coconut milk (or yogurt): The silky, rich texture of coconut milk adds creaminess to the pops, which balances the slight tartness of the fruit.
- 2 cups blueberries, pureed: Deeply flavored blueberries finish the popsicles with their luscious taste and beautiful color.
- Honey or maple syrup to taste (optional): For those with a sweeter tooth, a hint of honey or maple syrup can elevate the natural flavors.
If you’re looking for substitutions, experiment with plant-based yogurt or even almond milk to tailor the pops to your dietary needs or taste preferences.
How to Make Red, White, and Blue Popsicles
Crafting your Red, White, and Blue Popsicles is simple and utterly rewarding. Follow these easy steps for a successful assembly:
- Blend Strawberries: Start by adding the fresh strawberries to your blender. Puree until they achieve a smooth, velvety consistency. This burst of fruity goodness will be the vibrant red layer.
- Prepare Coconut Mixture: In a mixing bowl, combine the coconut milk or yogurt with honey or maple syrup if you desire added sweetness. Stir until it’s well mixed, creating the inviting white layer.
- Layer the Strawberry Puree: Carefully spoon the strawberry puree into your popsicle molds until they’re about one-third full. Gently tap the molds to remove any air bubbles and ensure an even layer.
- Add Coconut Mixture: Pour the coconut milk mixture into each mold to fill another third of the way, layering it gracefully atop the strawberry.
- Finish with Blueberries: Finally, add the blueberry puree topping the molds, completing the tri-color masterpiece.
- Insert Sticks and Freeze: Place popsicle sticks into each mold. Freeze for at least 4-6 hours, or until they are fully solid.
- Release the Popsicles: When it’s time to indulge, gently run warm water over the outside of the molds for a few seconds to help release your popsicles. Serve and watch smiles bloom!
Chef’s Notes & Helpful Tips
- Make Ahead: These popsicles can be made in advance. Store them in an airtight container in the freezer for up to two weeks while keeping their delightful taste intact.
- Cooking Alternatives: If you prefer a quicker method and have an ice cream maker, you can also churn the mixture, creating a creamy sorbet. Adjust the freezing time and temperature settings based on your machine’s manual.
- Customization Ideas: Don’t hesitate to experiment! Add a squeeze of lemon or lime to the strawberry layer for an exciting citrusy kick, or mix in some chopped mint leaves for a refreshing twist. You could even fold some granola into the coconut layer for a bit of crunch.
Common Mistakes to Avoid
Creating the perfect popsicles is a gorgeously simple task, yet there are a few pitfalls to watch for:
- Overfilling the Molds: Avoid cramming the molds too full; leaving space allows for the mixtures to expand as they freeze, preventing messy spills.
- Insufficient Freezing Time: Patience is key! Ensure they freeze completely; otherwise, they will become a gooey disappointment when you try to release them.
- Ignoring the Helpers: We all love frozen treats, but remember that the sticks help shape and support the popsicles too! Skipping this step means risking disarray in your layers.
What to Serve With Red, White, and Blue Popsicles
Elevate your summer gatherings with these fun pairing ideas that complement your Red, White, and Blue Popsicles beautifully:
- Fresh Fruit Salad: A vibrant mix of seasonal fruits mirrors the popsicle colors and enhances the wholesome theme.
- Grilled Chicken Skewers: The savory flavor of smoky chicken and the sweetness of your popsicles create a delightful taste contrast.
- Margaritas or Lemonade: Sip on a refreshing beverage that balances the fruity popsicles, bringing joy to those sunny days.
- Shortcakes or Biscuits: Serve alongside delicious shortcakes as a cool, tangy topping.
- Cheese Board: Pair them with creamy soft cheeses like brie and sharp cheddar—the flavors will surprise you!
- Vanilla Ice Cream: Make a playful dessert variety by topping a scoop of vanilla ice cream with chunks of popsicle!
Storage & Reheating Instructions
These popsicles freeze beautifully, allowing for enjoyment at your convenience. Store them in airtight containers or in their molds, ensuring they are airtight to fend off freezer burn.
- Fridge: These popsicles store in the fridge for about an hour if you want to soften slightly before serving.
- Freezer: In the freezer, they will last for up to two weeks, but trust us—once you taste them, you may find they disappear much faster!
- Reheating: Since these treats are enjoyed frozen, there’s no need for reheating. Just allow them to sit at room temperature for a couple of minutes if they are too hard to bite into.
Estimated Nutrition Information
A delicious treat can still be mindful of your health! Each Red, White, and Blue Popsicle is approximately:
- Calories: 85
- Fat: 5g
- Carbohydrates: 14g
- Protein: 1g
Please note these values can vary based on specific brands and substitutes used.
FAQs
Can I use frozen fruit instead of fresh?
Absolutely! Frozen strawberries and blueberries work beautifully. Just make sure to blend them well to achieve a smooth texture before layering.
What if I want to make these dairy-free?
These popsicles are already dairy-free! Use coconut milk or any other non-dairy yogurt you love, and you’ll be good to go.
How can I reduce sugar?
Feel free to omit the honey or maple syrup altogether or use a sugar substitute that aligns with your dietary preferences.
Can I add other fruits?
Of course! Try ripe peaches or mangoes for a tropical twist or add kiwi for a bright green layer. The possibilities are endless!
How do I get the popsicles out of the molds without breaking them?
Run warm water over the outside of the molds to gently loosen the popsicles. This small step makes all the difference for easy removal.
Conclusion
As you take your first bite of the vibrant Red, White, and Blue Popsicles, allow the harmonious blend of flavors to whisk you away to carefree summer days. The joy of making your very own popsicles fills the air with excitement, transforming simple ingredients into a dreamy, delicious treat. With each layer, you savor sweet memories and the warmth of shared moments with loved ones. So gather your ingredients, unleash your creativity, and let these popsicles become a staple of your summer story. Embrace the colors, the flavors, and the memories—one popsicle at a time!
Print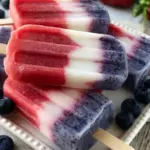
Red, White, and Blue Popsicles
- Prep Time: 15 minutes
- Cook Time: 0 minutes
- Total Time: 360 minutes
- Yield: 8 servings 1x
- Category: Dessert
- Method: Freezing
- Cuisine: American
- Diet: Vegetarian
Description
Refreshing tri-layered popsicles made with strawberries, coconut milk, and blueberries, perfect for summer celebrations.
Ingredients
- 2 cups strawberries, pureed
- 2 cups coconut milk (or yogurt)
- 2 cups blueberries, pureed
- Honey or maple syrup to taste (optional)
Instructions
- Blend strawberries until smooth to create the vibrant red layer.
- Prepare the coconut mixture by combining coconut milk or yogurt with honey or maple syrup if desired.
- Layer strawberry puree into popsicle molds until one-third full.
- Add the coconut mixture, filling another third of the way.
- Finish with blueberry puree on top, completing the tri-color pops.
- Insert sticks and freeze for 4-6 hours until solid.
- Release popsicles by running warm water over the molds and enjoy!
Notes
You can make these popsicles in advance and store them for up to two weeks. Customize sweetness and flavors to your liking.
Nutrition
- Serving Size: 1 popsicle
- Calories: 85
- Sugar: 6g
- Sodium: 5mg
- Fat: 5g
- Saturated Fat: 4g
- Unsaturated Fat: 1g
- Trans Fat: 0g
- Carbohydrates: 14g
- Fiber: 1g
- Protein: 1g
- Cholesterol: 0mg