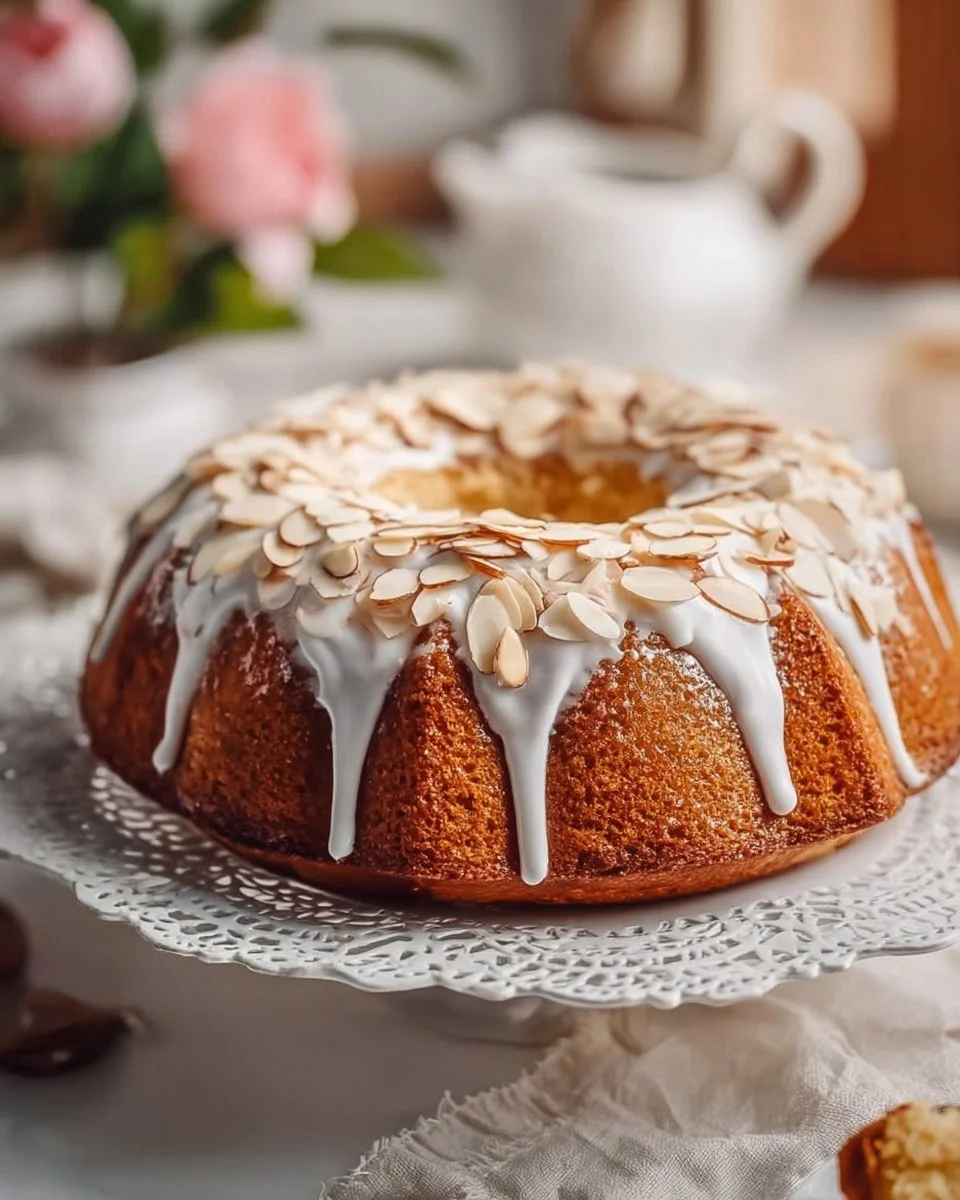
The warmth envelops you as the sweet aroma of baking butter and sugar fills the air, curling around you like a comforting embrace. The anticipation builds with every passing moment, the mouthwatering scent promising a treat that will melt on your tongue and bring joy to your palate. Picture a golden-brown loaf, with a crisp crust that gives way to an impossibly soft, tender interior. Each slice reveals a beautifully dense crumb, glistening with tiny flecks of melted butter that elevate this timeless classic to an unforgettable experience.
Classic pound cake is not just a dessert; it is a sensory journey. The first bite encapsulates a heavenly blend of flavors—sweet, buttery, and slightly nutty. As you savor its rich taste, you experience a luxurious, velvety texture that begs for another mouthful. Accompanied by the crisp sounds of a fork gliding through its moist layers, your enjoyment transforms into something truly magical. Each piece, soft and yet substantial, carries the essence of home-baked goodness, perfect for any occasion.
Why You’ll Love This Classic Pound Cake
This classic pound cake stands out because it combines simplicity and elegance in every slice. The list of ingredients is short, allowing the natural flavors to shine. Who doesn’t love a cake that’s easy to throw together yet delivers a show-stopping result? This pound cake is a marvel because it’s incredibly versatile too—coat it with a rich frosting, sprinkle it with powdered sugar, or enjoy it unadorned for a taste of pure decadence.
Its texture strikes a perfect balance between dense and airy, making it the ideal companion for a hot cup of coffee during morning brunch or a delightful after-dinner treat. Celebrate special occasions like birthdays or holidays with a cake that speaks to nostalgia while still feeling relevant and chic. Whether you’re sharing it with family or treating yourself, every bite promises warmth and joy.
Preparation Phase & Tools to Use
Before diving into the baking, gather a few key tools that will make your experience smooth and enjoyable.
-
Mixing Bowls: Invest in a couple of sturdy mixing bowls for creamy blends and dry ingredients.
-
Electric Mixer: A hand or stand mixer makes achieving the light and fluffy consistency crucial for a perfect pound cake a breeze.
-
Loaf Pan: A 9×5 inch loaf pan is ideal; opt for a non-stick one for easier release.
-
Rubber Spatula: This handy tool helps you scrape down the sides of the bowl and fold ingredients without deflating your batter.
-
Wire Rack: Allow your cake to cool properly on a wire rack to prevent becoming soggy.
Preparation tips enhance the baking process. Always ensure your butter is at room temperature for optimal creaming. Take a minute to read through the recipe fully before getting started so you can flow from step to step with ease.
Ingredients for Classic Pound Cake
-
1 cup unsalted butter, softened – Using unsalted butter allows you to control the level of saltiness, leading to a well-balanced flavor.
-
1 cup granulated sugar – Commonly used for its fine texture, it helps create that essential airy quality when creamed with butter.
-
4 large eggs – Eggs not only bind the ingredients but also add richness, creating a luxurious crumb.
-
1 cup all-purpose flour – The backbone of your cake, a good quality flour will ensure stability and a beautiful rise.
-
1 teaspoon vanilla extract – The essence of comfort, it enhances the cake’s flavor with warmth.
-
1/4 teaspoon salt – Salt enhances the sweetness, balancing out the flavors and contributing to a well-rounded cake.
Feel free to experiment with substitutions! For a richer flavor profile, consider using brown sugar or experimenting with flavored extracts like almond or lemon. Gluten-free flour blends can also work wonders for a gluten-free version of this beloved dessert.
How to Make Classic Pound Cake
-
Preheat your oven to 350°F (175°C). Grease and flour a 9×5 inch loaf pan to ensure easy release.
-
Cream the softened butter and sugar together in a mixing bowl until the mixture looks light and fluffy—this step takes about 5-7 minutes.
-
Add the eggs, one at a time, beating well after each addition. This ensures they incorporate fully, contributing to that decadent texture.
-
Mix in the vanilla extract, blending until evenly distributed. The rich aroma will already hint at the delight to come!
-
Gradually add the flour and salt, mixing until just combined. Avoid overmixing to maintain the cake’s tender crumb.
-
Pour the batter into the prepared loaf pan, smoothing the top with your spatula for an even bake.
-
Bake for 60-70 minutes, or until a toothpick inserted into the center comes out clean. The aroma wafting from your oven will have your mouth watering in anticipation.
-
Let the cake cool in the pan for 10 minutes, then carefully transfer it to a wire rack to cool completely. Patience will reward you with a better-like texture!
Chef’s Notes & Helpful Tips
-
Make-ahead tips: This cake stores beautifully! You can bake it a day in advance; its flavors deepen and improve over time.
-
Cooking alternatives: You can use an air fryer set at 320°F (160°C) for about 30-40 minutes. Just keep an eye on it for doneness!
-
Customization ideas: Add citrus zest, like lemon or orange, for an unexpected freshness. Toss in chocolate chips, berries, or nuts for delightful surprises in each bite!
Common Mistakes to Avoid
-
Melted Butter: Ensure your butter is softened, but not melted. Melted butter can lead to a greasy texture.
-
Overmixing: Mixing too long after adding flour can result in a tough cake. Mix until just combined for the best texture.
-
Skimpy Measuring: Use a kitchen scale for precision or spoon the flour gently into the measuring cup; don’t pack it down.
-
Opening the Oven: Avoid peeking too early! Opening the oven causes fluctuations in temperature that may inhibit proper rising.
What to Serve With Classic Pound Cake
Serve this pound cake warm or at room temperature alongside delightful companions:
-
Fresh Berries: Strawberries or raspberries bring a zesty pop that complements the cake’s sweetness marvelously.
-
Whipped Cream: A dollop of lightly sweetened whipped cream adds a lush touch, elevating every slice to dreamy heights.
-
Ice Cream: A scoop of vanilla bean ice cream creates a blissful contrast to the warm pound cake—a match made in heaven.
-
Coffee or Tea: A robust espresso or a soothing chamomile tea enhances the cake’s richness; sip and savor with each bite.
-
Fruit Compote: Spoon over some homemade or store-bought fruit compote for a fruity, tart counterpoint to the sweet cake.
-
Chocolate Ganache: Drizzle warm ganache over slices for an indulgent chocolate experience that will capture every chocolate lover’s heart.
Storage & Reheating Instructions
Store any leftover pound cake in an airtight container in the fridge for up to a week. If you want to save it for later, wrap it tightly in plastic wrap and place it in the freezer. It can last for several months. When you’re ready to enjoy it again, simply thaw it in the fridge or at room temperature. Reheat individual slices in the microwave for 10-15 seconds to bring back that fresh-baked warmth.
Estimated Nutrition Information
These values depend on specific ingredient brands and methods of preparation:
- Serving size: 1 slice (approximately 1/12 of the cake)
- Calories: ~340
- Total Fat: 19g
- Saturated Fat: 11g
- Cholesterol: 90mg
- Sodium: 150mg
- Total Carbohydrates: 38g
- Dietary Fiber: 0g
- Sugars: 18g
- Protein: 5g
This approximation may vary based on designated ingredients.
FAQs
1. Why is my pound cake dense?
A dense pound cake often results from overmixing or adding too much flour. Ensure proper measuring and mix just until combined for the best texture.
2. How do I know when my pound cake is done?
A toothpick inserted in the center should come out clean or with a few moist crumbs. The cake surface will also spring back when gently pressed.
3. Can I use salted butter instead?
Yes! However, if you do, consider reducing the added salt to prevent overpowering the cake’s natural sweetness.
4. Can I bake this in a bundt pan?
Absolutely! Just adjust the baking time, as cakes in bundt pans may need extra time to cook through due to their thickness.
5. How can I add flavors to my pound cake?
Infuse flavor by adding extracts such as almond or lemon zest, or fold in ingredients like toasted nuts, chocolate chips, or dried fruit.
Conclusion
Baking classic pound cake invites you into a world where simplicity meets indulgence. As you savor each slice, let the memories of warm kitchens and cherished moments wrap around you like a beloved quilt. This cake holds the power to uplift your spirits, satisfy your sweet tooth, and bring loved ones together in celebration. Try your hand at this foolproof recipe and witness how it transforms every ordinary day into a moment worth cherishing. Indulge in the glorious comfort of homemade pound cake—a timeless treasure for any occasion, waiting to be savored!
Print
Classic Pound Cake
- Prep Time: 15 minutes
- Cook Time: 70 minutes
- Total Time: 85 minutes
- Yield: 12 servings 1x
- Category: Dessert
- Method: Baking
- Cuisine: American
- Diet: Vegetarian
Description
A timeless classic pound cake with a perfect balance of sweetness and buttery flavor, ideal for any occasion.
Ingredients
- 1 cup unsalted butter, softened
- 1 cup granulated sugar
- 4 large eggs
- 1 cup all-purpose flour
- 1 teaspoon vanilla extract
- 1/4 teaspoon salt
Instructions
- Preheat your oven to 350°F (175°C). Grease and flour a 9×5 inch loaf pan.
- Cream the softened butter and sugar together in a mixing bowl until light and fluffy, about 5-7 minutes.
- Add the eggs, one at a time, beating well after each addition.
- Mix in the vanilla extract until evenly distributed.
- Gradually add the flour and salt, mixing until just combined.
- Pour the batter into the prepared loaf pan.
- Bake for 60-70 minutes, or until a toothpick inserted into the center comes out clean.
- Let the cake cool in the pan for 10 minutes, then transfer to a wire rack to cool completely.
Notes
Can be stored in an airtight container for up to a week. Wrap in plastic and freeze for longer storage.
Nutrition
- Serving Size: 1 slice
- Calories: 340
- Sugar: 18g
- Sodium: 150mg
- Fat: 19g
- Saturated Fat: 11g
- Unsaturated Fat: 7g
- Trans Fat: 0g
- Carbohydrates: 38g
- Fiber: 0g
- Protein: 5g
- Cholesterol: 90mg