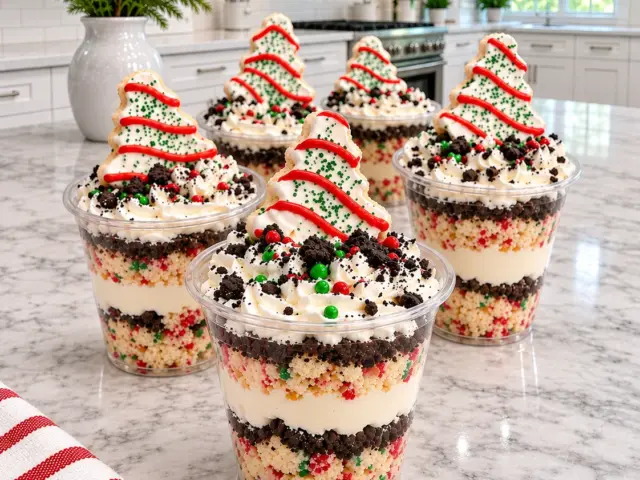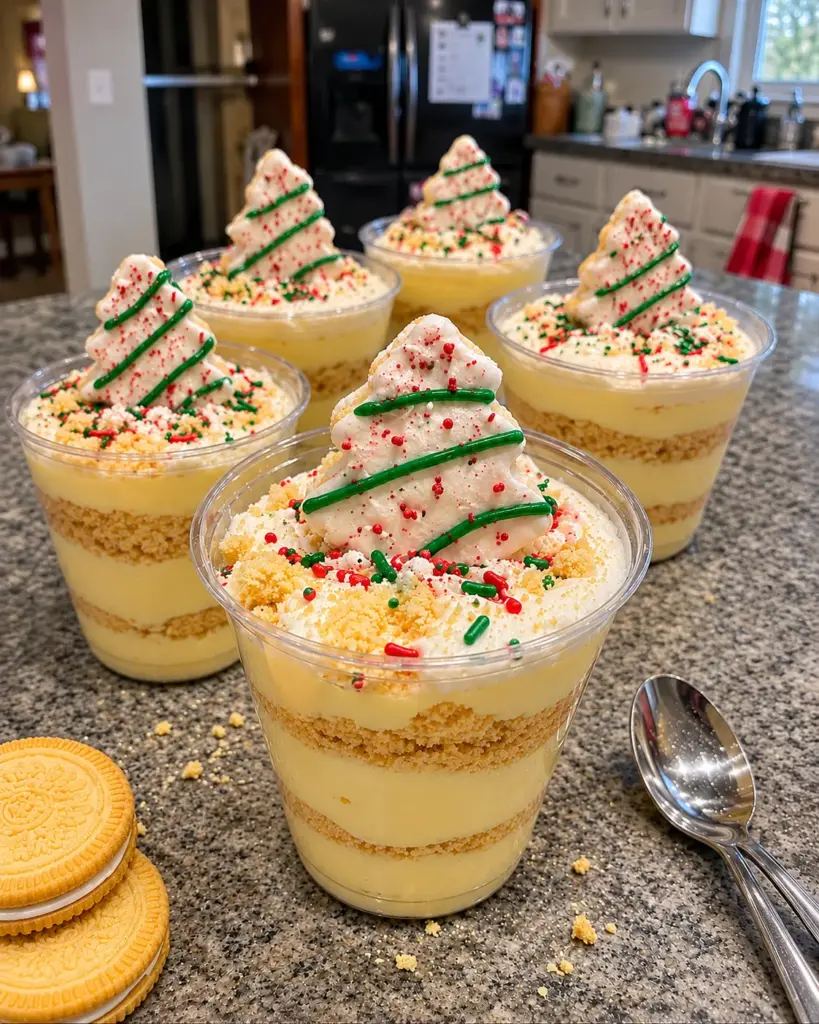
Christmas Tree Cake Dessert Cups stack golden vanilla cookie crumbs with a thick vanilla cheesecake filling, then finish each serving with sprinkles and an upright Christmas tree cake. The layers show through clear cups, making a festive dessert that needs no oven time and no slicing when guests are ready to eat.
This recipe makes six generous cups. The cream combines instant vanilla pudding, softened cream cheese, and whipped topping; the cookie crumbs add a little crunch between the creamy layers. Make the cups ahead, then decorate the tree cakes with green icing and stand them on top shortly before serving.
Why You’ll Love These Christmas Dessert Cups
The presentation is playful, but the method is straightforward. You whisk pudding, beat cream cheese smooth, fold in whipped topping, and layer everything in clear cups. Each guest gets a full dessert without having to cut a cake or scoop from a large dish. The white frosting, green icing, and red and green sprinkles provide the holiday color.
The cups are also flexible for entertaining. You can prepare the vanilla filling and layer the cookies the day before. A short refrigerator chill lets the cream set and makes the dessert easier to carry. The tree cakes are added at the end so they keep their shape and stand upright.
Ingredients for Christmas Tree Cake Dessert Cups
For the Vanilla Cheesecake Filling
- 2 packages (3.4 oz / 96 g each) instant vanilla pudding mix: Instant pudding gives the filling body without cooking. Check that the boxes say instant, since cook-and-serve pudding works differently.
- 3 cups (720 ml) cold milk: This is intentionally less milk than two boxes of pudding might ordinarily use, producing a thicker filling that holds the cup layers. Use cold milk for reliable thickening.
- 8 oz (225 g) cream cheese, softened: Soft cream cheese beats smoothly into the pudding and adds a gentle cheesecake note.
- 1 tub (8 oz / 225 g) whipped topping, thawed: Fold it into the thick pudding mixture for a lighter, spoonable texture. Thaw in the refrigerator first.
- 1 teaspoon vanilla extract: Rounds out the flavor of the filling.
For Layering and Decorating
- 2½ cups (about 250 g) finely crushed vanilla sandwich cookies or vanilla wafers: Vanilla sandwich cookies make a slightly sweeter layer; vanilla wafers give a simpler crisp crumb. Crush them finely for clean stripes.
- 6 Little Debbie Christmas Tree Cakes: One tree cake stands in each finished cup. Keep the cakes wrapped until it is time to decorate and serve.
- 2 tablespoons red and green Christmas sprinkles: Scatter over the tops for color and a little crunch.
- 2 tablespoons green decorating icing: Pipe green garland lines over the white-frosted tree cakes before placing them upright in the cups.
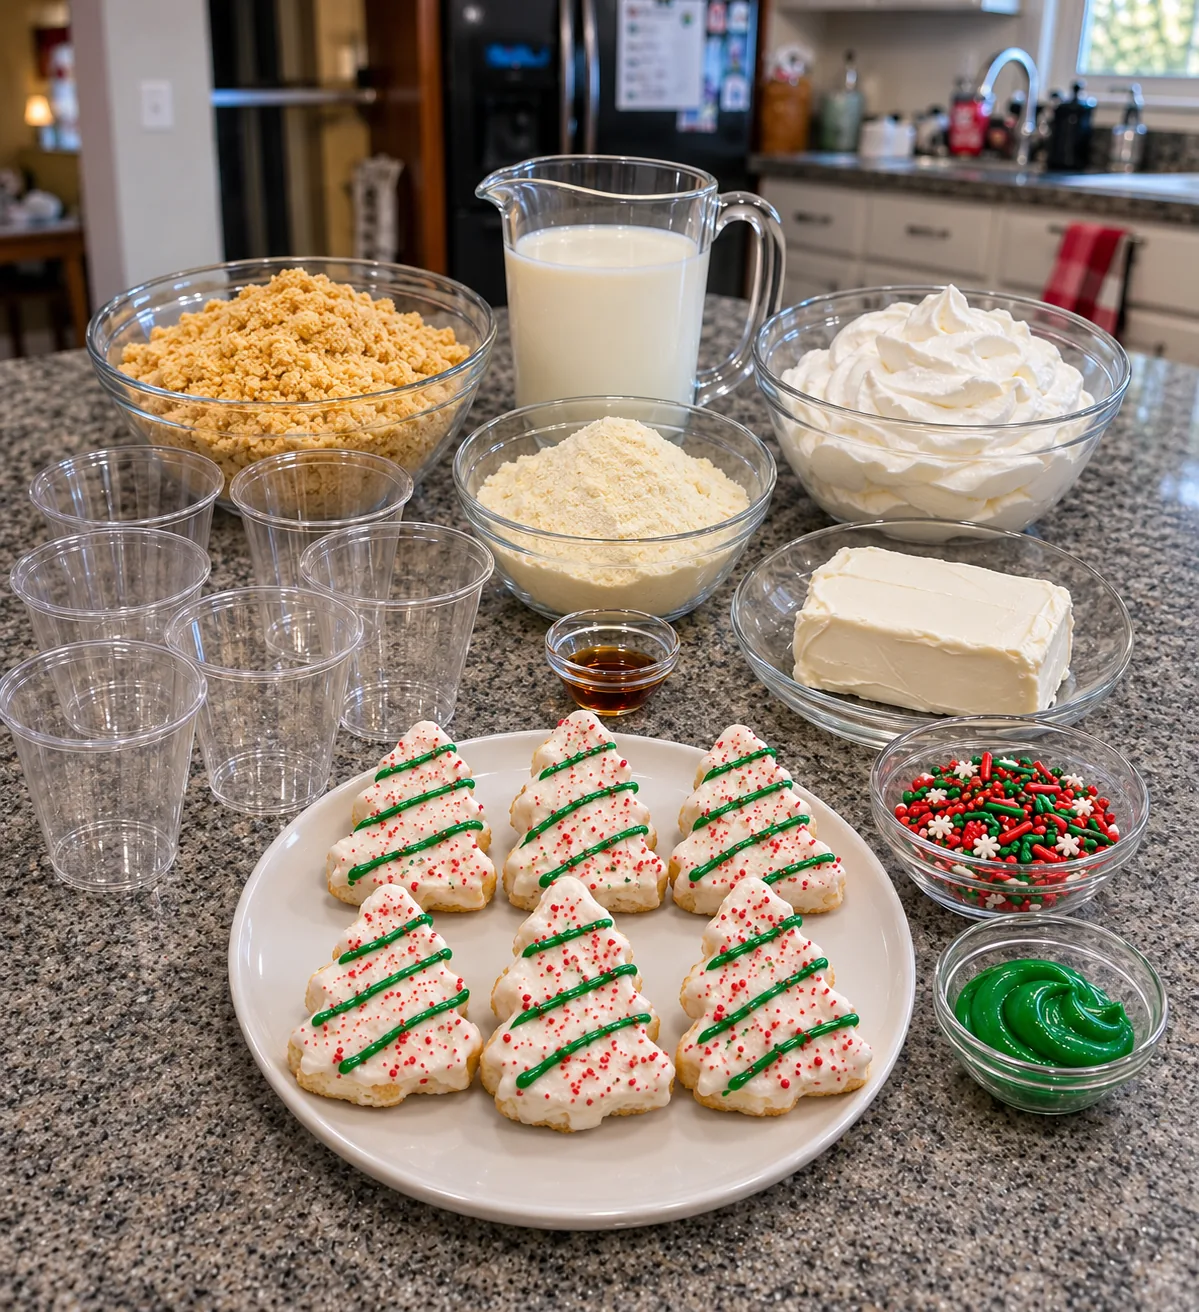
Choose the Right Cups
Use six clear cups holding roughly 12 to 16 oz each. The recipe provides a generous amount of thick filling, cookie crumbs, and a full tree cake for every cup, so small tasting cups will be crowded. A broad opening is especially helpful: it leaves enough room for the cake base to sit in the cream without tipping.
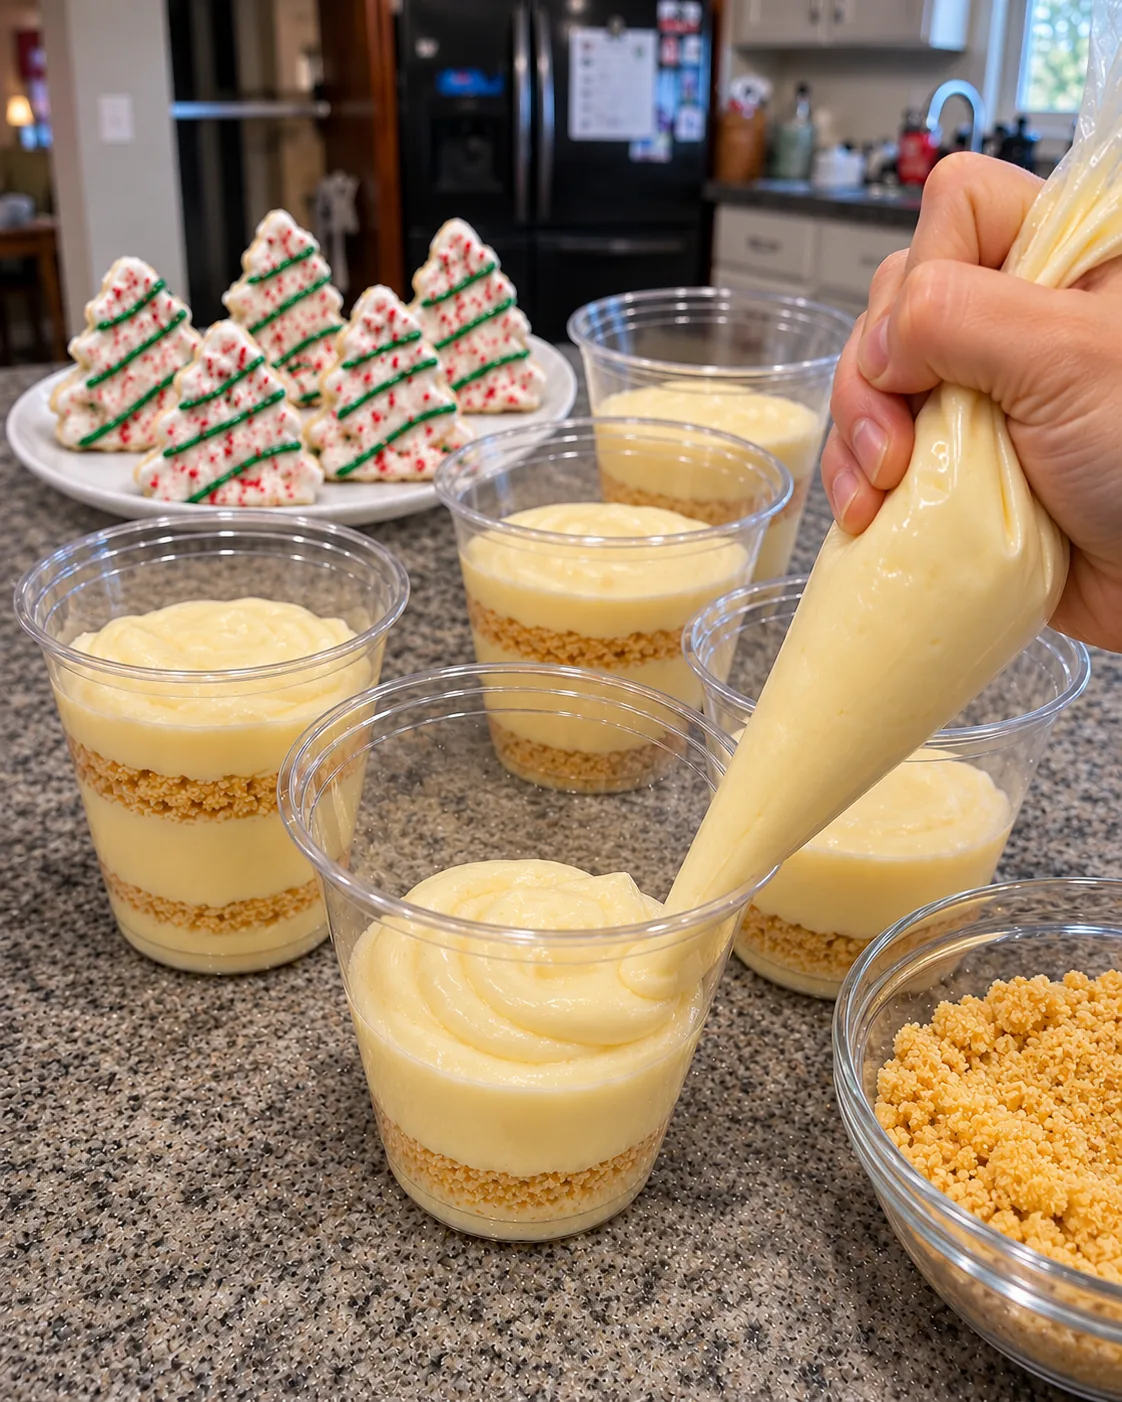
Set all six cups on a tray before you begin. The tray lets you move the whole batch into the refrigerator without disturbing the layers. If you want especially clean sides, transfer the cheesecake filling to a large piping bag or zip-top bag with a corner cut off. Piping around the inside edge first gives each cup a neat cream stripe.
Instructions: How to Make Christmas Tree Cake Dessert Cups
- Whisk the pudding. In a large bowl, whisk 2 packages (3.4 oz / 96 g each) instant vanilla pudding mix with 3 cups (720 ml) cold milk for about 2 minutes, or according to the package’s mixing time. Let stand for about 5 minutes until noticeably thick. The mixture should be thicker than standard pudding because this recipe uses less milk.
- Beat the cream cheese. In a separate bowl, beat 8 oz (225 g) softened cream cheese with 1 teaspoon vanilla extract until smooth. Scrape the bowl so no dense lumps remain. Add the thick pudding in several additions, beating briefly after each one until the filling is uniform.
- Fold in whipped topping. Gently fold in 1 thawed tub (8 oz / 225 g) whipped topping with a spatula. Stop as soon as the mixture is evenly combined. If it seems soft, chill it for 15 to 20 minutes before layering.
- Prepare the cookie crumbs. Finely crush 2½ cups (about 250 g) vanilla sandwich cookies or vanilla wafers. Divide the crumbs into three portions: about 1 cup for the bottom layers, 1 cup for the middle layers, and ½ cup for sprinkling over the cup tops.
- Start the six cups. Divide the first 1 cup of crumbs evenly among six clear 12- to 16-oz cups. Spoon or pipe about half the cheesecake filling over the crumbs, keeping the cream against the cup walls if you want distinct stripes.
- Repeat the layers. Divide the second 1 cup of crumbs among the six cups, followed by the rest of the cheesecake filling. Smooth the tops gently. Cover and refrigerate for at least 2 hours so the cream firms and the crumbs settle into the layers.
- Decorate the cakes. Just before serving, unwrap 6 Little Debbie Christmas Tree Cakes. Pipe the 2 tablespoons green decorating icing in thin zigzag lines across the cakes, dividing it evenly. Let the icing set for a few minutes if it is very soft.
- Finish the cups. Scatter the reserved ½ cup cookie crumbs and 2 tablespoons red and green Christmas sprinkles over the six chilled cups. Stand one decorated tree cake in each cup, pressing its base gently into the filling so it is stable. Serve cold with spoons.
Ingredient Notes and Easy Variations
Instant pudding is essential for the no-bake method. It thickens in cold milk. Cook-and-serve pudding must be heated and cooled before layering, so it is not a direct swap for these instructions.
Keep the milk measurement at 3 cups. Using the usual amount printed on two pudding boxes can create a softer filling that is harder to layer and less able to support the upright cakes. Measure the cold milk before whisking.
Pick one cookie style. Vanilla sandwich cookies, with their cream centers, bring a sweeter crumb. Vanilla wafers have a drier, simpler crunch. Both work; use the same measured amount after crushing. A mix is fine if you have partial packages to use.
Let cream cheese soften naturally. Cold cream cheese can leave lumps that remain visible in the pale filling. Beat it smooth before adding pudding, and scrape the bowl a few times.
Keep cake decorations simple. The Christmas Tree Cakes already bring white frosting and colorful details. The measured green icing is enough for thin garland lines across all six; a heavy coat can make the trees slippery.
Tips for Neat Layers and Standing Trees
Crush cookies finely. Small crumbs settle into even bands. Large pieces can make the filling look lumpy at the sides of the clear cups and leave gaps beneath the tree cakes.
Use a piping bag for the cream. A spoon works, but piping gives you more control and keeps the upper walls clean. If you do use a spoon, wipe accidental smears with a clean, damp paper towel before chilling.
Leave headspace. Finish the creamy layers slightly below the rim. The cookie crumbs, sprinkles, and upright cakes need space without spilling over the cup.
Chill before decorating. The filling becomes firmer in the refrigerator. A chilled top supports the cake more reliably than freshly mixed cream. Give the cups at least 2 hours, or make them the day before.
Patience with the green icing helps. Pipe thin lines over the white frosting and let them settle for a few minutes. Handle each cake by its sides when moving it into a cup so the garland stays intact.
Common Mistakes to Avoid
Using warm milk: Instant pudding thickens most reliably with cold milk. Chill the milk beforehand and whisk thoroughly for the time directed.
Adding extra milk: The 3-cup amount is intentional. More milk may make the filling too loose to show clear layers or hold a tree cake upright.
Folding in frozen whipped topping: Thaw the tub in the refrigerator first. Frozen pieces do not blend evenly into the pudding and cream cheese.
Overfilling the cups: If all the cream reaches the rim, the cake has nowhere to sit. Choose larger cups or make additional smaller servings, with extra tree cakes if you want one per cup.
Adding the cakes the night before: The exposed tree cakes can soften as they sit in the refrigerator. Layer the cups ahead, then add the cakes shortly before serving for the best appearance.
Make-Ahead and Serving Ideas
Prepare the filling and assemble the cookie layers the day before a gathering. Cover the cups and refrigerate them on their tray. Keep the Christmas Tree Cakes wrapped and the green icing ready. Decorating the cakes and standing them in the cups takes only a few minutes when guests are ready for dessert.
Arrange the six cups in two rows on a platter so the tree shapes are easy to see. Serve with small spoons. The cups are sweet and substantial enough to be dessert on their own; coffee or a warm holiday drink pairs well with the chilled vanilla filling.
If you need smaller portions, divide the same ingredients among eight or more cups and cut the tree cakes into smaller pieces. The look will be different, but the layers remain attractive. For the exact presentation in the photo, keep to six larger clear cups with one whole cake each.
Storage and Food Safety
Keep assembled, undecorated dessert cups covered in the refrigerator for up to 2 days. The cookie crumbs soften slightly over time, creating a more cake-like layer. For the crispest top, add the reserved crumbs and sprinkles just before serving.
Once the tree cakes are added, store any leftover cups carefully in a tall covered container so the decorations are not crushed. Keep the cream cheese, milk, pudding, and whipped topping mixture chilled until serving. Freezing the assembled cups is not recommended because thawed pudding cream can separate and the cookies can turn soggy.
For transport, place the covered cups upright in a tray inside a cooler with ice packs. Carry the wrapped cakes separately and stand them in the cups at the destination.
FAQ: Christmas Tree Cake Dessert Cups
Can I make these dessert cups the day before?
Yes. Assemble the cookie and cheesecake pudding layers, cover, and refrigerate. Add the reserved crumbs, sprinkles, green icing decorations, and tree cakes shortly before serving.
Why do two boxes of pudding use only 3 cups of milk?
The reduced milk makes a thick pudding base that stays distinct from the cookie layers and supports the upright tree cakes. Follow the 3-cup measurement in this recipe rather than the combined package directions.
Can I use vanilla wafers instead of vanilla sandwich cookies?
Yes. Finely crush them and measure 2½ cups of crumbs. Wafers give a slightly less sweet, crisper layer than sandwich cookies.
What size cups are best?
Use six clear cups with about 12 to 16 oz capacity and a fairly wide opening. This gives you enough room for generous layers and one full Christmas Tree Cake on each cup.
Do these cups need baking?
No. Instant pudding sets with cold milk, and the rest of the ingredients are ready to assemble. The filled cups simply need at least 2 hours in the refrigerator before decorating.
Conclusion: A Festive No-Bake Dessert in Six Cups
Christmas Tree Cake Dessert Cups are easy to make ahead and fun to serve. Whisk the pudding with the measured cold milk, blend it with cream cheese and whipped topping, then alternate the filling with golden cookie crumbs. After a good chill, decorate the cakes with green icing and place one on every cup for a holiday-ready finish.
Print
Christmas Tree Cake Dessert Cups
- Prep Time: 35 minutes
- Cook Time: 0 minutes
- Total Time: 2 hours 35 minutes, including chilling
- Yield: 6 cups 1x
- Category: Desserts
- Method: No-Bake
Description
Six clear no-bake dessert cups with vanilla cookie crumbs, creamy cheesecake pudding, red and green sprinkles, and upright Christmas Tree Cakes.
Ingredients
- 2 packages (3.4 oz / 96 g each) instant vanilla pudding mix
- 3 cups (720 ml) cold milk
- 8 oz (225 g) cream cheese, softened
- 1 tub (8 oz / 225 g) whipped topping, thawed
- 1 teaspoon vanilla extract
- 2½ cups (about 250 g) finely crushed vanilla sandwich cookies or vanilla wafers
- 6 Little Debbie Christmas Tree Cakes
- 2 tablespoons red and green Christmas sprinkles
- 2 tablespoons green decorating icing
Instructions
Step 1 Whisk 2 packages (3.4 oz / 96 g each) instant vanilla pudding mix with 3 cups (720 ml) cold milk for about 2 minutes. Let stand about 5 minutes until thick. The reduced milk amount gives a firm layer.
Step 2 Beat 8 oz (225 g) cream cheese, softened, with 1 teaspoon vanilla extract until smooth. Add the thickened pudding in several additions and beat briefly until uniform. Gently fold in 1 tub (8 oz / 225 g) whipped topping, thawed.
Step 3 Measure 2½ cups (about 250 g) finely crushed vanilla sandwich cookies or vanilla wafers. Reserve about ½ cup for topping and divide the remaining 2 cups in half for the two cookie layers.
Step 4 Divide the first 1 cup cookie crumbs among six clear 12- to 16-oz cups. Spoon or pipe half the vanilla cheesecake filling over the crumbs. Add the second 1 cup crumbs, then divide the remaining filling among the cups, leaving headspace. Cover and refrigerate for at least 2 hours.
Step 5 Shortly before serving, unwrap 6 Little Debbie Christmas Tree Cakes. Pipe 2 tablespoons green decorating icing in thin zigzags across the cakes, dividing evenly, and let the icing settle for a few minutes.
Step 6 Scatter the reserved ½ cup vanilla cookie crumbs and 2 tablespoons red and green Christmas sprinkles over the chilled cups. Stand one decorated Christmas Tree Cake in each cup and serve cold.
Notes
Use instant pudding and exactly 3 cups cold milk for a thick filling. Soften cream cheese fully before beating for a smooth pale filling. Leave headspace for the tree cakes and add them shortly before serving. Use fine cookie crumbs for tidy visible layers.