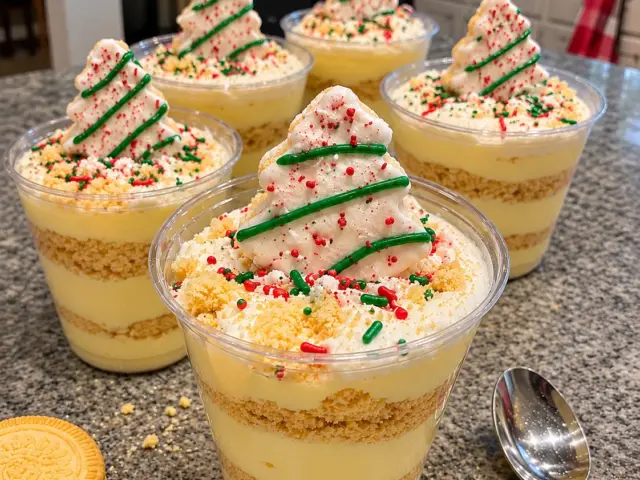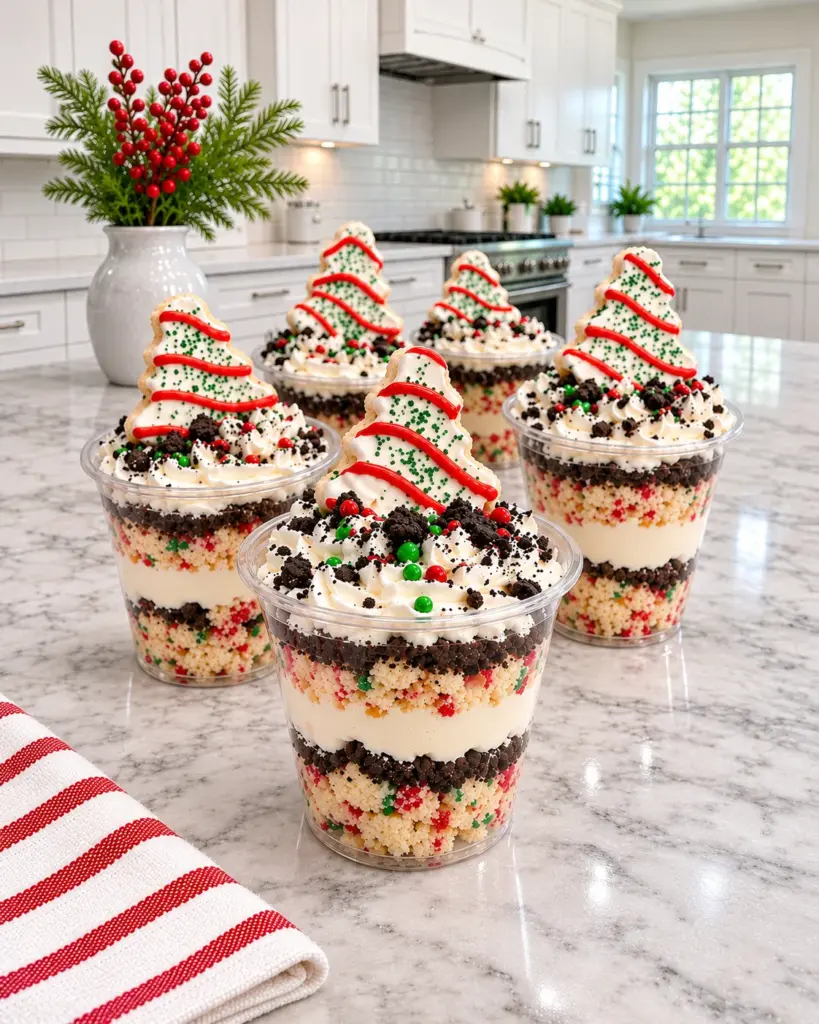
Christmas Tree Cake Dirt Cups turn a familiar snack cake into a festive, individual no-bake dessert. Clear cups show off layers of vanilla cake, chocolate sandwich cookie crumbs, and a fluffy vanilla pudding cream. A little whipped topping and a whole Christmas tree cake on each cup make them look like miniature holiday centerpieces.
The recipe makes six generous cups and is especially useful for a Christmas party because most of the work can be done ahead. Mix and layer the cups, chill them until the cream settles, then stand the tree cakes upright just before serving. That last step keeps the icing and cake decorations looking fresh.
Why You’ll Love Christmas Tree Cake Dirt Cups
These cups bring together contrasting textures in every spoonful. Crumbled vanilla cake is soft and sweet, crushed chocolate sandwich cookies add a dark, slightly crunchy “dirt” layer, and the cream is smooth and light. Red and green sprinkles make the cake crumbs colorful without changing the flavor. The frosted tree cakes provide a striking finish with almost no decorating work.
Individual portions are easy to place on a dessert table and simple for guests to pick up. You can see the layers through the clear sides, so the dessert looks special even before adding the tree cakes. There is no oven time for the cups themselves; you only need prepared cake, pudding mix, and a few mixing bowls.
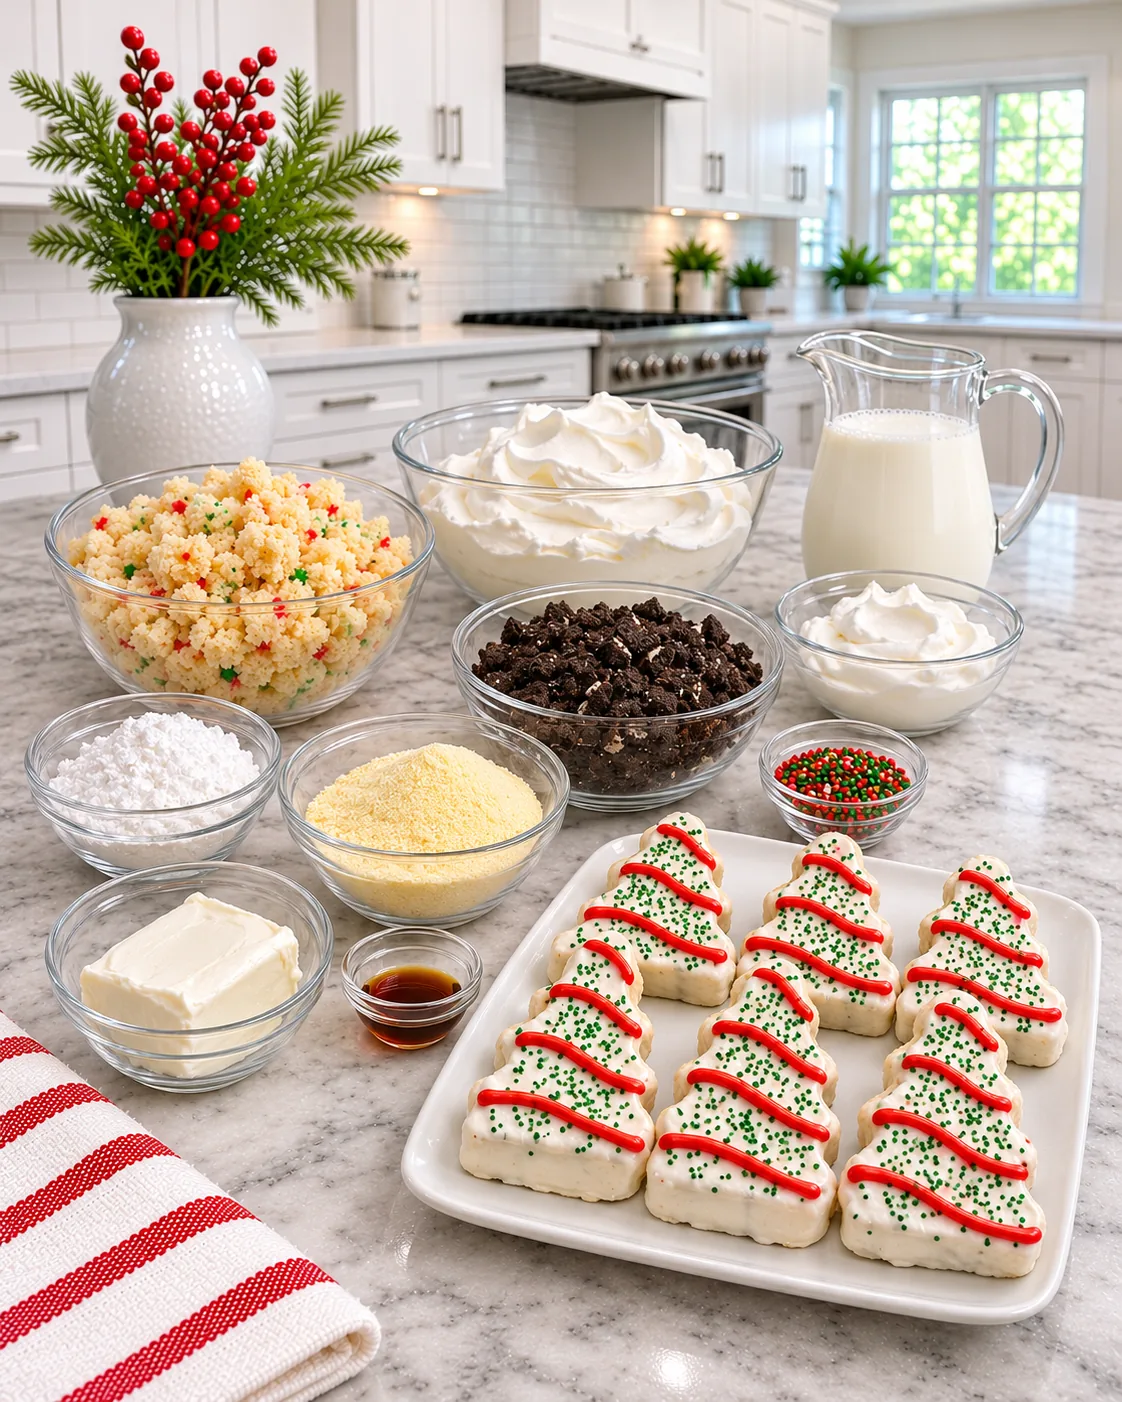
Ingredients for Christmas Tree Cake Dirt Cups
For the Vanilla Cream
- 1 package (3.4 oz / 96 g) instant vanilla pudding mix: Instant pudding thickens with cold milk, so the cream sets without cooking. Check the box before mixing; cook-and-serve pudding needs a different method.
- 2 cups (480 ml) cold milk: Cold milk helps the pudding reach its intended thickness. Whole milk produces a rich result, but use a dairy milk compatible with your pudding mix.
- 8 oz (225 g) cream cheese, softened: Softening the cream cheese prevents lumps and gives the vanilla layer a mild cheesecake flavor.
- ½ cup (60 g) powdered sugar: Powdered sugar blends smoothly into the cream cheese.
- 1 teaspoon vanilla extract: Vanilla rounds out the pudding and cake flavors.
- 1 tub (8 oz / 225 g) whipped topping, thawed: Fold it into the pudding and cream cheese mixture for a lighter texture. Thaw it in the refrigerator before starting.
For the Layers and Decoration
- 2 cups (about 200 g) crumbled vanilla cake: Use cooled, unfrosted vanilla cake or scrape away heavy frosting before crumbling. Small, loose crumbs make tidy layers.
- 1 tablespoon red and green sprinkles, plus more for decorating: Toss the measured tablespoon through the cake crumbs for color, then keep a little extra for the tops.
- 2 cups (about 200 g) crushed chocolate sandwich cookies: Crush whole cookies with their cream filling. Keep some pieces a little coarse if you like a stronger cookie texture.
- 6 Little Debbie Christmas Tree Cakes: Place one cake upright in each finished cup. Keep them wrapped until the final decorating step.
- ½ cup (about 120 g) whipped topping for the cup tops: This is additional to the 8 oz tub mixed into the vanilla cream. Spoon or pipe a little onto each cup to support the tree cakes.
Choosing Cups and Preparing the Layers
Use six clear dessert cups with roughly 12 to 16 oz capacity. The recipe contains a generous quantity of pudding cream plus four cups of cake and cookie crumbs, so small tasting cups will overflow. You can also divide the mixture among more, smaller cups, but then you will need additional Christmas tree cakes if you want one on every serving.
Set the cups on a tray before assembling. A tray makes it easier to move all six into the refrigerator without tipping the layers. If the cup openings are narrow, transfer the vanilla cream to a piping bag or a zip-top bag with one corner snipped off. That keeps the sides cleaner than dropping large spoonfuls from above.
For the cake, break a prepared vanilla cake into small crumbs with clean hands or a fork. Toss it with the tablespoon of red and green sprinkles shortly before layering. For the cookie “dirt,” pulse chocolate sandwich cookies in a food processor or crush them in a sealed bag. Aim for mostly small crumbs with a few larger bits for contrast.
Instructions: How to Make Christmas Tree Cake Dirt Cups
- Thicken the pudding. Whisk 1 package (3.4 oz / 96 g) instant vanilla pudding mix with 2 cups (480 ml) cold milk for about 2 minutes, or for the time on the package. Let it stand for about 5 minutes until thickened.
- Make the cream cheese base. In a separate large bowl, beat 8 oz (225 g) softened cream cheese with ½ cup (60 g) powdered sugar and 1 teaspoon vanilla extract until completely smooth. Scrape the sides and bottom of the bowl so no lumps remain.
- Finish the vanilla cream. Beat or whisk the thickened pudding into the cream cheese mixture a little at a time until evenly combined. Gently fold in 1 thawed tub (8 oz / 225 g) whipped topping. Refrigerate the cream while you set out the cups and crumbs.
- Prepare colorful cake crumbs. Toss 2 cups (about 200 g) crumbled vanilla cake with 1 tablespoon red and green sprinkles. Set out 2 cups (about 200 g) crushed chocolate sandwich cookies in another bowl. Keep a small spoonful of cookie crumbs for the final decoration if you like.
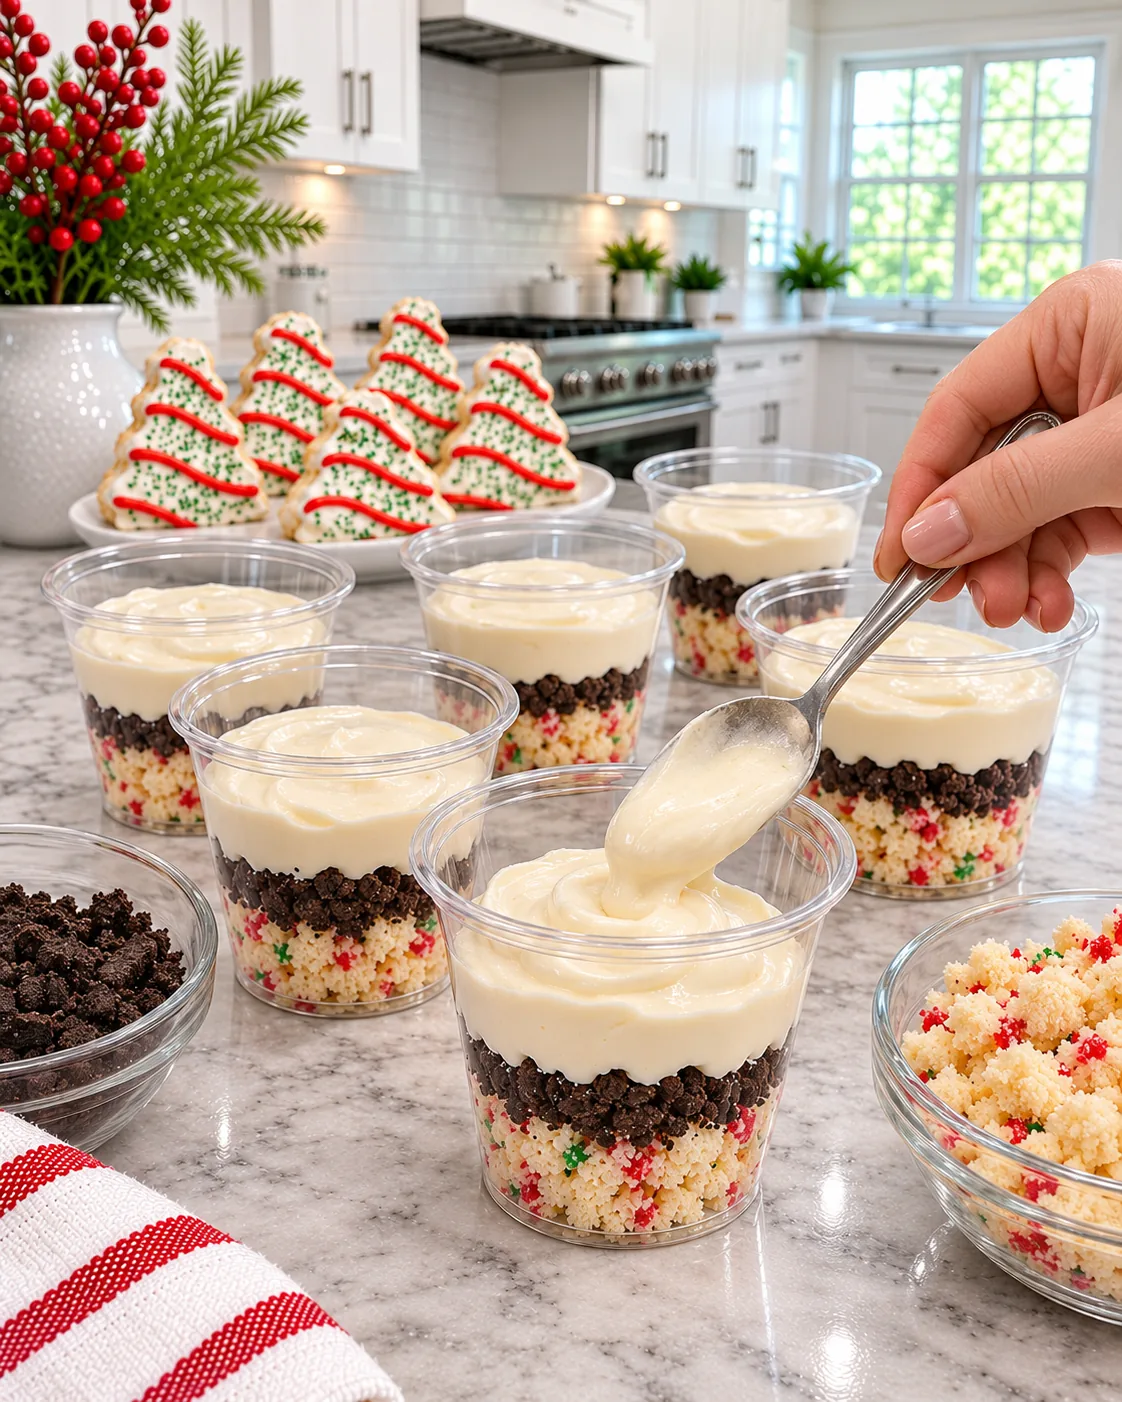
- Build the first layers. Divide half the cake crumbs among six clear cups, about ⅙ cup per cup. Add half the crushed chocolate cookies, roughly ⅙ cup per cup, then spoon or pipe in about half the vanilla cream. Smooth the cream gently without pressing the crumbs into it.
- Repeat the layers. Divide the remaining cake crumbs among the cups, followed by most of the remaining cookie crumbs. Top with the remaining vanilla cream. Leave a little space below each rim for whipped topping and a Christmas tree cake.
- Chill. Cover the cups and refrigerate for at least 2 hours so the cream firms and the layers settle. Keep 6 Little Debbie Christmas Tree Cakes wrapped separately until ready to serve.
- Decorate and serve. Divide the additional ½ cup (about 120 g) whipped topping over the cup tops. Scatter on the reserved cookie crumbs and a little more red and green sprinkles. Stand one Christmas Tree Cake upright in each cup, pressing its base lightly into the topping. Serve cold with spoons.
Tips for Distinct, Pretty Layers
Use a clear cup with enough room. These are generous dessert portions. A tall cup makes the alternating pale cake, dark cookie crumbs, and vanilla cream easy to see. Leave headspace for the topping instead of filling to the brim.
Keep the cream thick. Let the instant pudding thicken before mixing it with the cream cheese. If the cream seems very soft after folding in whipped topping, refrigerate it for 15 to 20 minutes before layering. A thicker cream sits on the cookie crumbs without seeping straight through.
Pipe cream against the cup wall. If you want clean stripes from the outside, pipe the cream around the inside edge first, then fill the center. A small spoon works too; wipe any accidental smears with a clean, damp paper towel.
Crush cookies to the texture you prefer. Fine crumbs create an even dark band. A few coarse pieces keep some crunch, especially if you assemble the cups shortly before the gathering. After an overnight chill, the cookie layer becomes softer, more like classic dirt cake.
Add the tree cakes last. The cakes look best when their white coating and red icing stay dry and visible. Set them in place shortly before serving, using a little whipped topping as a cushion to hold each one upright.
Common Mistakes to Avoid
Using warm milk: Instant pudding needs cold milk to thicken properly. Chill the milk before whisking, and use the amount listed in the recipe rather than adding extra to thin the cream.
Mixing in frozen whipped topping: Frozen pieces leave streaks and can make the cream uneven. Thaw the 8 oz tub in the refrigerator, then fold it gently into the pudding and cream cheese mixture.
Starting with cold cream cheese: Firm cream cheese is difficult to beat smooth and may leave lumps. Allow it to soften before adding powdered sugar and vanilla.
Using cups that are too small: Filling a small cup all the way to the rim leaves nowhere to stand the tree cake. Choose larger cups or plan to make additional portions with additional cakes.
Garnishing too early: Sprinkles can bleed color and the Christmas Tree Cakes can soften in the fridge. The layered cups can wait, but the extra whipped topping, sprinkles, and cake decorations are freshest when added near serving time.
Make-Ahead and Serving Ideas
For a holiday party, assemble the six layered cups the night before and refrigerate them covered. Keep the extra whipped topping cold and the Christmas Tree Cakes in their wrappers. Decorate the cups just before setting them out. You can arrange them on a tray with the trees facing outward so the red icing shows from across the table.
These dessert cups are sweet and substantial, so they can stand alone as the finale of a meal. If you are serving several Christmas treats, offer smaller spoons and let guests share a cup. To make a dessert station, set out the chilled cups and let everyone add extra cookie crumbs and sprinkles to their own serving; place the tree cakes yourself so each cup has one.
The visual layers are part of the fun. Add crumbs carefully and keep the cup sides clean. You do not need perfect stripes, though: the rustic chocolate “dirt” looks inviting against the snowy cream and bright green and red cake pieces.
Storage and Food Safety
Cover and refrigerate the assembled cups for up to 2 days. Keep them chilled until serving because they contain cream cheese, milk, pudding, and whipped topping. The cake and cookies soften as they sit, which many people enjoy, but the sharpest contrast in textures is on the first day.
If the cups are already decorated, store them carefully so the covers do not touch the tree cakes. For the neatest appearance, refrigerate only the layered cups and add the cakes at the last moment. Freezing is not recommended: thawed pudding cream may separate, and the cake and cookie layers can become soggy.
If transporting the dessert, place the covered cups upright in a tray or shallow box and keep them in a cooler with ice packs. Take the six wrapped Christmas Tree Cakes separately and stand them in the cups when you arrive.
FAQ: Christmas Tree Cake Dirt Cups
Do I need to bake anything for these cups?
No. The cups are no bake when you start with prepared vanilla cake and packaged Christmas Tree Cakes. Instant pudding thickens with cold milk, and the layers set in the refrigerator.
Can I make the cups the day before?
Yes. Assemble the cake, cookie, and vanilla cream layers the day before, cover, and refrigerate. Add the extra whipped topping, sprinkles, and upright tree cakes shortly before serving.
What size cups should I use?
Six clear cups holding about 12 to 16 oz each work well for generous servings. Check the shape of your cups: a wider mouth leaves room for the Christmas Tree Cake and makes layering easier.
Can I use homemade vanilla cake?
Yes. Use cooled cake, crumble it finely, and measure 2 cups. If it has thick frosting, remove most of the frosting before crumbling so the cake band stays light and distinct.
Why is my cream runny?
Make sure the pudding mix is instant, use exactly 2 cups cold milk, and allow the pudding to thicken before combining it with the softened cream cheese. Chill the finished cream briefly if it needs to firm up before layering.
Can I use smaller cups?
Yes, but the same ingredient quantities will make more than six portions. You will also need more Christmas Tree Cakes if every small cup should have a whole tree on top.
Conclusion: A Festive Dessert in Every Cup
Christmas Tree Cake Dirt Cups are an easy way to serve a playful holiday dessert without baking a new cake. Mix the vanilla cream until smooth, alternate it with colorful cake crumbs and chocolate cookie “dirt,” then chill the cups. Add whipped topping and one frosted tree cake per cup just before serving for the prettiest finish.
Print
Christmas Tree Cake Dirt Cups
- Prep Time: 30 minutes
- Cook Time: 0 minutes
- Total Time: 2 hours 30 minutes
- Yield: 6 cups 1x
- Category: Desserts
- Method: No-Bake
Description
Six clear no-bake dessert cups with colorful vanilla cake, chocolate cookie dirt, creamy vanilla pudding, whipped topping, and Christmas Tree Cakes.
Ingredients
- 1 package (3.4 oz / 96 g) instant vanilla pudding mix
- 2 cups (480 ml) cold milk
- 8 oz (225 g) cream cheese, softened
- ½ cup (60 g) powdered sugar
- 1 teaspoon vanilla extract
- 1 tub (8 oz / 225 g) whipped topping, thawed, for the cream
- 2 cups (about 200 g) crumbled vanilla cake
- 1 tablespoon red and green sprinkles, plus more for decorating
- 2 cups (about 200 g) crushed chocolate sandwich cookies
- 6 Little Debbie Christmas Tree Cakes
- ½ cup (about 120 g) whipped topping for the cup tops
Instructions
Step 1 Whisk 1 package (3.4 oz / 96 g) instant vanilla pudding mix with 2 cups (480 ml) cold milk for about 2 minutes. Let stand for about 5 minutes until thickened.
Step 2 Beat 8 oz (225 g) cream cheese, softened, with ½ cup (60 g) powdered sugar and 1 teaspoon vanilla extract until smooth. Gradually combine with the thickened pudding, then gently fold in 1 tub (8 oz / 225 g) whipped topping, thawed, for the cream.
Step 3 Toss 2 cups (about 200 g) crumbled vanilla cake with 1 tablespoon red and green sprinkles, plus more for decorating later. Set out 2 cups (about 200 g) crushed chocolate sandwich cookies. Reserve a small spoonful of cookie crumbs for garnish if desired.
Step 4 Divide half the cake crumbs among six clear 12- to 16-oz cups, followed by half the crushed chocolate cookies and half the vanilla cream. Repeat with the remaining cake, most of the remaining cookies, and remaining cream. Leave headspace for toppings.
Step 5 Cover and refrigerate for at least 2 hours. Keep 6 Little Debbie Christmas Tree Cakes wrapped separately until serving.
Step 6 Divide the extra ½ cup (about 120 g) whipped topping for the cup tops among the six chilled cups. Add reserved cookie crumbs and a little more red and green sprinkles. Stand one Christmas Tree Cake upright in each cup and serve cold.
Notes
Use instant pudding and cold milk; let pudding thicken before combining with cream cheese. Leave headspace in each cup for whipped topping and a whole Christmas Tree Cake. Keep tree cakes wrapped separately until just before serving so the icing stays attractive.