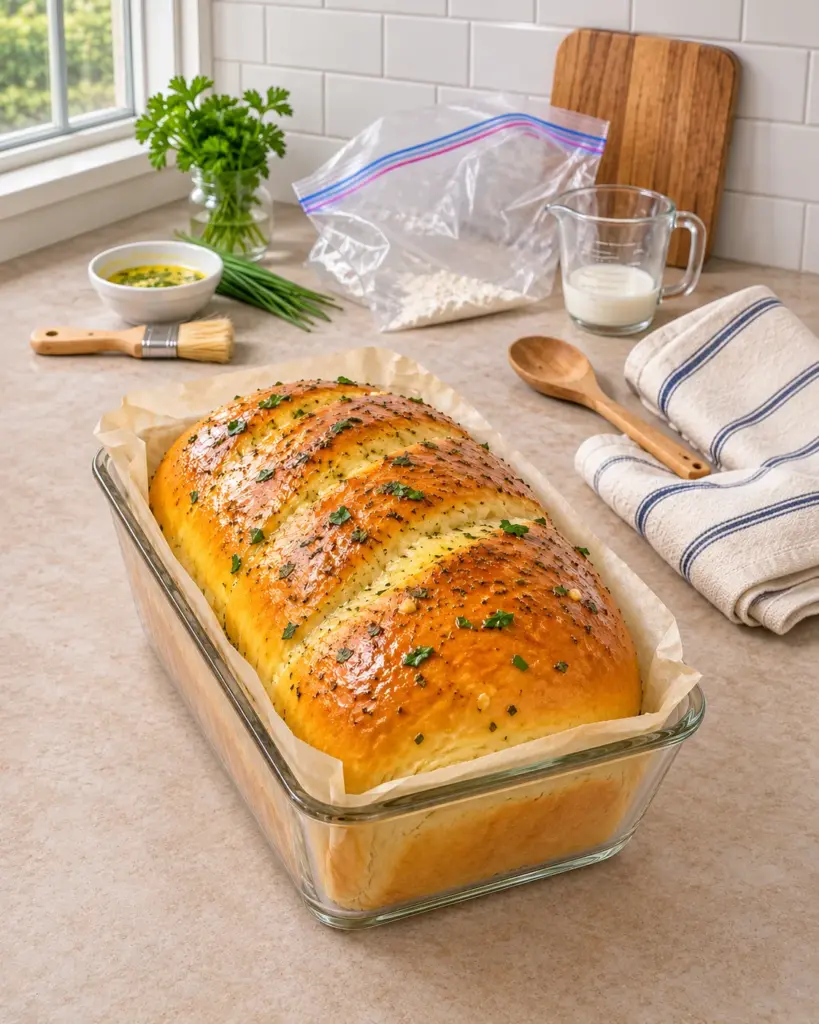
Soft & Fluffy Garlic Herb Bread in a Bag brings the mixing and early dough work into one large zip-top bag. The loaf itself bakes in a pan, coming out golden and tender with garlic and Italian herbs in the crumb. A warm garlic butter made with parsley and chives gives the crust its glossy, fragrant finish.
The bag method keeps sticky dough contained while you squeeze and fold it by hand. You can feel the mixture change from loose flour and milk to a cohesive dough without getting your counter covered in flour. After the first rise, transfer it to a loaf pan, let it become puffy again, and bake. This recipe makes one generous 9 × 5 inch loaf, ideal for thick slices with soup or a family dinner.
Why You’ll Love This Garlic Herb Bread
The dough uses milk, egg, and a little melted butter for a soft, fluffy interior. Garlic powder and dried Italian seasoning flavor the bread throughout, while fresh garlic, parsley, and chives stay vivid in the butter brushed on after baking. The result is more aromatic than a plain sandwich loaf, but mild enough to serve with many meals.
The bag is especially helpful if you want a small, contained mixing space. A large food-safe bag lets you combine the ingredients and work the dough without a stand mixer. The finished bread can be sliced for sandwiches, toasted, or served warm in thick pieces.
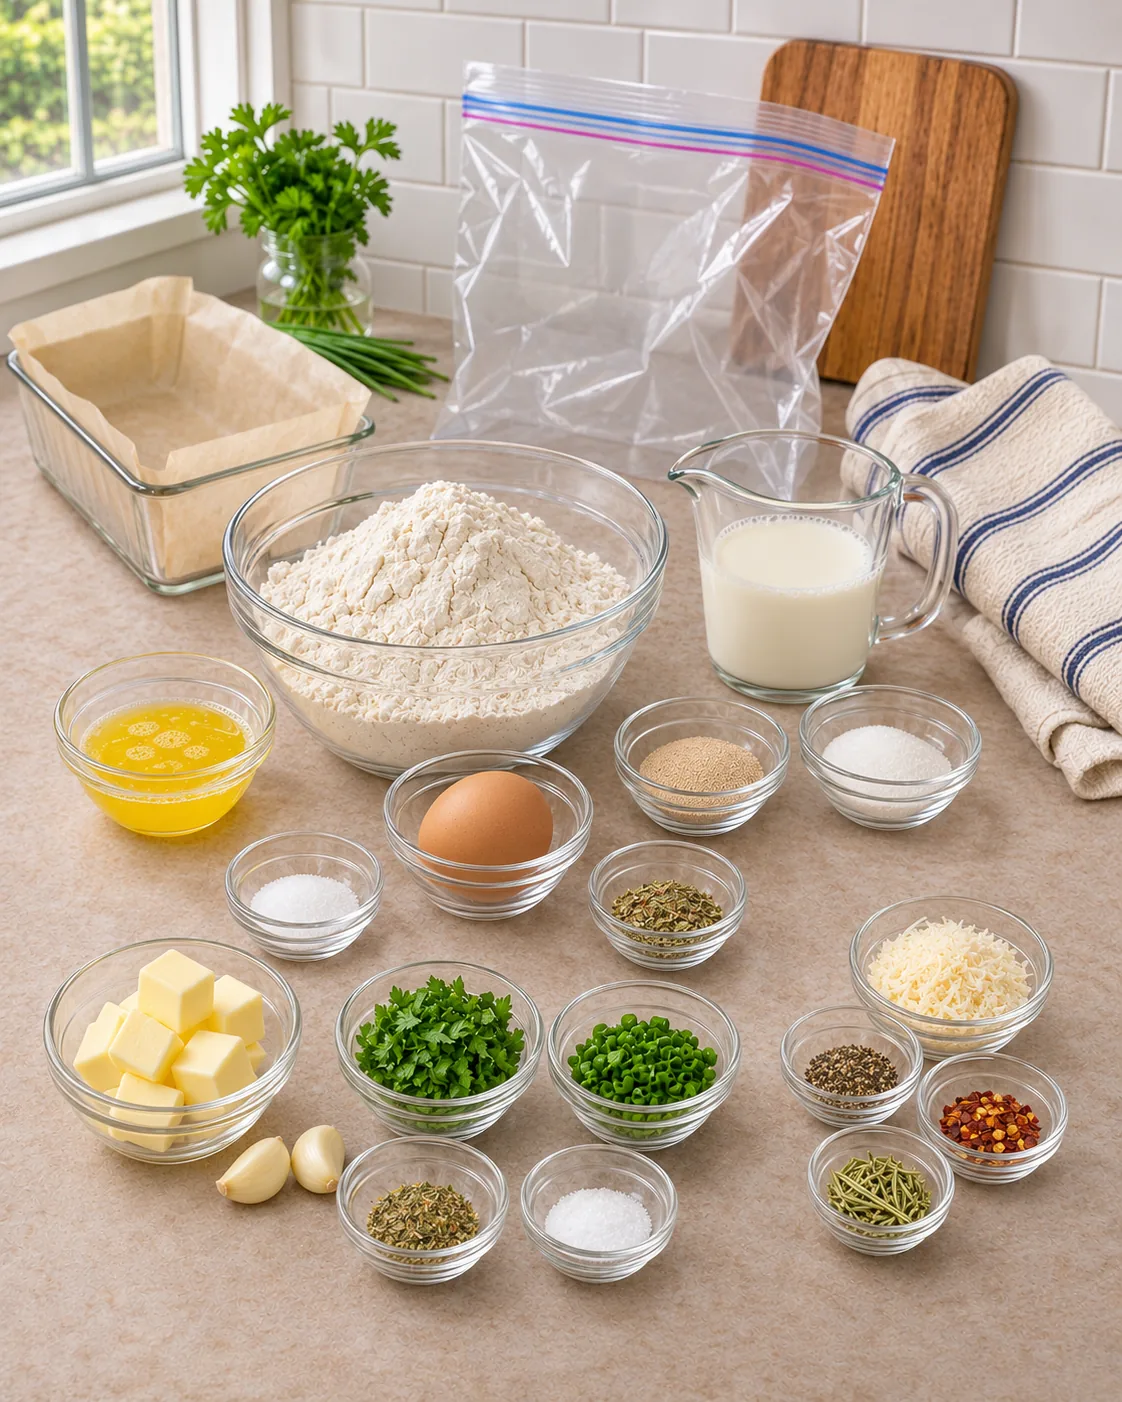
Ingredients for Soft & Fluffy Garlic Herb Bread in a Bag
For the Dough
- 1 cup whole milk, warmed to 105–110°F: Warm milk supports the yeast and adds tenderness. It should be warm, not hot.
- 2¼ teaspoons active dry or instant yeast: Either type works. Active dry yeast can be mixed with the warm milk and sugar first; instant yeast can go straight in with the flour.
- 3 tablespoons granulated sugar: Gives the bread a mild sweetness and helps the crust color.
- 1 large egg, room temperature: Adds richness and helps the crumb stay soft.
- 3 tablespoons unsalted butter, melted and cooled slightly: Mix into the dough after it is no longer hot so it does not overheat the yeast.
- 3¼ cups all-purpose or bread flour, spooned and leveled: All-purpose flour gives a softer crumb; bread flour lends a little more chew and height.
- 1½ teaspoons fine salt: Seasons the dough itself and balances the sugar.
- 1 teaspoon garlic powder: Spreads garlic flavor evenly through the loaf.
- 1 teaspoon dried Italian seasoning: Adds herbs throughout the dough.
- 2–4 tablespoons additional flour, only if needed: Add it gradually if the dough stays more like batter after several minutes of mixing. A soft, slightly tacky dough is the goal.
For the Pan and Crust
- 1 teaspoon softened butter or neutral oil: Lightly coat the loaf pan, even if using a parchment sling.
- 1 tablespoon milk for brushing: Brush over the risen dough just before baking for gentle color.
For the Garlic Herb Butter
- 3 tablespoons unsalted butter: Melt for the finishing brush.
- 2 garlic cloves, finely minced or grated: Warm briefly in the melted butter to soften the raw edge.
- 1 tablespoon finely chopped fresh parsley: Adds color and a fresh note.
- 2 teaspoons finely chopped fresh chives: Give a mild onion flavor.
- ½ teaspoon dried Italian seasoning: Reinforces the herbs in the dough.
- ¼ teaspoon fine salt: Seasons the finishing butter.
Optional Additions
- ¼ cup grated Parmesan: Mix into the dough for savory depth.
- ½ teaspoon cracked black pepper: Add with the dry ingredients for warmth.
- ¼ teaspoon crushed red pepper flakes: For a gentle spicy edge.
- 1 tablespoon finely chopped fresh rosemary: Use sparingly because rosemary is assertive.
How the Bread-in-a-Bag Method Works
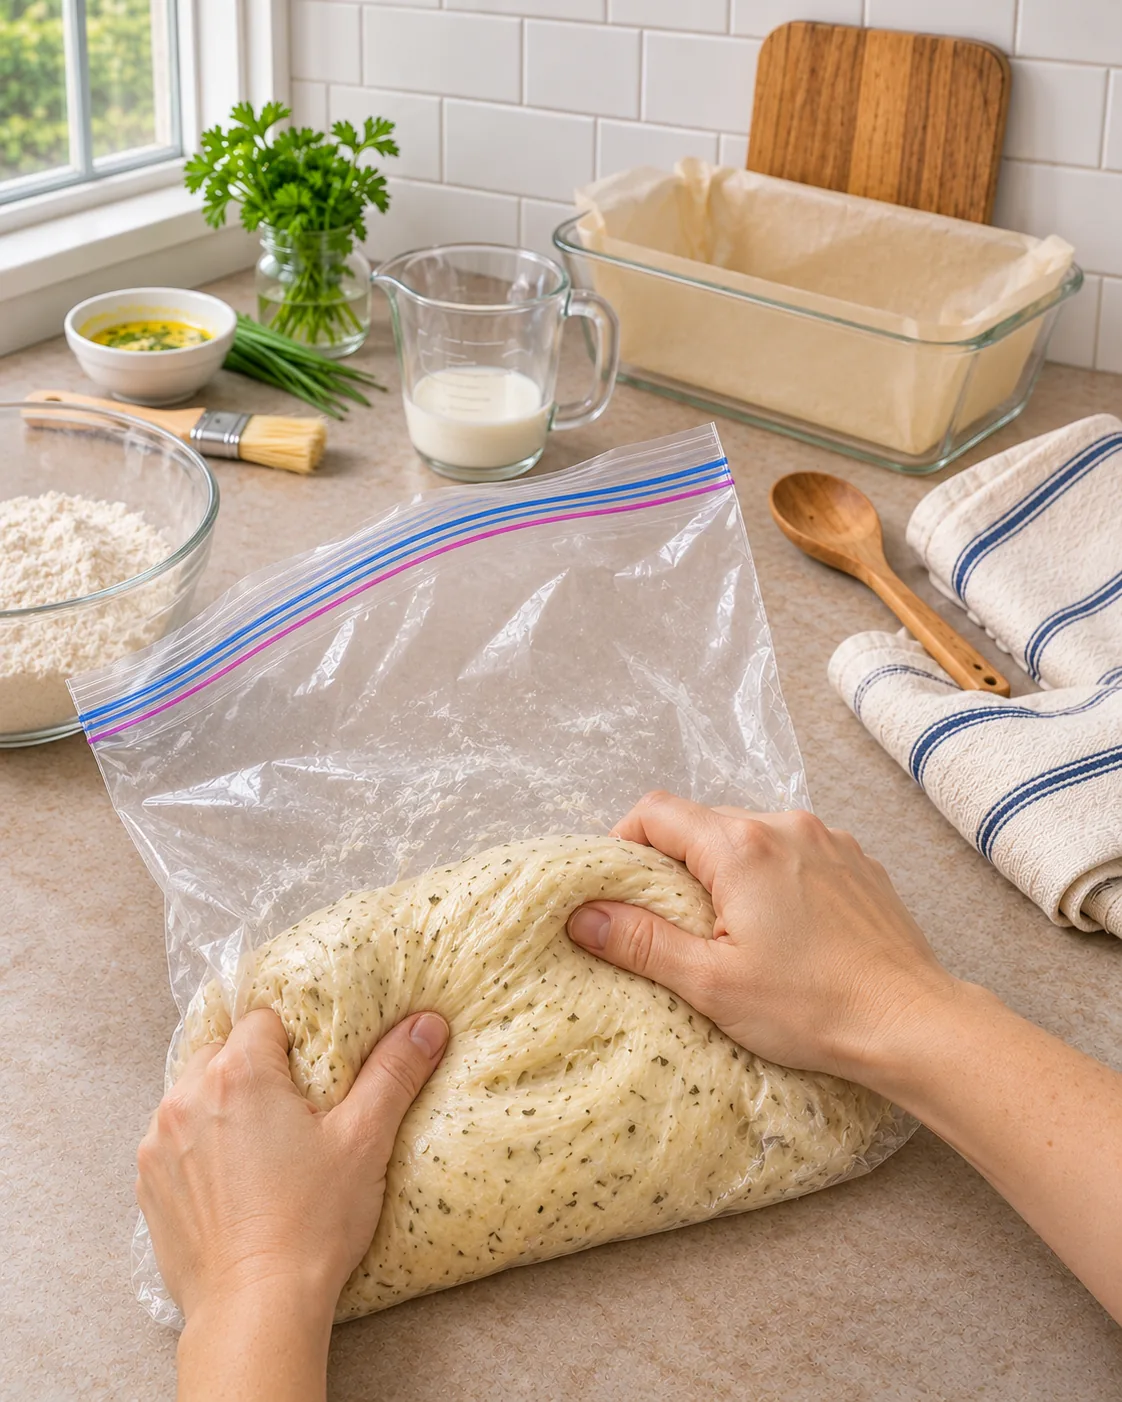
Use a sturdy, food-safe gallon-size zip-top bag. It needs enough space for the ingredients to move as you press them together and for the dough to expand during its first rise. Stand the bag inside a large bowl or measuring jug while adding ingredients. This supports the bag and makes spills less likely.
Once everything is inside, press most of the air out, close the zipper securely, and squeeze the dough from the outside of the bag. Keep working it until no dry flour remains and the mixture begins to feel elastic. After mixing, open the zipper slightly for the rise and set the bag in a bowl so the dough has room to expand. The bag is only a mixing and proofing tool; the dough goes into a prepared loaf pan for baking.
Equipment and Pan Size
Gather a sturdy gallon-size food bag, a bowl to support it, a measuring cup, and a 9 × 5 inch loaf pan. A parchment sling is helpful for lifting the warm loaf out. You will also need a small saucepan for the finishing butter, a pastry brush, and a cooling rack. A thermometer makes it easier to check both milk temperature and baked bread doneness.
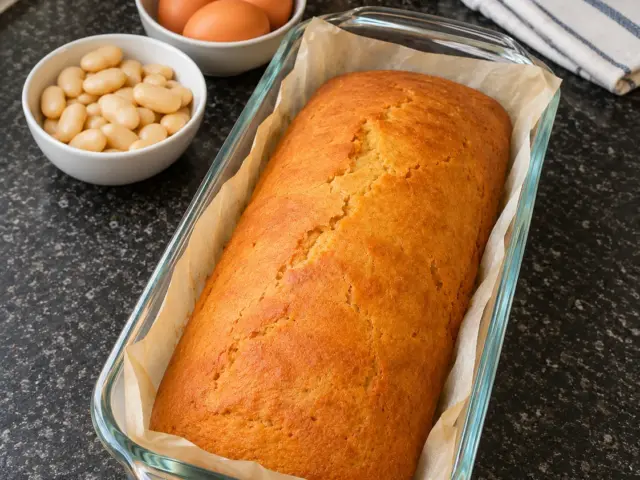
The photo shows a clear glass pan. Glass and metal pans can bake at slightly different rates, so check the center rather than judging by color alone. Place a hot glass pan on a dry rack or towel and avoid sudden temperature changes.
Instructions: How to Make Garlic Herb Bread in a Bag
- Prepare the yeast mixture. Warm 1 cup whole milk to 105–110°F. If using 2¼ teaspoons active dry yeast, stir it into the milk with 3 tablespoons granulated sugar and leave for 5 to 10 minutes until foamy. If using instant yeast, add it to the flour in the next step and combine the milk with the sugar.
- Fill the bag. Stand a sturdy gallon-size food bag open inside a large bowl. Add the warm milk mixture, 1 large room-temperature egg, and 3 tablespoons unsalted butter, melted and cooled slightly. Add 3¼ cups all-purpose or bread flour, spooned and leveled, 1½ teaspoons fine salt, 1 teaspoon garlic powder, and 1 teaspoon dried Italian seasoning. Add the instant yeast here if using it. If desired, also add ¼ cup grated Parmesan, ½ teaspoon cracked black pepper, ¼ teaspoon crushed red pepper flakes, or 1 tablespoon finely chopped fresh rosemary.
- Mix in the bag. Close the zipper securely, leaving a little room for the ingredients to move. Press and squeeze the bag from the outside for about 5 to 7 minutes, turning it as needed, until no dry flour remains and the dough feels cohesive and slightly elastic. If it remains extremely wet and cannot hold together, work in 2–4 tablespoons additional flour, only if needed, one tablespoon at a time. The dough should still feel soft and a little tacky.
- First rise. Open the zipper about an inch to allow expansion, place the bag upright in its supporting bowl, and cover loosely with a clean towel. Let the dough rise in a warm spot for about 60 to 90 minutes, until roughly doubled. Do not leave the bag near direct heat.
- Shape and pan. Coat a 9 × 5 inch loaf pan with 1 teaspoon softened butter or neutral oil and line with parchment if desired. Turn the dough out of the bag onto a lightly floured surface. Pat it into a rough rectangle, roll it into a log the length of the pan, pinch the seam closed, and place seam-side down in the pan.
- Second rise. Cover the pan loosely and let the dough rise for about 40 to 60 minutes, until it looks light and crowns approximately 1 inch above the pan rim. During the last 20 minutes, preheat the oven to 350°F (175°C).
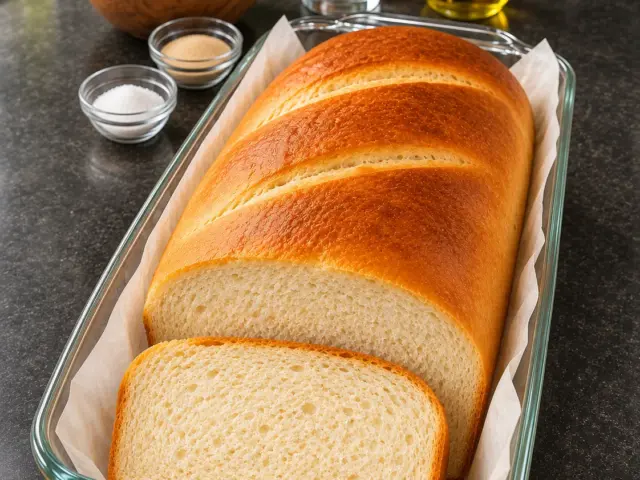
- Brush and bake. Gently brush the top with 1 tablespoon milk for brushing. Make three shallow diagonal slashes with a sharp blade if you want the look shown in the photo. Bake at 350°F (175°C) for about 35 to 45 minutes, until the top is deeply golden and the center reaches about 190–200°F (88–93°C). Tent with foil if it browns before the middle is ready.
- Prepare the garlic herb butter. While the loaf finishes baking, melt 3 tablespoons unsalted butter over low heat. Add 2 finely minced or grated garlic cloves and warm gently for about 1 minute, stirring, without browning. Remove from the heat and stir in 1 tablespoon finely chopped fresh parsley, 2 teaspoons finely chopped fresh chives, ½ teaspoon dried Italian seasoning, and ¼ teaspoon fine salt.
- Finish and cool. Rest the baked loaf in its pan for 10 minutes, then lift it to a rack. Brush the warm crust generously with the garlic herb butter. Let it cool at least another 30 minutes before slicing so the crumb sets. Serve warm or at room temperature.
Tips for Soft, Fluffy Bread
Keep the milk in the warm range. Milk at 105–110°F helps active dry yeast wake up. Milk that feels hot can harm the yeast, and very cool milk slows the rise. A thermometer is useful, but comfortably warm milk is a practical guide.
Let melted butter cool slightly. Stir it into the bag after it has lost its heat. This protects the yeast and keeps the egg from beginning to cook in the mixture.
Measure flour lightly. Spoon flour into the cup and level it. Dense scoops can add much more flour than intended, giving you a stiff loaf. Add the optional 2–4 tablespoons only if the mixed dough truly needs it.
Work the bag thoroughly. Squeeze and fold through the plastic until the dough looks even, not streaked with dry flour. A few minutes of this motion help develop structure for a higher loaf.
Watch both rises. The first rise should roughly double the dough; the second should create a light crown above the pan. Timing varies with room temperature. Bread that goes into the oven too early may be dense, while overproofed dough can sag.
Check the center. A golden top does not always mean the middle is ready. A thermometer reading around 190–200°F and a loaf that feels firm at the sides give better evidence.
Common Mistakes to Avoid
Using a bag that is too small or thin: A sturdy gallon-size food bag leaves space to mix without leaks. Stand it in a bowl while filling and proofing. If the bag seems fragile, use a second bag around it for mixing support.
Sealing the bag tightly during the rise: Yeast releases gas and the dough expands. Leave the zipper slightly open during proofing and support the bag in a bowl.
Adding all optional flour immediately: The dough becomes less sticky as it is worked. Wait until after several minutes of bag mixing before deciding whether additional flour is needed.
Adding raw garlic butter before baking: The fresh garlic and herbs are best warmed gently and brushed onto the baked loaf. That keeps their flavor and color fresher.
Cutting a very hot loaf: Give the crumb time to set on a rack. Cutting straight from the oven can compress the soft interior.
Serving Ideas
Thick slices are excellent beside tomato soup, pasta, roasted vegetables, or a salad. The loaf also makes flavorful toast. For garlic bread, toast leftover slices briefly and brush with a little extra warmed garlic herb butter. If you add Parmesan to the dough, serve it with a simple meal so its savory flavor can stand out.
You can cut the loaf into cubes for a bread basket or use cooled slices for sandwiches. The herbs in the dough are gentle enough for many savory fillings, while the shiny garlic butter makes the loaf appealing as a side on its own.
Storage, Freezing, and Reheating
Store: Let the loaf cool completely. Because its crust is brushed with fresh garlic herb butter, wrap it and refrigerate leftovers for up to 3 days. Bring slices briefly to room temperature or reheat before serving.
Freeze: Slice the cooled loaf, separate slices with parchment, and freeze tightly wrapped for up to 2 months. For the freshest herb finish, you can freeze the bread before brushing and make fresh garlic butter when reheating.
Reheat: Warm slices in a 325°F (165°C) oven for about 8 to 10 minutes, or toast them lightly. If the crust feels dry, brush with a small amount of warmed butter after reheating.
FAQ: Garlic Herb Bread in a Bag
Do I bake the bread in the plastic bag?
No. The food bag is for combining the ingredients, working the dough, and the first rise. Transfer the dough to a prepared loaf pan for the second rise and baking.
Can I use instant yeast instead of active dry?
Yes. Use 2¼ teaspoons instant yeast. Mix it with the flour rather than blooming it in the milk. The rest of the method is the same, though rise times may vary slightly.
Can I use bread flour?
Yes. Use 3¼ cups, spooned and leveled. Bread flour can give a slightly chewier, higher loaf, while all-purpose flour tends to be softer.
How do I know whether to add the extra flour?
After 5 to 7 minutes of mixing in the bag, the dough should hold together and feel soft and slightly tacky. If it is still almost pourable, add the optional flour one tablespoon at a time, up to 4 tablespoons. Avoid making the dough dry.
Can I make it ahead?
You can complete the first rise, shape the dough in the pan, then cover and refrigerate it overnight. Let it warm and become puffy before baking. The timing will depend on how cold the dough is. Brush on the fresh garlic herb butter after baking.
Conclusion: A Fragrant Loaf with Simple Cleanup
Soft & Fluffy Garlic Herb Bread in a Bag keeps mixing contained and finishes as a golden, tender loaf. Work the dough through a sturdy food bag, allow both rises to develop, bake until the center is done, and brush the warm crust with garlic, parsley, and chive butter. Slice it for a savory side or save the leftovers for fragrant toast.
Print
Soft & Fluffy Garlic Herb Bread in a Bag
- Prep Time: 25 minutes
- Cook Time: 45 minutes
- Total Time: About 3 hours 30 minutes, including rising and cooling
- Yield: 12 slices 1x
- Category: Sourdough
- Method: Baking
Description
One fluffy garlic and Italian herb loaf baked in a pan and brushed with warm garlic, parsley, and chive butter.
Ingredients
- 1 cup whole milk, warmed to 105–110°F
- 2¼ teaspoons active dry or instant yeast
- 3 tablespoons granulated sugar
- 1 large egg, room temperature
- 3 tablespoons unsalted butter, melted and cooled slightly
- 3¼ cups all-purpose or bread flour, spooned and leveled
- 1½ teaspoons fine salt
- 1 teaspoon garlic powder
- 1 teaspoon dried Italian seasoning, for the dough
- 2–4 tablespoons additional flour, only if needed
- 1 teaspoon softened butter or neutral oil, for the pan
- 1 tablespoon milk for brushing
- 3 tablespoons unsalted butter, for the garlic herb butter
- 2 garlic cloves, finely minced or grated
- 1 tablespoon finely chopped fresh parsley
- 2 teaspoons finely chopped fresh chives
- ½ teaspoon dried Italian seasoning, for the garlic herb butter
- ¼ teaspoon fine salt, for the garlic herb butter
- ¼ cup grated Parmesan, optional
- ½ teaspoon cracked black pepper, optional
- ¼ teaspoon crushed red pepper flakes, optional
- 1 tablespoon finely chopped fresh rosemary, optional
Instructions
Step 1 Use 1 cup whole milk, warmed to 105–110°F. For 2¼ teaspoons active dry or instant yeast, bloom the active dry type in the milk with 3 tablespoons granulated sugar for 5 to 10 minutes until foamy. If using instant yeast, stir the 3 tablespoons granulated sugar into the milk and add the yeast with the flour instead.
Step 2 Stand a sturdy gallon-size food bag inside a bowl. Add the warm milk mixture, 1 large egg, room temperature, and 3 tablespoons unsalted butter, melted and cooled slightly. Add 3¼ cups all-purpose or bread flour, spooned and leveled, 1½ teaspoons fine salt, 1 teaspoon garlic powder, and 1 teaspoon dried Italian seasoning for the dough. If desired add ¼ cup grated Parmesan, ½ teaspoon cracked black pepper, ¼ teaspoon crushed red pepper flakes, or 1 tablespoon finely chopped fresh rosemary.
Step 3 Close the bag securely with room for the dough to move. Squeeze and press through the bag for 5 to 7 minutes until no dry flour remains and the dough is cohesive. If still almost pourable, add 2–4 tablespoons additional flour, only if needed, one tablespoon at a time.
Step 4 Open the zipper slightly, support the bag in a bowl, cover loosely, and let the dough rise 60 to 90 minutes until roughly doubled.
Step 5 Coat a 9 × 5 inch loaf pan with 1 teaspoon softened butter or neutral oil and line with parchment if desired. Transfer the dough out of the bag, shape into a log, and place seam-side down in the pan. Cover and proof 40 to 60 minutes until puffy and crowned about 1 inch above the rim. Preheat oven to 350°F (175°C).
Step 6 Brush with 1 tablespoon milk for brushing. Score three shallow diagonal slashes if desired. Bake at 350°F (175°C) for 35 to 45 minutes until deeply golden and the center reaches 190–200°F (88–93°C).
Step 7 Melt 3 tablespoons unsalted butter for the garlic herb butter over low heat. Add 2 garlic cloves, finely minced or grated, and warm gently 1 minute without browning. Remove from heat and stir in 1 tablespoon finely chopped fresh parsley, 2 teaspoons finely chopped fresh chives, ½ teaspoon dried Italian seasoning for the garlic herb butter, and ¼ teaspoon fine salt for the garlic herb butter.
Step 8 Rest the loaf in its pan for 10 minutes, lift to a rack, and brush with the warm garlic herb butter. Cool at least another 30 minutes before slicing.
Notes
Stand the food bag in a bowl while filling and proofing. Keep the bag zipper slightly open during the first rise as the dough expands. Add the optional flour only after working the dough for several minutes. Warm garlic in melted butter briefly and brush over the baked loaf.