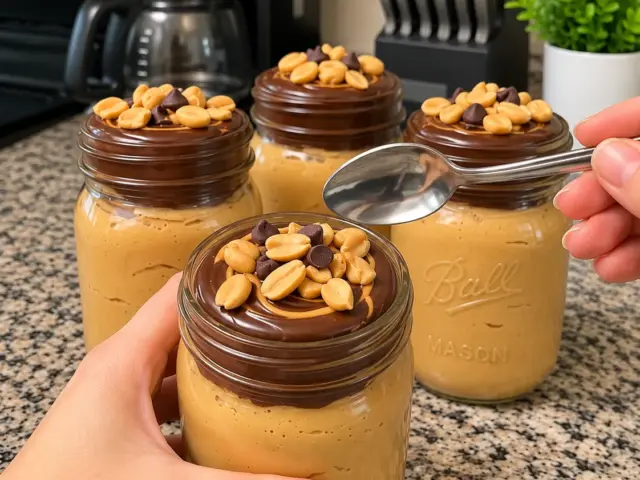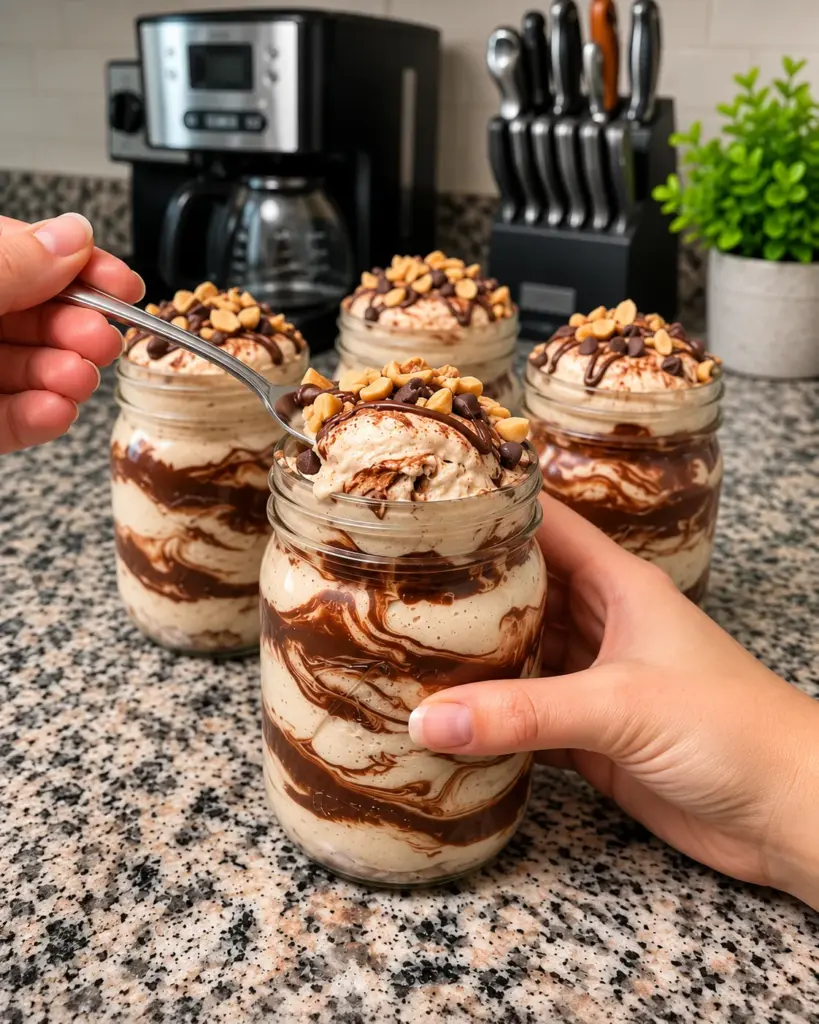
High-Protein Chocolate Peanut Butter Swirl Fluff Cups bring together a whipped peanut butter base, a deep cocoa ribbon, and a thin chocolate drizzle in individual jars. Cottage cheese and Greek yogurt make the base creamy, while softened cream cheese and a little pudding mix help the spoonfuls hold their shape. The dessert in the reference photograph has dramatic dark-and-light marbling, chopped peanuts on top, and a fluffy scoop that still looks soft rather than frozen or firm.
The recipe is assembled cold and needs no oven. Blend the cottage cheese until smooth, mix the peanut butter fluff, prepare the chocolate layer separately, then spoon the two mixtures into jars. A small amount of milk can loosen either mixture when needed. The drizzle goes on after layering, and a short chill gives the flavors time to settle. The result is a make-ahead dessert with a rich peanut butter taste and a clear chocolate contrast.
Why You’ll Love This Recipe
Individual jars make portioning and serving easy. The pale fluff and dark swirl stay distinct when added in alternating spoonfuls, so you get a chocolate-peanut butter combination in every bite. Most of the ingredients are used cold, and the recipe can be made with an electric mixer, food processor, or a whisk after the cottage cheese has been blended smooth.
The topping can be as simple or decorated as you like. Chopped roasted peanuts echo the peanut butter flavor, mini chips add a little crunch, and a pinch of flaky salt sharpens the chocolate. Because the base is already sweetened to taste, optional candy and cookie toppings can be added only to the jars that need them. The cups are especially convenient for preparing dessert earlier in the day.
Ingredients
For the High-Protein Peanut Butter Fluff
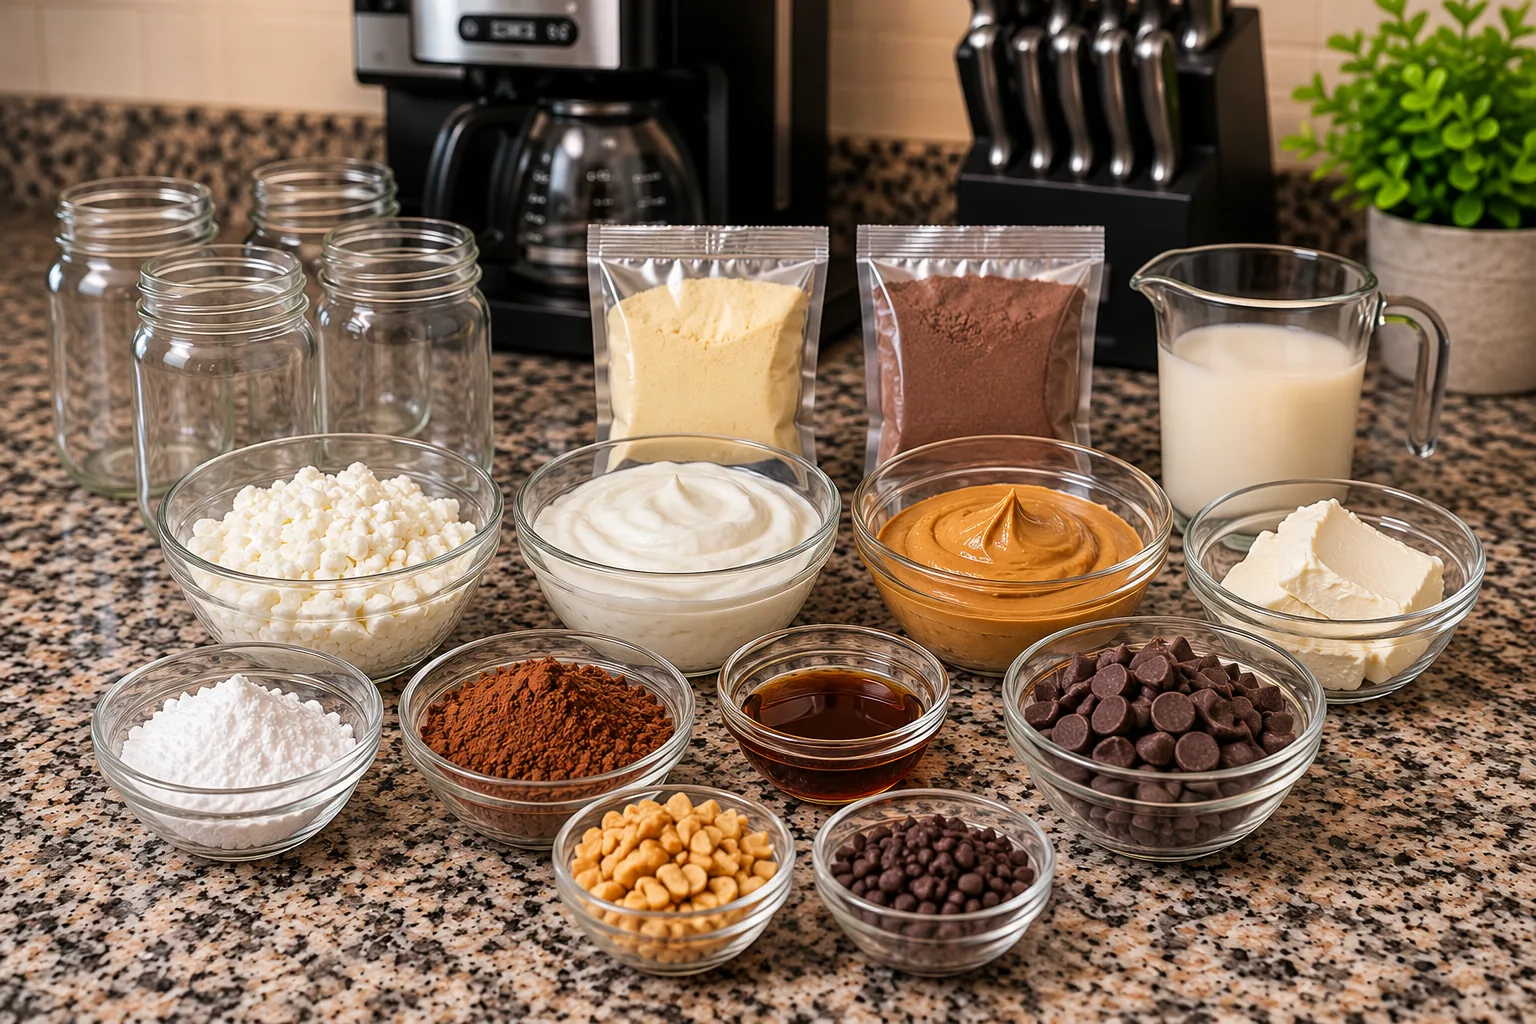
- 1 cup (225 g) low-fat cottage cheese — Blend until smooth so the curds disappear into the fluff. Drain off any large pool of whey before measuring to keep the mixture thick.
- 1 cup (240 g) plain nonfat Greek yogurt — Provides a tangy, creamy base. A thick, strained style helps the dessert hold its shape in the jars.
- 1/3 cup (85 g) creamy natural peanut butter — Stir the jar well before measuring so the oil and peanut solids are evenly combined. Smooth peanut butter makes the light layer easy to spoon.
- 1/4 cup (60 g) reduced-fat cream cheese, softened — Softening prevents little white lumps and gives the mixture a richer, mousse-like body.
- 2–3 tbsp powdered zero-calorie sweetener, or to taste — Powdered sweetener dissolves more smoothly than coarse granules. Start with the smaller amount and taste after mixing.
- 2 tbsp sugar-free vanilla or cheesecake-flavored instant pudding mix — This dry mix thickens the dairy base. Use instant pudding mix; cook-and-serve pudding does not set the same way here.
- 1 tsp pure vanilla extract — Rounds out the peanut butter flavor without needing another sweet ingredient.
- 2 tbsp powdered peanut butter, optional for extra peanut butter flavor — Boosts peanut flavor and absorbs a little moisture. It can make the fluff thicker, so adjust milk only afterward.
- 1–2 tbsp unsweetened almond milk or regular milk, only if needed — Add a teaspoon at a time only if the base is too stiff to blend or spoon. Too much will soften the layers.
- 1/4 tsp fine sea salt — Balances the sweetness and makes the peanut butter taste fuller.
- 1/4 cup (60 g) light whipped topping, optional for extra fluffiness — Fold it in gently at the end to keep its airiness. It is not needed for the base recipe to work.
For the Chocolate Swirl
- 1/2 cup (120 g) plain nonfat Greek yogurt — Forms the tangy base of the dark layer and keeps it lighter than a ganache.
- 2 tbsp (12–15 g) unsweetened cocoa powder — Sift if lumpy, then stir until no dry pockets remain.
- 2 tbsp (30 g) creamy natural peanut butter — Connects the chocolate layer to the peanut butter fluff and adds body.
- 1–2 tbsp powdered zero-calorie sweetener, or to taste — Cocoa is bitter; sweeten this layer separately so it tastes balanced against the pale fluff.
- 1 tbsp sugar-free chocolate instant pudding mix, optional for a thicker chocolate mousse texture — Use only if you want a firmer dark ribbon. It thickens as the cups chill.
- 2–3 tbsp unsweetened almond milk or regular milk, as needed — Loosen the chocolate mixture gradually until it can be swirled without running straight to the bottom.
- 1/2 tsp pure vanilla extract — Softens the edge of unsweetened cocoa.
For the Chocolate Drizzle
- 1/4 cup (40–45 g) dark chocolate chips or sugar-free chocolate chips — Use a kind you enjoy eating; the drizzle is noticeable even in a small amount.
- 1–2 tbsp (15–30 ml) unsweetened almond milk or regular milk — Warm with the chips carefully and add gradually for a fluid drizzle.
- 1 tsp coconut oil, optional for a smoother chocolate drizzle — A small amount can make the melted chocolate easier to pour and slightly glossier.
Optional Toppings
- Chopped roasted peanuts — Scatter on immediately before serving for crunch.
- Mini dark chocolate chips — Use a small pinch on each jar for extra chocolate texture.
- Sugar-free chocolate drizzle — Use as an alternative to the homemade drizzle if desired.
- Melted peanut butter drizzle — Thin only enough to pour, then make a few narrow lines over the tops.
- A light dusting of unsweetened cocoa powder — Sift lightly so the surface does not become dry or bitter.
- Crushed high-protein peanut butter cookies — Add just before serving to keep the pieces crisp.
- Sugar-free peanut butter cups, chopped — A decorative optional finish for a sweeter dessert.
- A small sprinkle of flaky sea salt — Especially useful when using a sweet chocolate topping.
- Extra light whipped topping — Spoon on when serving for a taller, softer finish.
Ingredient Notes and Substitutions
The thickness of cottage cheese and yogurt varies by brand. Drain separated whey, then blend the curds until smooth before adding the other peanut butter fluff ingredients. Start with less milk than listed and add only enough to let the blender move. A layer that is too thin will not hold the dark swirl in distinct ribbons.
Natural peanut butter often separates, so stir it thoroughly before measuring for both layers. Powdered sweeteners vary in strength; taste each mixture separately after it is fully combined. The dessert is called high-protein because it uses cottage cheese and Greek yogurt, but the actual protein amount depends on brands, serving size, and optional toppings. Avoid a numeric nutrition claim without calculating from the exact products used.
Instant pudding mixes are not interchangeable with cooked pudding. Some sugar-free mixes contain ingredients that may not suit every diet, so check the label if that matters to you. Milk can be almond or regular milk as listed. The chocolate drizzle may become thick if cold milk is added to overheated chips; warm gently and stir slowly instead of cooking it hard.
Instructions — Detailed Preparation
Step 1: Smooth the cottage cheese
Spoon off any obvious whey from 1 cup (225 g) low-fat cottage cheese. Blend it until the curds are mostly smooth. This small step gives the final fluff a creamy texture rather than visible curds. Set out four clean small jars or dessert cups and make room in the refrigerator.
Step 2: Whip the peanut butter layer
Add 1 cup (240 g) plain nonfat Greek yogurt, 1/3 cup (85 g) creamy natural peanut butter, 1/4 cup (60 g) softened reduced-fat cream cheese, 2 tbsp powdered zero-calorie sweetener, 2 tbsp sugar-free vanilla or cheesecake-flavored instant pudding mix, 1 tsp pure vanilla extract, and 1/4 tsp fine sea salt to the smooth cottage cheese. Blend or beat until thick and uniform. Taste, adding the remaining 1 tbsp sweetener if desired.
Step 3: Adjust the pale fluff
If using 2 tbsp powdered peanut butter for extra peanut butter flavor, blend it in now. Add 1–2 tbsp unsweetened almond milk or regular milk only if needed, a teaspoon at a time, until the mixture can be spooned but still holds soft peaks. If using 1/4 cup (60 g) light whipped topping, fold it in gently after blending so it stays airy.
Step 4: Mix the chocolate swirl
In a separate bowl combine 1/2 cup (120 g) plain nonfat Greek yogurt, 2 tbsp (12–15 g) unsweetened cocoa powder, 2 tbsp (30 g) creamy natural peanut butter, 1 tbsp powdered zero-calorie sweetener, and 1/2 tsp pure vanilla extract. Stir smooth. Taste and use the remaining 1 tbsp sweetener if needed. For a thicker mousse texture, mix in the optional 1 tbsp sugar-free chocolate instant pudding mix. Add 2–3 tbsp unsweetened almond milk or regular milk gradually until the dark mixture is spreadable, not runny.
Step 5: Layer and marble the cups
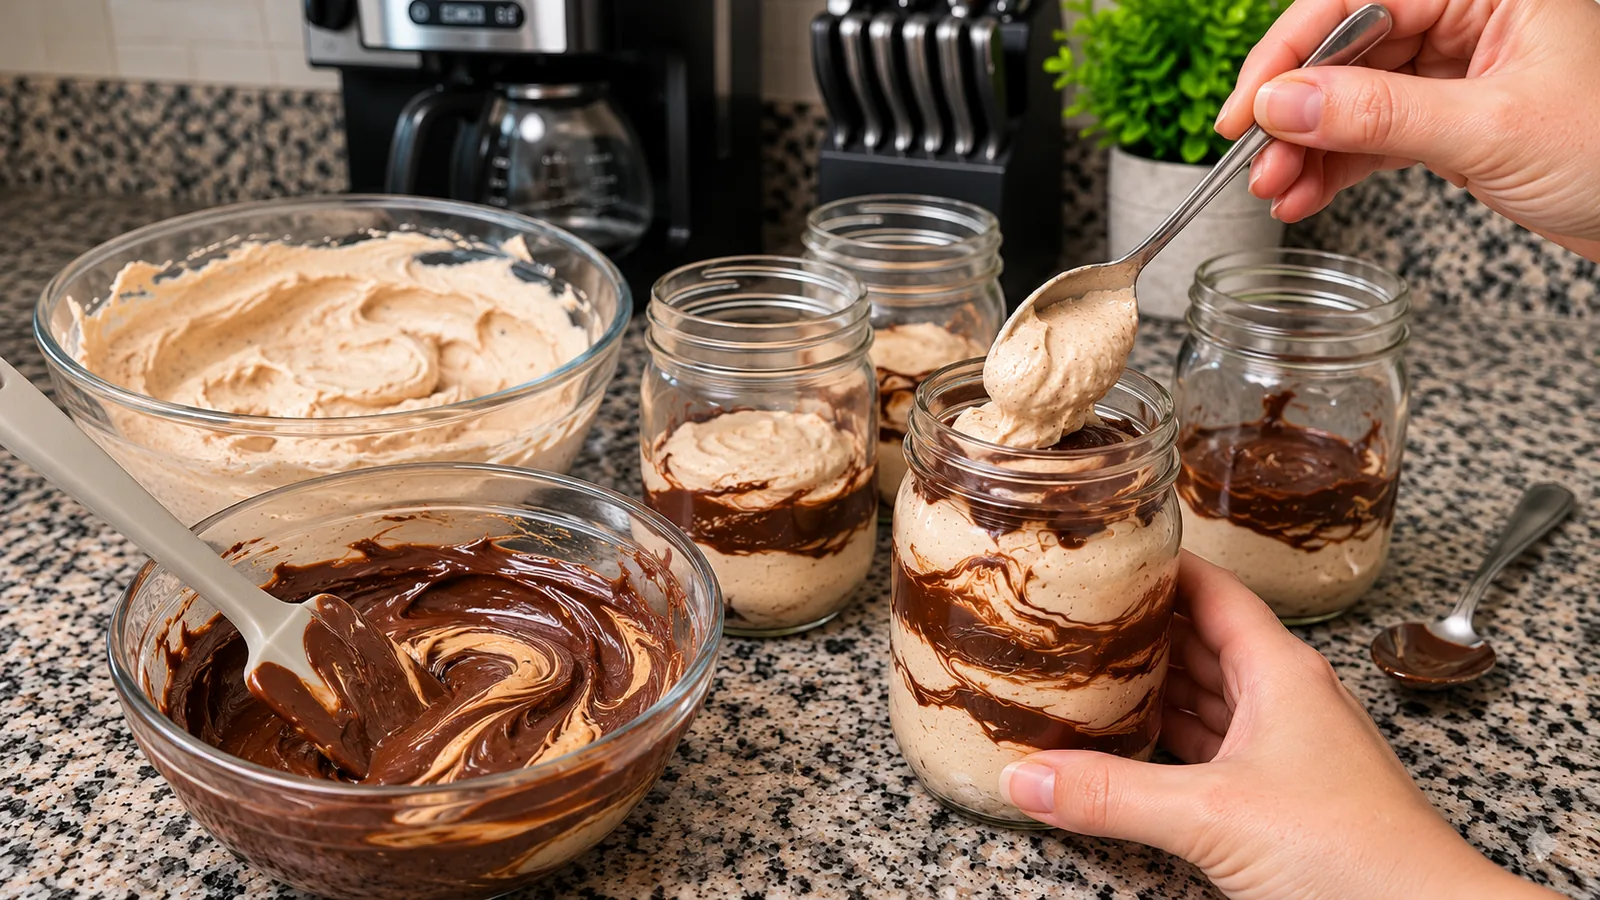
Spoon a layer of pale peanut butter fluff into each of four jars. Add a smaller spoonful of chocolate swirl, then repeat until both mixtures are used. Run a skewer once or twice down the inside edge of each jar to create ribbons without blending the colors completely. Cover and refrigerate for at least 1 hour so the pudding mixes hydrate and the layers settle.
Step 6: Make the chocolate drizzle
Put 1/4 cup (40–45 g) dark chocolate chips or sugar-free chocolate chips with 1 tbsp (15 ml) unsweetened almond milk or regular milk in a microwave-safe bowl. Warm in 10- to 15-second bursts, stirring each time, or use very low heat over a water bath. Add up to the remaining 1 tbsp milk only if needed. Stir in the optional 1 tsp coconut oil for a smoother drizzle. Let it cool until warm, not hot.
Step 7: Finish and serve
Drizzle the chocolate over chilled cups. Choose any optional toppings: chopped roasted peanuts, mini dark chocolate chips, sugar-free chocolate drizzle, melted peanut butter drizzle, a light dusting of unsweetened cocoa powder, crushed high-protein peanut butter cookies, chopped sugar-free peanut butter cups, a small sprinkle of flaky sea salt, or extra light whipped topping. Add crunchy items just before serving. Serve cold with a spoon.
Expert Tips
- Blend cottage cheese first; the smoothness of this base determines the texture of the whole dessert.
- Keep the pale and dark mixtures similarly thick so a spoonful of chocolate does not sink to the bottom.
- Taste each layer before assembling. Cocoa needs its own sweetness adjustment.
- Chill the cups before adding a warm drizzle, and let melted chocolate cool slightly so it does not collapse the fluff.
- Use a skewer sparingly. One or two passes create defined ribbons; too many turns make a uniform brown mixture.
- Add nuts and cookie crumbs when serving, as they soften in the refrigerator.
Common Mistakes
The most common texture problem is adding all the milk at once. The yogurt and cottage cheese already contain moisture, and different brands need different adjustments. Add milk by teaspoons until the mixture is spoonable. If it becomes loose, chill it and allow the pudding mix time to thicken before adding more ingredients.
A second mistake is leaving natural peanut butter unstirred. The oily top and dense bottom give different results in the two layers. Stir the jar smooth before measuring each portion. Also soften the reduced-fat cream cheese; cold pieces can remain visible even after blending.
Overheating chocolate chips can produce a grainy or seized drizzle. Use brief warming intervals and stir thoroughly. Finally, avoid swirling the two mixtures repeatedly. The reference shows bold, separate chocolate ribbons against a pale fluff, not an evenly mixed cocoa dessert.
Serving Ideas
Serve the jars cold after at least an hour of chilling. They look attractive with a few chopped roasted peanuts, a narrow chocolate drizzle, and just a pinch of mini chips, like the supplied photo. For a less sweet finish, use cocoa dust and flaky salt instead of candy toppings. A small spoon lets guests take both layers in each bite.
These cups make an easy individual dessert for a dinner gathering or a prepared afternoon treat. Keep extra toppings separate so everyone can finish their own jar. The recipe makes four generous cups; use smaller containers if you want lighter portions, but do not assume the nutrition per cup stays the same when changing the yield.
Storage and Freezing
Cover the assembled cups and refrigerate for up to 3 days. Add nuts, cookie pieces, and the final whipped topping shortly before serving. The layers may settle slightly in the refrigerator, but a chilled cup should remain spoonable. If a little moisture appears at the edge, stir only that spot rather than mixing the whole jar.
Freezing is possible for a more frozen-dessert texture, but dairy-based fluff can become grainy or separate when fully thawed. For the creamy texture shown in the photo, refrigeration is the better choice. If you do freeze a portion, use a freezer-safe container, leave headspace, freeze for up to 1 month, and enjoy it partially thawed rather than expecting the same mousse texture after defrosting.
FAQ
Can I taste the cottage cheese?
Blending smooths its texture, and peanut butter, vanilla, cocoa, and yogurt supply the main flavors. A mild cottage cheese works best if you prefer a less tangy result.
Can I leave out the pudding mix?
You can, but the fluff will be softer and the jars may not hold distinct swirls as well. Chill thoroughly and keep added milk minimal.
How do I make the chocolate layer thicker?
Use the optional sugar-free chocolate instant pudding mix and give it time to hydrate in the refrigerator. Avoid adding extra cocoa alone, which can make it bitter.
Can I make these ahead for a party?
Yes. Assemble and chill up to 3 days ahead, then add crunchy toppings and final drizzle shortly before serving for the best appearance.
Are the cups sugar-free?
They can be made with sugar-free sweetener, pudding mix, and chips, but read every product label. Natural dairy and peanut butter also contain naturally occurring sugars.
Conclusion
High-Protein Chocolate Peanut Butter Swirl Fluff Cups combine a thick pale peanut butter base with a separately sweetened cocoa ribbon. Blend the cottage cheese smooth, adjust liquids gradually, layer the jars without overmixing, and chill before drizzling. The recipe rewards careful texture more than complicated technique, and the optional toppings let each cup be finished to taste.
Print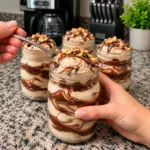
High-Protein Chocolate Peanut Butter Swirl Fluff Cups
- Prep Time: 25 minutes
- Cook Time: 0 minutes
- Total Time: 1 hour 25 minutes
- Yield: 4 cups 1x
- Category: Desserts
- Method: Baking
Description
Creamy peanut butter cottage cheese fluff layered with a chocolate yogurt swirl and a light chocolate drizzle in individual cups.
Ingredients
- 1 cup (225 g) low-fat cottage cheese
- 1 cup (240 g) plain nonfat Greek yogurt
- 1/3 cup (85 g) creamy natural peanut butter
- 1/4 cup (60 g) reduced-fat cream cheese, softened
- 2–3 tbsp powdered zero-calorie sweetener, or to taste
- 2 tbsp sugar-free vanilla or cheesecake-flavored instant pudding mix
- 1 tsp pure vanilla extract
- 2 tbsp powdered peanut butter, optional for extra peanut butter flavor
- 1–2 tbsp unsweetened almond milk or regular milk, only if needed
- 1/4 tsp fine sea salt
- 1/4 cup (60 g) light whipped topping, optional for extra fluffiness
- 1/2 cup (120 g) plain nonfat Greek yogurt
- 2 tbsp (12–15 g) unsweetened cocoa powder
- 2 tbsp (30 g) creamy natural peanut butter
- 1–2 tbsp powdered zero-calorie sweetener, or to taste
- 1 tbsp sugar-free chocolate instant pudding mix, optional for a thicker chocolate mousse texture
- 2–3 tbsp unsweetened almond milk or regular milk, as needed
- 1/2 tsp pure vanilla extract
- 1/4 cup (40–45 g) dark chocolate chips or sugar-free chocolate chips
- 1–2 tbsp (15–30 ml) unsweetened almond milk or regular milk
- 1 tsp coconut oil, optional for a smoother chocolate drizzle
- Chopped roasted peanuts
- Mini dark chocolate chips
- Sugar-free chocolate drizzle
- Melted peanut butter drizzle
- A light dusting of unsweetened cocoa powder
- Crushed high-protein peanut butter cookies
- Sugar-free peanut butter cups, chopped
- A small sprinkle of flaky sea salt
- Extra light whipped topping
Instructions
Step 1 Spoon off any obvious whey from 1 cup (225 g) low-fat cottage cheese. Blend it until the curds are mostly smooth. This small step gives the final fluff a creamy texture rather than visible curds. Set out four clean small jars or dessert cups and make room in the refrigerator.
Step 2 Add 1 cup (240 g) plain nonfat Greek yogurt, 1/3 cup (85 g) creamy natural peanut butter, 1/4 cup (60 g) softened reduced-fat cream cheese, 2 tbsp powdered zero-calorie sweetener, 2 tbsp sugar-free vanilla or cheesecake-flavored instant pudding mix, 1 tsp pure vanilla extract, and 1/4 tsp fine sea salt to the smooth cottage cheese. Blend or beat until thick and uniform. Taste, adding the remaining 1 tbsp sweetener if desired.
Step 3 If using 2 tbsp powdered peanut butter for extra peanut butter flavor, blend it in now. Add 1–2 tbsp unsweetened almond milk or regular milk only if needed, a teaspoon at a time, until the mixture can be spooned but still holds soft peaks. If using 1/4 cup (60 g) light whipped topping, fold it in gently after blending so it stays airy.
Step 4 In a separate bowl combine 1/2 cup (120 g) plain nonfat Greek yogurt, 2 tbsp (12–15 g) unsweetened cocoa powder, 2 tbsp (30 g) creamy natural peanut butter, 1 tbsp powdered zero-calorie sweetener, and 1/2 tsp pure vanilla extract. Stir smooth. Taste and use the remaining 1 tbsp sweetener if needed. For a thicker mousse texture, mix in the optional 1 tbsp sugar-free chocolate instant pudding mix. Add 2–3 tbsp unsweetened almond milk or regular milk gradually until the dark mixture is spreadable, not runny.
Step 5 Spoon a layer of pale peanut butter fluff into each of four jars. Add a smaller spoonful of chocolate swirl, then repeat until both mixtures are used. Run a skewer once or twice down the inside edge of each jar to create ribbons without blending the colors completely. Cover and refrigerate for at least 1 hour so the pudding mixes hydrate and the layers settle.
Step 6 Put 1/4 cup (40–45 g) dark chocolate chips or sugar-free chocolate chips with 1 tbsp (15 ml) unsweetened almond milk or regular milk in a microwave-safe bowl. Warm in 10- to 15-second bursts, stirring each time, or use very low heat over a water bath. Add up to the remaining 1 tbsp milk only if needed. Stir in the optional 1 tsp coconut oil for a smoother drizzle. Let it cool until warm, not hot.
Step 7 Drizzle the chocolate over chilled cups. Choose any optional toppings: chopped roasted peanuts, mini dark chocolate chips, sugar-free chocolate drizzle, melted peanut butter drizzle, a light dusting of unsweetened cocoa powder, crushed high-protein peanut butter cookies, chopped sugar-free peanut butter cups, a small sprinkle of flaky sea salt, or extra light whipped topping. Add crunchy items just before serving. Serve cold with a spoon.
Notes
Use exactly three distinct WebP images; reuse the featured media ID for the Tasty card. Cover the assembled cups and refrigerate for up to 3 days. Add nuts, cookie pieces, and the final whipped topping shortly before serving. The layers may settle slightly in the refrigerator, but a chilled cup should remain spoonable. If a little moisture appears at the edge, stir only that spot rather than mixing the whole jar. Freezing is possible for a more frozen-dessert texture, but dairy-based fluff can become grainy or separate when fully thawed. For the creamy texture shown in the photo, refrigeration is the better choice. If you do freeze a portion, use a freezer-safe container, leave headspace, freeze for up to 1 month, and enjoy it partially thawed rather than expecting the same mousse texture after defrosting.