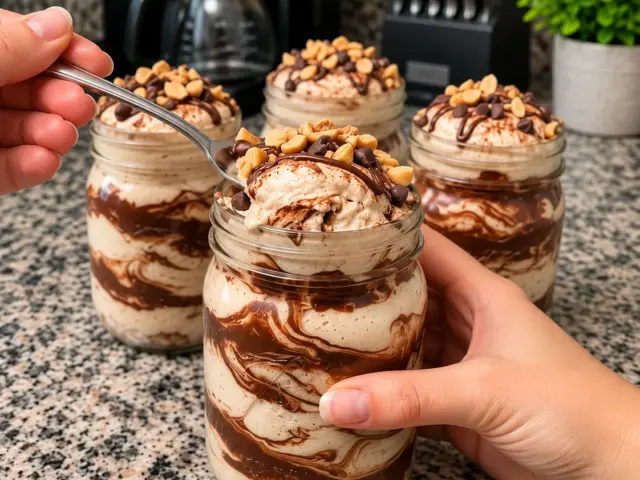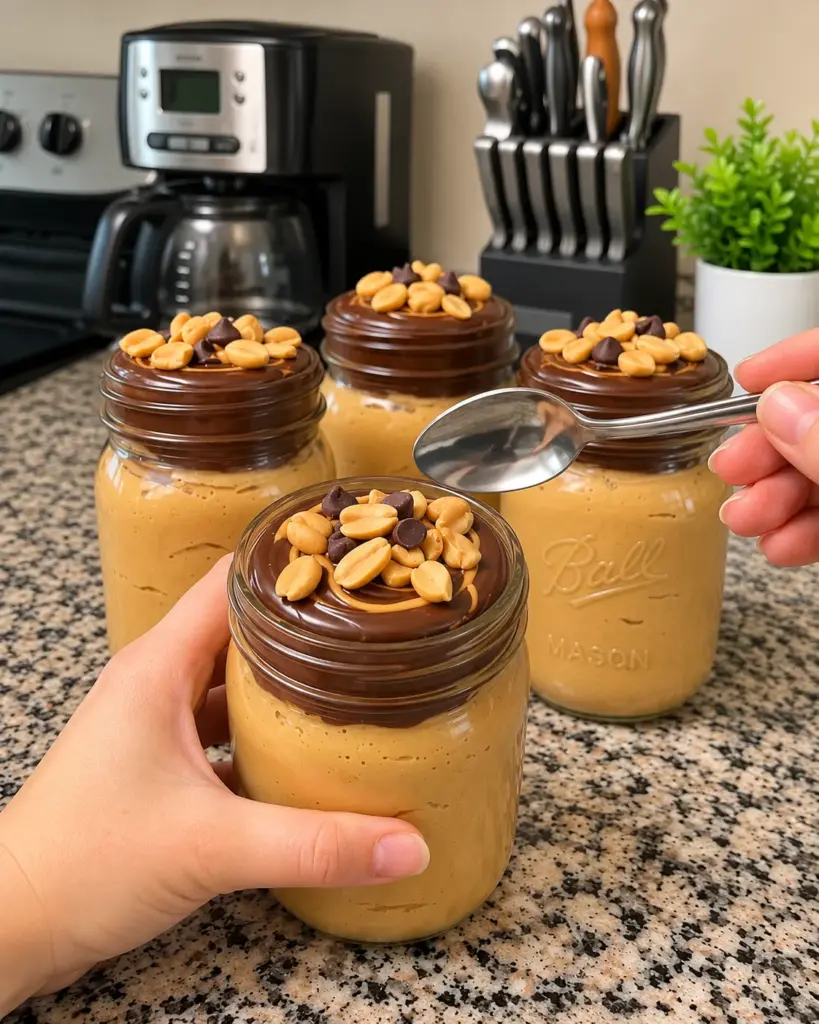
High-Protein Reese’s-Inspired Peanut Butter Cheesecake Cups turn a familiar chocolate-and-peanut-butter pairing into a chilled, spoonable dessert. The base blends low-fat cottage cheese, thick Greek yogurt, peanut butter, cream cheese, and vanilla protein powder until smooth. Each small glass jar receives a distinct dark chocolate layer, then a scattering of peanuts or chocolate chips if you want a little crunch. The finished cups echo the reference photo: pale tan filling under glossy chocolate, served in individual jars rather than as a baked cheesecake.
These cups are easy to assemble without an oven, but the order matters. Smoothing the cottage cheese first removes curds, adding extra milk only when the blender needs help protects the thick texture, and letting the chocolate cool slightly keeps the layers separate. A brief refrigerator rest helps both the filling and topping firm up. This guide explains every supplied ingredient, how to adjust the sweetness, how to portion the jars, and how to keep the topping pleasantly biteable rather than overly hard.
The phrase high-protein describes the protein-rich ingredients, not a fixed amount per serving. Actual protein and sweetness depend on the brands of cottage cheese, Greek yogurt, protein powder, peanut butter, and chocolate you choose. Use the product labels if you need precise nutrition information. The recipe is dessert first: rich, creamy, chocolatey, and made for a chilled spoonful after dinner or as a make-ahead treat.
Why You’ll Love This Recipe
No baking is required. A processor or blender does most of the work, and four small jars make the dessert simple to portion and serve. Individual cups also make the chocolate layer look striking, especially when the dark cap contrasts with the pale peanut butter cheesecake fluff. They can be assembled ahead, so serving does not involve cutting a cake or plating from a large dish.
The ingredients have clear roles. Cottage cheese and yogurt make a tangy, creamy base; peanut butter supplies the flavor; softened cream cheese gives the familiar cheesecake note; and vanilla protein powder adds body. Powdered sweetener dissolves smoothly, while the optional instant pudding mix can help the filling hold its shape. You can choose whether to fold in light whipped topping for an airier spoonful.
The chocolate topping is intentionally separate from the filling. Sugar-free dark chocolate chips melted with a little coconut oil spread into a glossy layer that firms in the refrigerator. Roasted peanuts, mini chips, or a tiny pinch of flaky salt can be added just before serving. The contrast between soft fluff, chocolate, and crunch is what makes the cups feel like a full dessert despite the short preparation time.
Ingredients
For the Peanut Butter Cheesecake Fluff
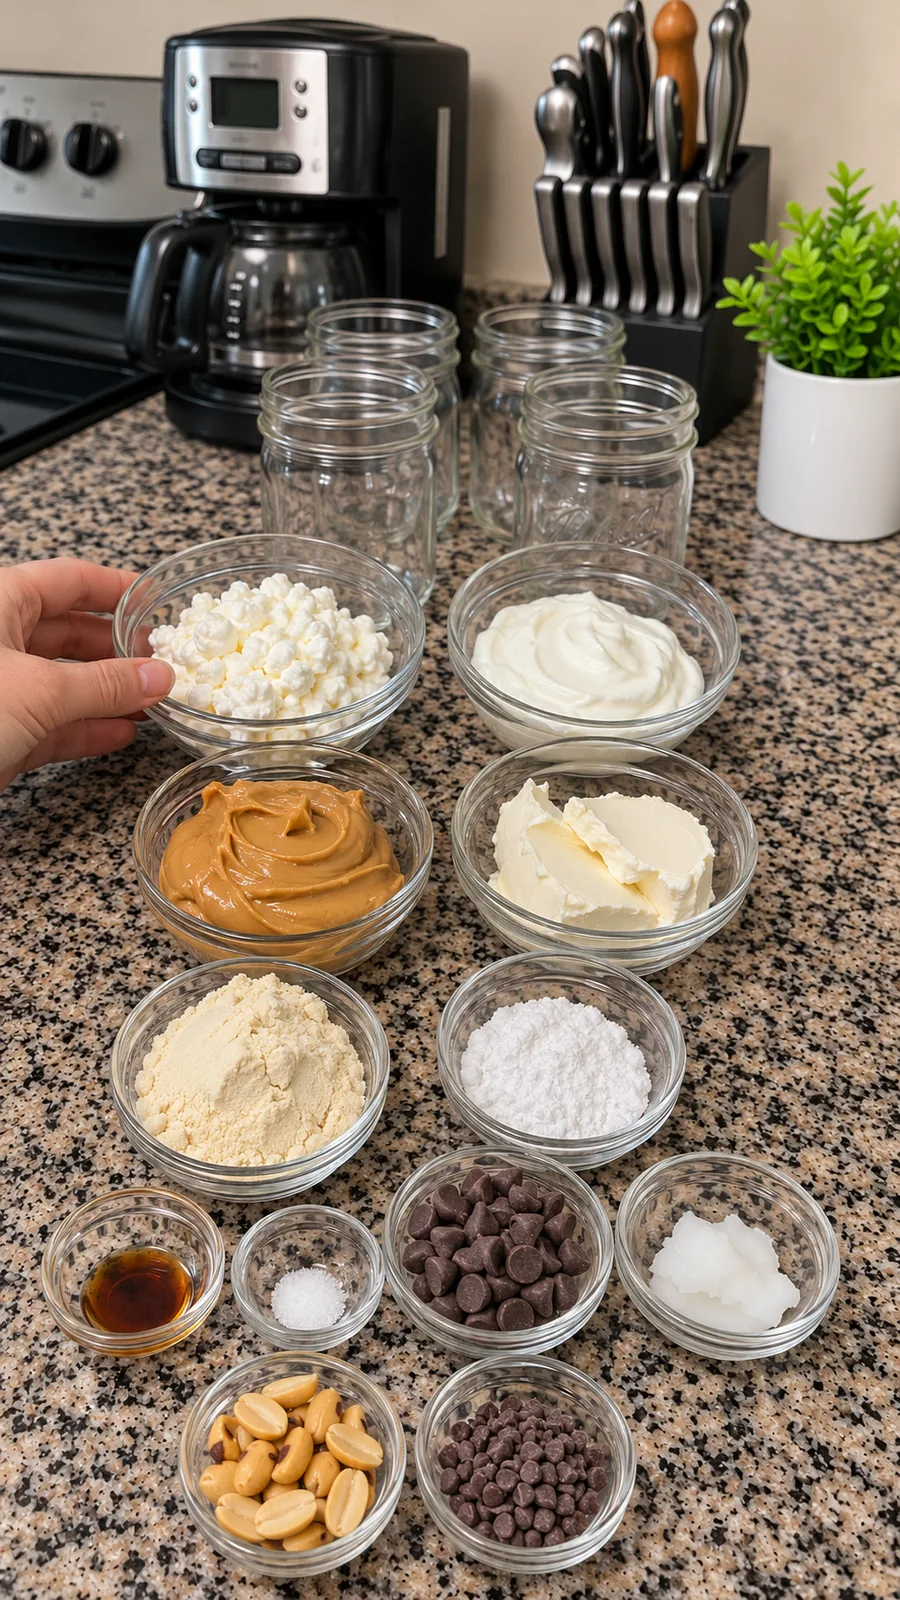
- 1 cup (225 g) low-fat cottage cheese — Blend this first until no visible curds remain; it provides a creamy base and mild tang.
- 1 cup (240 g) plain nonfat Greek yogurt — Choose a thick plain yogurt. A thin, watery yogurt can make the cups loose.
- 1/3 cup (85 g) creamy natural peanut butter — Stir the jar before measuring so separated oil and solids are recombined.
- 1/4 cup (60 g) reduced-fat cream cheese, softened — Let it soften enough to blend without leaving little white flecks.
- 1/4 cup (30 g) vanilla protein powder — Use a powder whose flavor you like; different brands absorb liquid differently.
- 2 to 3 tablespoons powdered zero-calorie sweetener, or to taste — Start with 2 tablespoons, blend, and taste before adding the third.
- 2 tablespoons sugar-free cheesecake or vanilla instant pudding mix, optional — Choose instant mix, not cook-and-serve; it is an optional thickener.
- 1 teaspoon pure vanilla extract — Rounds out the tang of the dairy and reinforces the cheesecake flavor.
- 1/4 teaspoon fine sea salt — A small amount sharpens the peanut butter and chocolate flavors.
- 1 to 2 tablespoons unsweetened almond milk, only if needed — Add gradually only when the blender cannot turn the mixture smoothly.
- 1/2 cup (30 g) light whipped topping, optional — Fold in at the end rather than blending to keep the fluff airy.
For the Chocolate Topping
- 1/2 cup (85 g) sugar-free dark chocolate chips — Melt gently; check the package if you need to avoid a particular sweetener.
- 2 teaspoons coconut oil — Melt with the chips so the topping spreads smoothly across four cups.
Optional Toppings
- Chopped roasted peanuts — Add just before serving for crunch.
- Mini sugar-free chocolate chips — Use a light sprinkle so the chocolate layer remains the star.
- Chopped sugar-free peanut butter cups — Choose these if you want a closer candy-inspired finish.
- Extra melted chocolate drizzle — Drizzle over the set topping rather than mixing it into the fluff.
- Creamy peanut butter drizzle — Warm briefly if needed so it falls in thin ribbons.
- Flaky sea salt — A tiny pinch balances sweet and rich flavors.
- Crushed peanut butter cookies — Add immediately before serving so the crumbs stay crisp.
Ingredient Notes and Substitutions
Use smooth, thoroughly stirred natural peanut butter. Dry or separated peanut butter can leave greasy streaks or grainy spots in the cheesecake fluff.
Low-fat cottage cheese is the specified base, but brands vary in moisture and curd size. Blend it on its own first and scrape the processor bowl to create a smooth foundation.
Plain nonfat Greek yogurt should be thick. If liquid has separated in the tub, stir or pour off the whey before measuring. A runnier yogurt may need the optional instant pudding mix to set well.
Vanilla protein powders vary widely in sweetness and thickening power. Taste after adding 2 tablespoons of powdered sweetener; add the third only if needed. Do not add all the almond milk automatically.
The sugar-free cheesecake or vanilla instant pudding mix is optional and changes the texture. Without it, the cups remain creamy but may be softer. Use instant pudding mix as listed; cooked pudding mix will not behave the same way.
The recipe calls for sugar-free dark chocolate chips, yet optional cookies or candy pieces may introduce sugar. Check each package if that distinction matters to you. Reese’s-inspired describes the chocolate-peanut-butter flavor; no branded candy is required.
Instructions — Detailed Preparation
Step 1: Prepare the jars and chilled ingredients
Set out four clean, dry small dessert jars. Let 1/4 cup (60 g) reduced-fat cream cheese soften until easily pressed with a spoon. Stir 1/3 cup (85 g) creamy natural peanut butter thoroughly if its oil has separated. Keep 1 cup (240 g) plain nonfat Greek yogurt cool, but pour off any pooled liquid before measuring. Have all the optional garnishes ready so they can go on after the chocolate sets.
Step 2: Blend the cottage cheese smooth
Place 1 cup (225 g) low-fat cottage cheese in a food processor or high-speed blender. Process for about 45 to 90 seconds, stopping to scrape the sides, until the curds disappear and the mixture looks creamy. This first blend is important: later ingredients make the mixture thicker and can hide unblended curds.
Step 3: Build the peanut butter cheesecake fluff
Add 1 cup (240 g) plain nonfat Greek yogurt, 1/3 cup (85 g) creamy natural peanut butter, the softened 1/4 cup (60 g) reduced-fat cream cheese, 1/4 cup (30 g) vanilla protein powder, 2 tablespoons powdered zero-calorie sweetener, 1 teaspoon pure vanilla extract, and 1/4 teaspoon fine sea salt. If using the optional 2 tablespoons sugar-free cheesecake or vanilla instant pudding mix, add it now. Blend until evenly tan and smooth, pausing to scrape down the sides.
Step 4: Adjust sweetness and thickness
Taste a small spoonful. Add up to 1 more tablespoon powdered zero-calorie sweetener if desired, then blend briefly. The mixture should mound softly on a spoon. Only if the blender stalls, add 1 tablespoon unsweetened almond milk, blend, and consider the second tablespoon only if still necessary. Do not thin the fluff until it pours like a drink; it needs to support the chocolate topping.
Step 5: Fold in optional whipped topping and portion
For a lighter, mousse-like finish, transfer the filling to a bowl and gently fold in the optional 1/2 cup (30 g) light whipped topping. Do not run the blender again after folding or the added air will collapse. Divide the filling evenly among four jars and smooth each surface with the back of a spoon. Leave a little room at the top for chocolate and garnishes. Refrigerate the jars for about 20 to 30 minutes while preparing the topping.
Step 6: Melt the chocolate topping
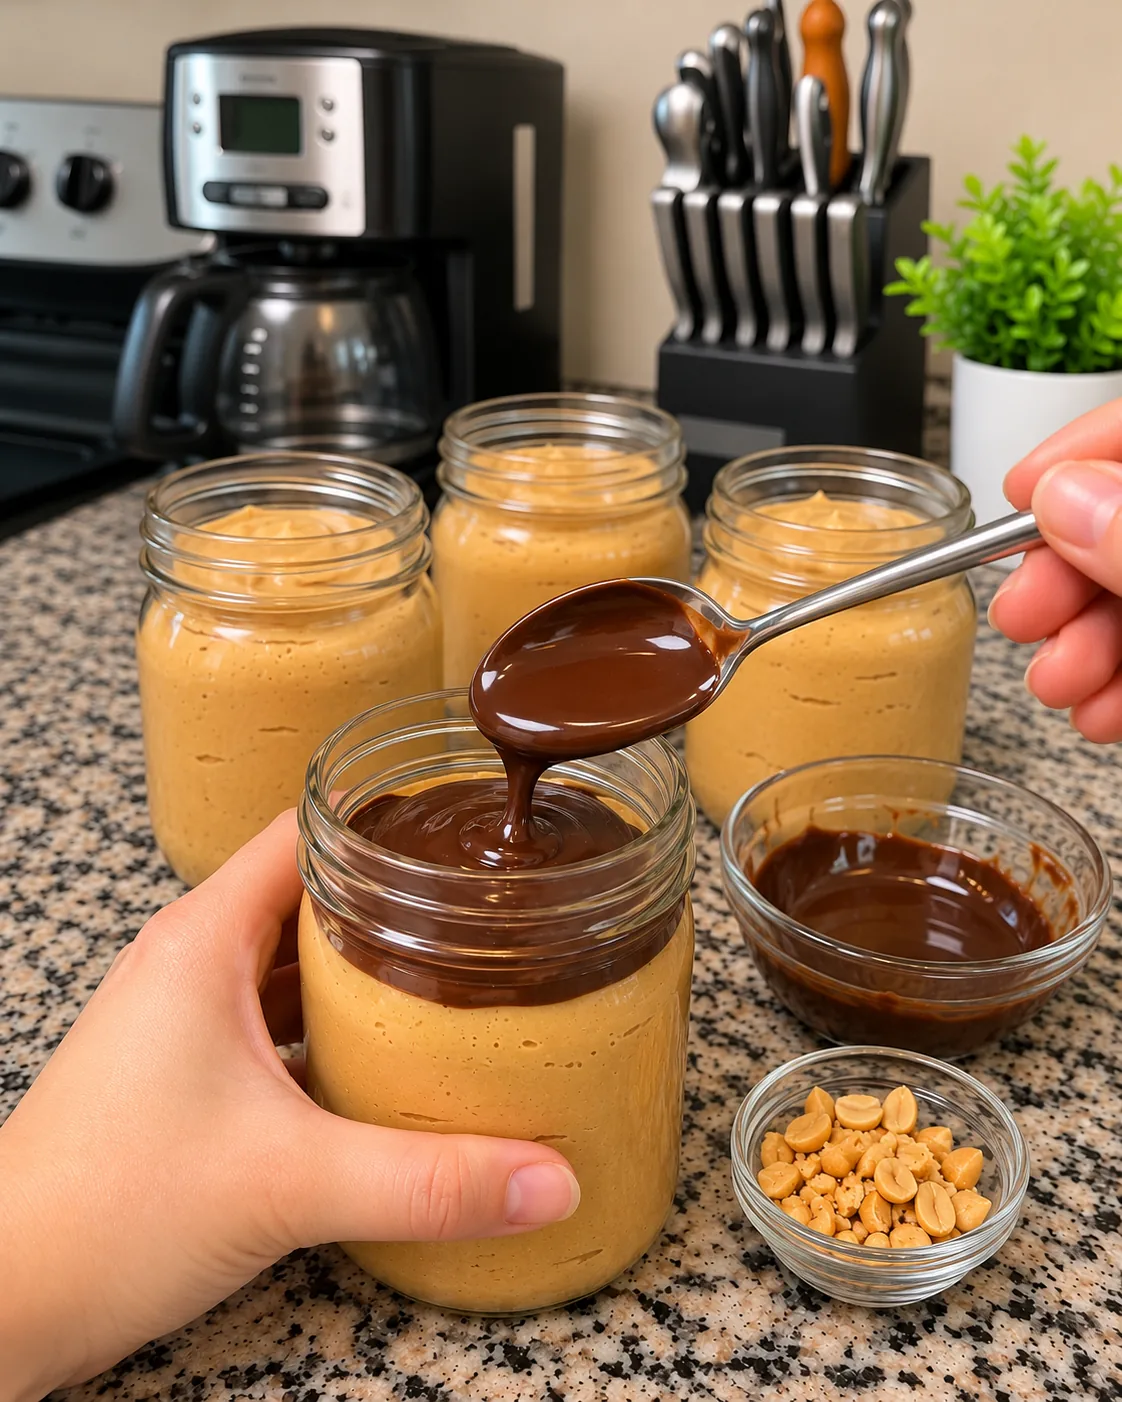
Combine 1/2 cup (85 g) sugar-free dark chocolate chips with 2 teaspoons coconut oil in a dry microwave-safe bowl. Microwave in 15-second bursts, stirring thoroughly between each, until just melted and glossy. Alternatively, stir the bowl over gently simmering water, keeping water out of the chocolate. Let the topping cool for a few minutes until warm but not hot; hot chocolate can sink into the chilled fluff.
Step 7: Cap each cup and refrigerate
Spoon the chocolate mixture evenly over the four cold jars, spreading it gently to the glass edge with the back of a teaspoon. Keep the chocolate as a separate top layer rather than swirling it through the pale tan filling. Refrigerate the covered cups for at least 30 to 60 minutes, until the chocolate is set and the cheesecake fluff is nicely chilled. The total chill can be extended for make-ahead serving.
Step 8: Finish and serve
Just before serving, add any chosen optional toppings: chopped roasted peanuts, mini sugar-free chocolate chips, chopped sugar-free peanut butter cups, extra melted chocolate drizzle, creamy peanut butter drizzle, a tiny pinch of flaky sea salt, or crushed peanut butter cookies. If the chocolate cap is firm, let the jars stand at room temperature for 5 to 10 minutes so a spoon can break through comfortably. Serve cold with a small spoon.
Expert Tips
- Blend cottage cheese alone before adding powder or peanut butter. A smooth base is the easiest way to avoid a lumpy cheesecake texture.
- Scrape down the processor several times. Peanut butter and cream cheese can cling to the sides, leaving uneven flavor if not reincorporated.
- Start with the smaller amount of powdered sweetener. Protein powder, pudding mix, and chocolate chips contribute different levels of sweetness by brand.
- Chill the portioned filling before adding chocolate. A cool, level surface helps the glossy layer stay distinct.
- Melt chocolate gently and stop heating while a few chips remain; stirring will finish melting them without scorching.
- Use dry bowls and utensils when melting chocolate. Even a little water can cause the chips to seize into a thick paste.
- Fold whipped topping gently only after blending. It is an optional texture change, not a replacement for the cottage cheese or yogurt.
- Add crunchy garnishes at serving time. Peanuts and cookies soften when stored against moist filling for hours.
Common Mistakes
Adding almond milk immediately is a common texture mistake. The specified 1 to 2 tablespoons are only for a blender that needs help moving. Cottage cheese, Greek yogurt, and natural peanut butter already contain moisture. Too much milk makes the filling runny and can allow the chocolate layer to sink.
Melted chocolate that is still hot may loosen the surface of the fluff. Let it cool until warm and fluid, then spoon it carefully over chilled jars. Heating chocolate for a long uninterrupted interval can make it grainy or scorched, especially when using sugar-free chips.
A few visible cottage-cheese curds make the cups feel more like a spread than cheesecake. Puree the cottage cheese thoroughly before adding the thick ingredients. Likewise, cold cream cheese can remain in little white flecks, so soften it first.
Mixing optional toppings into the chocolate before chilling can lead to soggy cookies and uneven coverage. Set the smooth layer first, then decorate just before serving. If the topping is too firm straight from the refrigerator, a few minutes on the counter improves the spoonful without warming the dairy excessively.
Serving Ideas
Serve the chilled jars directly with small spoons. For a look close to the reference photo, pile a few chopped roasted peanuts and mini sugar-free chocolate chips at the center of the dark chocolate cap. A modest creamy peanut butter drizzle can add visual contrast, while a pinch of flaky sea salt highlights the cocoa flavor.
For a dessert tray, arrange the jars on a board and let guests choose their own toppings. Chopped sugar-free peanut butter cups give a candy-inspired finish; crushed peanut butter cookies add a crisp crumb; extra melted chocolate drizzle makes the presentation more dramatic. Keep additions in small bowls so diners can tailor each cup and anyone avoiding a specific ingredient can skip it.
The cups are rich, so a small jar is usually enough. Serve with fresh berries on the side if you want a bright contrast, while keeping the core recipe and the photographed dessert unchanged. This is also a convenient make-ahead option for a gathering because the jars are already portioned and need only a final garnish.
Storage and Freezing
Cover the jars and refrigerate for up to 3 days. Because the filling contains cottage cheese, Greek yogurt, and cream cheese, keep it chilled except during serving. Store crunchy peanuts, cookies, and chopped candy pieces separately, then add them to the tops at the last moment. If condensation appears on the chocolate, blot the jar rim rather than stirring the layers together.
Freezing is possible but changes the texture: dairy filling can become grainy or separate when thawed, and the chocolate cap can crack. For the best creamy cheesecake consistency, make the cups fresh and refrigerate them. If you do freeze a spare cup, seal it tightly for up to 1 month, thaw overnight in the refrigerator, and stir the filling only if needed after breaking the chocolate layer. Do not refreeze a thawed cup.
FAQ
Do these peanut butter cheesecake cups need baking?
No. Blend the filling, divide it among jars, add melted chocolate, and refrigerate until set. There is no oven step.
Can I make the cups without instant pudding mix?
Yes. The 2 tablespoons sugar-free cheesecake or vanilla instant pudding mix are optional. Without it, the fluff may be a little softer, so use thick yogurt and avoid unnecessary almond milk.
Why does my filling taste too sweet?
Sweetness varies by protein powder, chocolate, and pudding mix. Begin with 2 tablespoons powdered zero-calorie sweetener, taste the blended fluff, and only then decide whether to use the third tablespoon.
Can I use chunky peanut butter?
The supplied recipe calls for creamy natural peanut butter. Chunky peanut butter would change the smooth cheesecake texture; use creamy peanut butter and add chopped roasted peanuts on top for crunch instead.
When should I add light whipped topping?
Fold the optional 1/2 cup light whipped topping into the blended filling immediately before portioning. Do not blend it into the processor if you want an airy texture.
How do I keep the chocolate layer separate?
Chill the filled jars briefly, allow the melted sugar-free chocolate and coconut oil to cool until warm, and spread it gently over the surface. Do not swirl it into the fluff.
Can I prepare these a day ahead?
Yes. Prepare and cover the finished jars, then refrigerate overnight. Add peanuts, cookies, candy pieces, or extra drizzles just before serving for the best texture.
Are these cups guaranteed sugar-free or a set amount of protein?
No fixed nutrition claim applies to every brand. The recipe uses a powdered zero-calorie sweetener and sugar-free chocolate chips, but optional garnishes vary. Check the labels of your chosen protein powder, peanut butter, pudding mix, and toppings for exact figures.
Conclusion
High-Protein Reese’s-Inspired Peanut Butter Cheesecake Cups deliver creamy peanut butter cheesecake fluff beneath a neat dark chocolate cap. Blend the cottage cheese smooth, keep extra milk to a minimum, portion into four jars, and allow the layers to chill before adding crunchy garnishes. With careful texture control and a few minutes of hands-on work, you get a make-ahead dessert that looks close to the reference photo and tastes like a chocolate-peanut-butter treat.
Print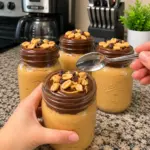
High-Protein Reese’s-Inspired Peanut Butter Cheesecake Cups
- Prep Time: 25 minutes
- Cook Time: 0 minutes
- Total Time: 1 hour 25 minutes
- Yield: 4 cups 1x
- Category: Desserts
- Method: Baking
Description
Creamy peanut butter cheesecake fluff made with cottage cheese, Greek yogurt and vanilla protein powder, topped with a glossy chocolate layer.
Ingredients
- 1 cup (225 g) low-fat cottage cheese
- 1 cup (240 g) plain nonfat Greek yogurt
- 1/3 cup (85 g) creamy natural peanut butter
- 1/4 cup (60 g) reduced-fat cream cheese, softened
- 1/4 cup (30 g) vanilla protein powder
- 2 to 3 tablespoons powdered zero-calorie sweetener, or to taste
- 2 tablespoons sugar-free cheesecake or vanilla instant pudding mix, optional
- 1 teaspoon pure vanilla extract
- 1/4 teaspoon fine sea salt
- 1 to 2 tablespoons unsweetened almond milk, only if needed
- 1/2 cup (30 g) light whipped topping, optional
- 1/2 cup (85 g) sugar-free dark chocolate chips
- 2 teaspoons coconut oil
- Chopped roasted peanuts
- Mini sugar-free chocolate chips
- Chopped sugar-free peanut butter cups
- Extra melted chocolate drizzle
- Creamy peanut butter drizzle
- Flaky sea salt
- Crushed peanut butter cookies
Instructions
Step 1 Set out four clean, dry small dessert jars. Let 1/4 cup (60 g) reduced-fat cream cheese soften until easily pressed with a spoon. Stir 1/3 cup (85 g) creamy natural peanut butter thoroughly if its oil has separated. Keep 1 cup (240 g) plain nonfat Greek yogurt cool, but pour off any pooled liquid before measuring. Have all the optional garnishes ready so they can go on after the chocolate sets.
Step 2 Place 1 cup (225 g) low-fat cottage cheese in a food processor or high-speed blender. Process for about 45 to 90 seconds, stopping to scrape the sides, until the curds disappear and the mixture looks creamy. This first blend is important: later ingredients make the mixture thicker and can hide unblended curds.
Step 3 Add 1 cup (240 g) plain nonfat Greek yogurt, 1/3 cup (85 g) creamy natural peanut butter, the softened 1/4 cup (60 g) reduced-fat cream cheese, 1/4 cup (30 g) vanilla protein powder, 2 tablespoons powdered zero-calorie sweetener, 1 teaspoon pure vanilla extract, and 1/4 teaspoon fine sea salt. If using the optional 2 tablespoons sugar-free cheesecake or vanilla instant pudding mix, add it now. Blend until evenly tan and smooth, pausing to scrape down the sides.
Step 4 Taste a small spoonful. Add up to 1 more tablespoon powdered zero-calorie sweetener if desired, then blend briefly. The mixture should mound softly on a spoon. Only if the blender stalls, add 1 tablespoon unsweetened almond milk, blend, and consider the second tablespoon only if still necessary. Do not thin the fluff until it pours like a drink; it needs to support the chocolate topping.
Step 5 For a lighter, mousse-like finish, transfer the filling to a bowl and gently fold in the optional 1/2 cup (30 g) light whipped topping. Do not run the blender again after folding or the added air will collapse. Divide the filling evenly among four jars and smooth each surface with the back of a spoon. Leave a little room at the top for chocolate and garnishes. Refrigerate the jars for about 20 to 30 minutes while preparing the topping.
Step 6 Combine 1/2 cup (85 g) sugar-free dark chocolate chips with 2 teaspoons coconut oil in a dry microwave-safe bowl. Microwave in 15-second bursts, stirring thoroughly between each, until just melted and glossy. Alternatively, stir the bowl over gently simmering water, keeping water out of the chocolate. Let the topping cool for a few minutes until warm but not hot; hot chocolate can sink into the chilled fluff.
Step 7 Spoon the chocolate mixture evenly over the four cold jars, spreading it gently to the glass edge with the back of a teaspoon. Keep the chocolate as a separate top layer rather than swirling it through the pale tan filling. Refrigerate the covered cups for at least 30 to 60 minutes, until the chocolate is set and the cheesecake fluff is nicely chilled. The total chill can be extended for make-ahead serving.
Step 8 Just before serving, add any chosen optional toppings: chopped roasted peanuts, mini sugar-free chocolate chips, chopped sugar-free peanut butter cups, extra melted chocolate drizzle, creamy peanut butter drizzle, a tiny pinch of flaky sea salt, or crushed peanut butter cookies. If the chocolate cap is firm, let the jars stand at room temperature for 5 to 10 minutes so a spoon can break through comfortably. Serve cold with a small spoon.
Notes
Use exactly three distinct WebP images; reuse the featured media ID for the Tasty card. Cover the jars and refrigerate for up to 3 days. Because the filling contains cottage cheese, Greek yogurt, and cream cheese, keep it chilled except during serving. Store crunchy peanuts, cookies, and chopped candy pieces separately, then add them to the tops at the last moment. If condensation appears on the chocolate, blot the jar rim rather than stirring the layers together. Freezing is possible but changes the texture: dairy filling can become grainy or separate when thawed, and the chocolate cap can crack. For the best creamy cheesecake consistency, make the cups fresh and refrigerate them. If you do freeze a spare cup, seal it tightly for up to 1 month, thaw overnight in the refrigerator, and stir the filling only if needed after breaking the chocolate layer. Do not refreeze a thawed cup.