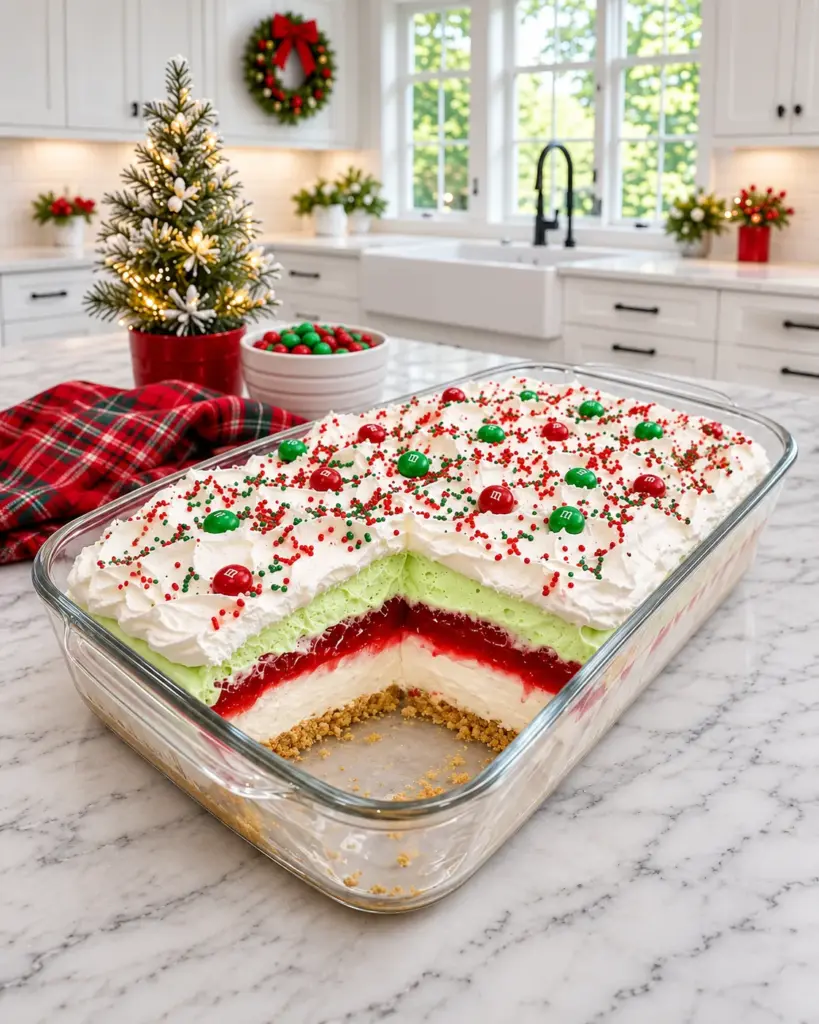
No-Bake Christmas Lush Dessert is a colorful layered holiday dessert built in a clear baking dish. A buttery graham cracker crust supports a smooth vanilla cream cheese layer, a bright red strawberry gelatin layer, a pale green pistachio pudding layer, and a generous white whipped topping. Red and green candies with tiny festive sprinkles complete the Christmas look. When a square is lifted from the dish, every stripe is visible, just as in the supplied reference photograph.
The method does not require an oven, but it does call for patience between layers. The cream cheese layer needs to chill before the strawberry gelatin is added. The gelatin needs to be cool and syrupy before it touches the cream, then it must set before the thicker pistachio mixture is spread over it. These pauses are what keep the red layer distinct rather than letting it bleed into the white and green layers. The dessert can be made in stages while you prepare other food, and most of the total time is hands-off refrigeration.
This guide explains what each ingredient contributes, the order of assembly, and the visual cues for moving to the next layer. It also covers substitutions, common layering mistakes, serving ideas, and storage. The recipe makes a 9-by-13-inch pan, suitable for about fifteen moderate squares. Use a clear glass dish if you want to show off the colors, and keep the candy decorations until near serving for the cleanest white topping.
Why You’ll Love This Recipe
The Christmas colors come from the dessert itself: strawberry gelatin gives a glossy ruby stripe and pistachio pudding gives a soft green stripe. White cheesecake-style cream and whipped topping frame those colors. The result looks festive before a single candy is added. A rectangular glass dish is especially effective because guests can see all the layers from the side and where the first square has been removed.
The ingredients are familiar and the preparation is straightforward. Graham crumbs and melted butter make a press-in base. Softened cream cheese, powdered sugar, vanilla, and whipped topping make the creamy layer. Prepared strawberry gelatin and quick pistachio pudding provide the colored sections without baking. Each component can be mixed in an ordinary bowl, with no special decorating skill or pastry equipment.
It is a useful make-ahead dessert. Once the layers are set, the covered dish can stay refrigerated until it is time to serve. The top can be decorated at the end, so the candies and sprinkles remain bright. Cut small portions for a dessert buffet or larger squares for a plated family dessert. The chilled texture is particularly welcome after a rich holiday meal.
Ingredients
For the Graham Cracker Crust
- 2 cups (200 g) graham cracker crumbs — Fine, even crumbs press into a sturdy no-bake base.
- 1/2 cup (113 g) unsalted butter, melted — Binds the crumbs so the first layer can support the filling.
- 2 tablespoons granulated sugar — Adds a little sweetness and helps the crust hold together.
For the Cream Cheese Layer
- 8 ounces (225 g) cream cheese, softened — Beat until smooth before adding the airy topping.
- 1/2 cup (60 g) powdered sugar — Sweetens the cheese without a gritty texture.
- 1 teaspoon vanilla extract — Adds the classic vanilla note to the white layer.
- 1 cup (60 g) whipped topping, thawed — Fold in gently to make this layer light and spreadable; the weight is approximate.
For the Strawberry Layer
- 1 package (3 ounces / 85 g) strawberry gelatin — Creates the distinct red layer; use the powdered gelatin dessert mix.
- 1 cup (240 ml) boiling water — Fully dissolves the strawberry gelatin powder.
- 1 cup (240 ml) cold water — Cools and dilutes the dissolved gelatin to the specified strength.
For the Pistachio Layer
- 2 packages instant pistachio pudding mix, 3.4 ounces (96 g) each — Gives the dessert its pale green pudding layer; use instant, not cook-and-serve.
- 2 cups (480 ml) cold milk — Whisk with both pudding packages for a thick mixture that can be layered.
- 1 cup (60 g) whipped topping, thawed — Lightens the pudding after it thickens; the weight is approximate.
For the Festive Topping
- 2 cups (120 g) whipped topping, thawed — Makes the fluffy white top that carries the decorations; the weight is approximate.
- 1/4 cup red and green candies — Scatter over the white topping shortly before serving.
- 1 tablespoon red, green, and white sprinkles — Adds small festive color accents without covering the cream.
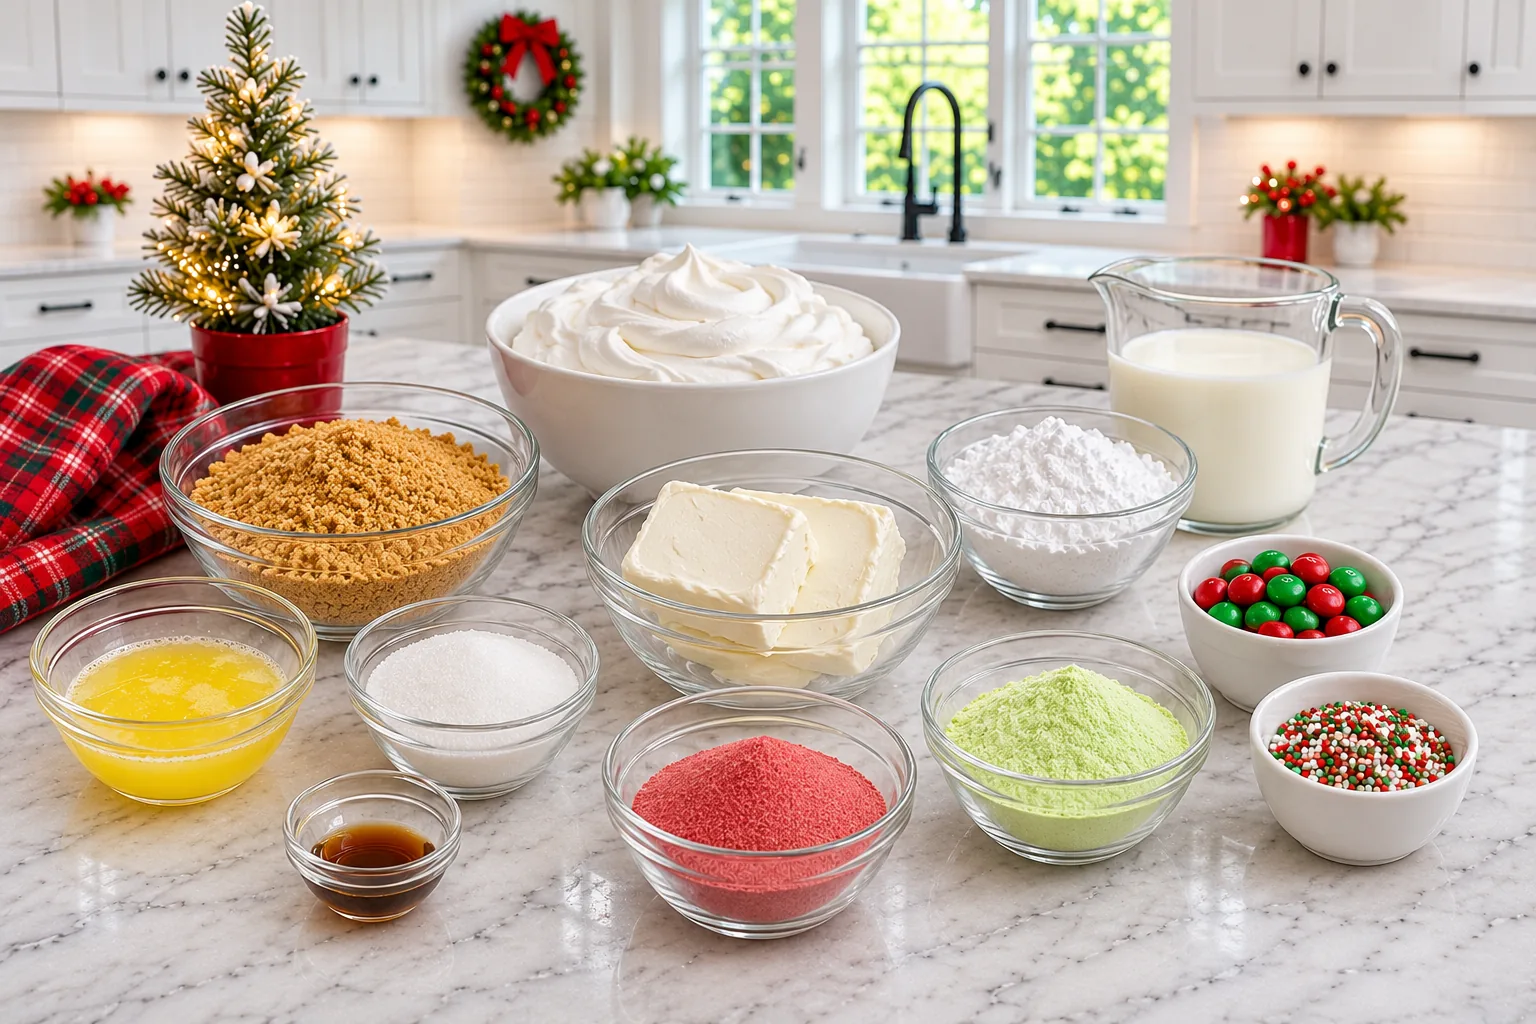
Ingredient Notes and Substitutions
Use fine graham cracker crumbs so the base presses flat and the layers sit evenly. If starting with whole crackers, crush them finely and measure after crushing. Mix the crumbs with melted unsalted butter and the two tablespoons of granulated sugar until no dry pockets remain. Press firmly but evenly across the dish. A loose crust falls apart when squares are lifted; an uneven crust makes the red and green lines appear tilted through the glass.
The cream cheese should be softened enough to beat smooth. Powdered sugar disperses quickly, and vanilla rounds out the flavor. Fold in one cup of fully thawed whipped topping after beating the cheese mixture; do not beat the topping hard with the mixer. The goal is a smooth but airy white layer. Spread it carefully to the corners and level the surface so the gelatin can rest on a uniform base. Keep this layer refrigerated while the gelatin cools.
For the red stripe, use one three-ounce package of strawberry gelatin dessert powder. Dissolve it in one cup of truly boiling water, then stir in one cup of cold water. The hot water is used to dissolve the powder; no part of the dessert is baked. Let the liquid cool, then refrigerate it briefly until it becomes noticeably thicker but still pourable. It should not be hot when it touches the cream cheese layer, and it should not be completely set in its bowl. If it starts to gel too firmly before you pour it, whisk gently until pourable rather than adding extra water.
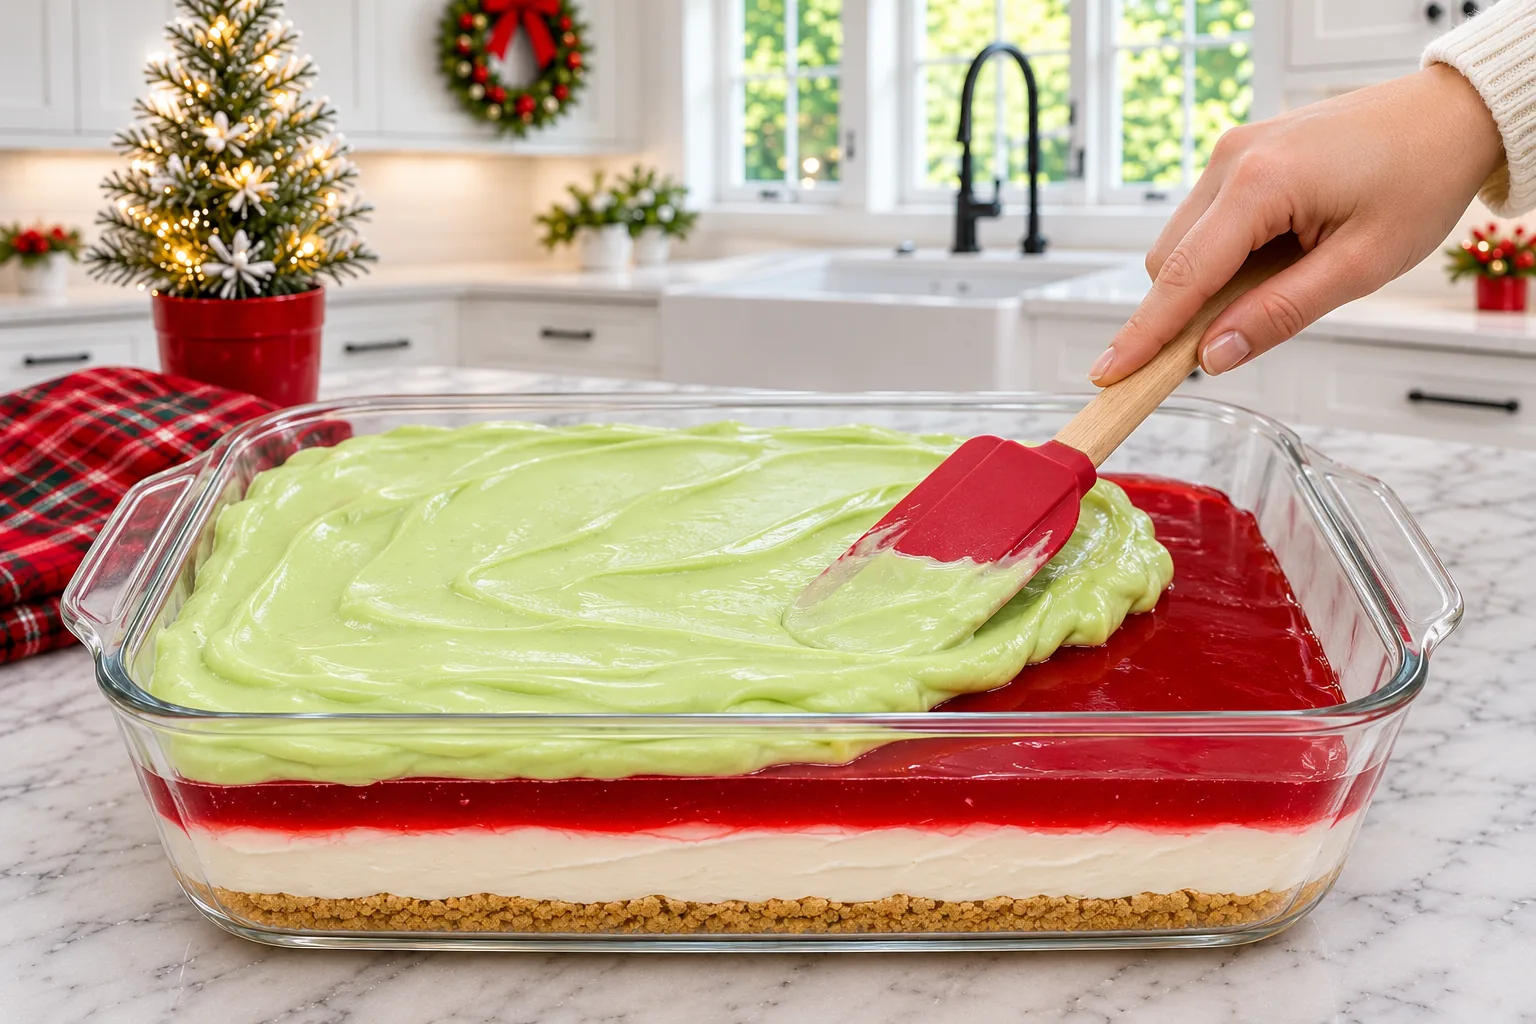
The pistachio layer uses two packages of instant pudding with only two cups of cold milk. That is intentionally thicker than a standard bowl of pudding and helps it stay above the strawberry layer. Choose instant pistachio pudding mix, not a cooked pudding product. Whisk until thickened, then fold in one cup of thawed whipped topping. Wait until the red gelatin is firmly set before adding the green mixture, and spoon it on in small dollops before smoothing. Pressing a thick mass across the gelatin can tear the red surface.
Whipped topping appears in three separate amounts: one cup in the cream cheese layer, one cup in the pistachio layer, and two cups on top. Reserve or measure these portions before starting so the right amount reaches each step. The red and green candies and red, green, and white sprinkles are decoration. Add them close to serving; their colors may bleed if left against moist topping for a long time. The reference shows a generous white top with scattered candy, not a solid blanket of sprinkles.
You can substitute a similar plain cookie crumb for graham crumbs if necessary, but the flavor and color of the base will change. A strawberry-flavored gelatin dessert powder is needed for the red layer; a different flavor may change the Christmas color. Milk should be cold for the instant pistachio pudding to thicken as intended. If using a different milk product, check that the particular pudding mix will set with it, as results can vary.
Instructions — Detailed Preparation
Step 1: Prepare the dish and crust
Set out a 9 x 13-inch clear glass baking dish. In a medium bowl, combine 2 cups graham cracker crumbs, 1/2 cup unsalted butter, melted, and 2 tablespoons granulated sugar. Stir until every crumb looks moistened. Tip the mixture into the dish and press it into an even, compact layer across the entire base, especially the corners. Chill for 20 minutes while you make the first filling. The chilled crust should feel firm enough to spread over without dragging crumbs into the white layer.
Step 2: Mix the cream cheese layer
Place 8 ounces cream cheese, softened, in a mixing bowl and beat until smooth. Beat in 1/2 cup powdered sugar and 1 teaspoon vanilla extract. Scrape the bowl and beat briefly again to remove any lumps. Fold in 1 cup whipped topping, thawed, with a rubber spatula. Spoon this mixture over the chilled crust and spread it gently and evenly to the edges. Cover and refrigerate for at least 30 minutes so the surface firms before the red layer is added.
Step 3: Dissolve and cool the strawberry gelatin
Empty 1 package strawberry gelatin, 3 ounces, into a heatproof bowl. Add 1 cup boiling water and stir until the powder is completely dissolved. Stir in 1 cup cold water. Let the mixture cool, then refrigerate briefly, checking often, until it is cool and slightly thickened but still flows from a spoon. Do not pour warm gelatin over the cream cheese and do not wait until the gelatin is fully set in the bowl.
Step 4: Add and set the red layer
Take the chilled dish from the refrigerator. Slowly spoon or pour the cooled, lightly thickened strawberry gelatin over the back of a spoon held close to the white layer. Work across the surface so the liquid spreads without digging into the cream. Return the dish to the refrigerator and chill until the red gelatin is completely set, usually 2 to 3 hours depending on the refrigerator and dish depth. It should not ripple when the dish is moved gently.
Step 5: Make the pistachio layer
When the red layer is set, whisk 2 packages instant pistachio pudding mix with 2 cups cold milk for about 2 minutes, until thick. Let it stand briefly if needed to finish thickening. Fold in the separate 1 cup whipped topping, thawed. Place small spoonfuls of the pale green mixture across the set red surface and smooth gently with a spatula. Avoid pressing into the gelatin. Chill the dish for at least 30 minutes so the green layer firms.
Step 6: Finish with whipped topping
Spread the reserved 2 cups whipped topping, thawed, over the chilled pistachio layer in soft swirls. Cover the dish without letting the wrap touch the top and refrigerate for at least 1 more hour, or until the layers feel well chilled and hold a clean edge when a square is lifted. Keep the dessert in the refrigerator until serving.
Step 7: Decorate and serve
Shortly before serving, scatter 1/4 cup red and green candies and 1 tablespoon red, green, and white sprinkles over the white top. Use a sharp knife, wiping it between cuts, to divide the dessert into about 15 squares. Lift each portion with a broad spatula to show the graham crust, white cream cheese, red strawberry, green pistachio, and white topping. The clear glass dish displays the striped layers like the supplied reference image.
Expert Tips
- Choose a clear 9 x 13-inch glass dish so the Christmas colors show from the side.
- Press the graham crust firmly and evenly; chill it before spreading the cream cheese mixture.
- Beat softened cream cheese smooth before folding in thawed whipped topping.
- Cool strawberry gelatin until lightly syrupy before layering it over the cold cheese filling.
- Let the gelatin set completely before adding pistachio pudding so the colors remain distinct.
- Use cold milk and instant pistachio pudding; the reduced milk amount creates a spreadable thick layer.
- Dollop pistachio filling across the surface before smoothing, rather than dragging one large mound over the gelatin.
- Save candies and sprinkles for the end to keep the white topping crisp-looking and the colors bright.
- Wipe the knife after every cut for cleaner red, green, and white stripes.
Common Mistakes
Pouring hot or very thin gelatin directly onto the cream cheese layer is the most likely cause of blurred layers. Heat can soften the white filling, and a forceful pour can break its surface. Chill the cheese layer, cool the gelatin until it starts to feel syrupy, and distribute it slowly over a spoon. The liquid must still be pourable, but it should not be warm. If the red layer is not fully set before the pistachio mixture is added, the colors can mix and the green filling may sink.
Another common mistake is using cook-and-serve pudding in place of instant pistachio pudding. The method here relies on a cold mixture that thickens after whisking with cold milk. Follow the listed two-package-to-two-cup ratio. Adding the milk amount printed for two ordinary pudding packages would make this layer looser than intended. Fold in the whipped topping only after the pudding has thickened. Spreading roughly across the red layer can tear it, so use small dollops and light strokes.
Cream cheese that is too cold can leave lumps in the first filling, while whipped topping that is still frozen can leave uneven pockets. Let both reach the temperatures specified. Keep the finished dish covered in the refrigerator, but avoid pressing plastic wrap onto the white top. Candy colors and sprinkles can bleed during long storage; decorate close to serving. Finally, do not rush the chilling time just because the dessert needs no oven. This recipe’s success depends on each layer being cold and stable before the next one arrives.
Serving Ideas
Bring the chilled dish straight to the dessert table and let guests see the red and green stripes through the glass. A little Christmas tree, plaid cloth, and bowl of candy can echo the reference setting if you are styling a holiday table, but the dessert itself supplies most of the decoration. Cut 15 moderate squares for a gathering. A broad, thin spatula helps lift the first portion, after which the exposed corner makes every layer visible.
Serve on small white plates to highlight the vivid red gelatin and pale green pudding. The dessert is rich and creamy, so modest portions work well after a large meal. For a buffet, keep the pan refrigerated until the last practical moment, then return leftovers promptly. If transporting it, keep it level in a cooler and add the candies and sprinkles after arriving.
Storage and Freezing
Cover the assembled dessert and refrigerate it for up to three days. It is best within the first two days, when the crust is still relatively firm and the whipped topping looks fresh. The graham layer gradually absorbs moisture, which is normal for a no-bake lush dessert. Keep cut portions covered so the exposed edges do not dry out or pick up refrigerator odors. Add candies and sprinkles just before serving if possible.
For make-ahead planning, finish the layers and chill the pan overnight, then decorate the next day. This gives the gelatin time to set and allows neat slices. Do not leave the dessert unrefrigerated for a long party service; the cream cheese, pudding, milk, and whipped topping all belong in the refrigerator. Use a chilled carrier or cooler for travel, and avoid stacking other dishes on the pan’s cover.
Freezing the completed dessert is not recommended. Gelatin and pudding can weep after thawing, the whipped topping may lose its smooth look, and the crumb crust can become soggy. The refrigerator provides the set texture this dessert needs. If you want to work ahead without storing the entire assembled dish, measure the dry crust crumbs and pudding packets in advance, then make and chill the layers in sequence.
FAQ
Does No-Bake Christmas Lush Dessert need an oven?
No. The crust is pressed into the dish and chilled. Boiling water dissolves the strawberry gelatin, but the dessert itself is not baked.
How long should the strawberry layer set?
Chill until it is fully firm, usually 2 to 3 hours. The surface should not ripple when the dish is moved gently.
Why did my layers mix together?
The white layer may not have been cold enough, the gelatin may have been too warm or thin, or the red layer may not have fully set before the pudding was spread. Chill each layer in sequence and work gently.
Can I use cook-and-serve pistachio pudding?
Use instant pistachio pudding for this method. Cook-and-serve pudding requires a different preparation and cooling process.
Can I make it the day before Christmas?
Yes. Assemble and chill the dish the day before, keep it covered, and add the red and green candies and sprinkles shortly before serving.
How many servings does one pan make?
A 9 x 13-inch dish makes about 15 moderate dessert squares. Cut smaller squares for a larger buffet.
Can I freeze the leftovers?
Freezing is not recommended because gelatin, pudding, and whipped topping can change texture after thawing.
Why is the pistachio pudding so thick?
The recipe uses two instant pudding packages with only two cups of cold milk. That thick texture helps the green layer sit above the set gelatin without running into it.
Conclusion
No-Bake Christmas Lush Dessert is a festive pan dessert whose white, red, green, and white layers are as appealing to look at as they are to eat. Make the graham crust, spread the airy cream cheese filling, carefully add cool strawberry gelatin, then wait for it to set before layering on the thick pistachio mixture. Finish with whipped topping and scatter the candies and sprinkles near serving. Give the dish its full chilling time and each square will show the clean holiday stripes from the reference photograph.
Print
No-Bake Christmas Lush Dessert
- Prep Time: 35 minutes
- Cook Time: 0 minutes
- Total Time: 5 hours 35 minutes including chilling
- Yield: 15 servings 1x
- Category: Desserts
- Method: Baking
Description
A festive no-bake layered dessert with graham cracker crust, vanilla cream cheese, red strawberry gelatin, pale green pistachio pudding, and a snowy whipped topping.
Ingredients
- 2 cups (200 g) graham cracker crumbs
- 1/2 cup (113 g) unsalted butter, melted
- 2 tablespoons granulated sugar
- 8 ounces (225 g) cream cheese, softened
- 1/2 cup (60 g) powdered sugar
- 1 teaspoon vanilla extract
- 1 cup (60 g) whipped topping, thawed
- 1 package (3 ounces / 85 g) strawberry gelatin
- 1 cup (240 ml) boiling water
- 1 cup (240 ml) cold water
- 2 packages instant pistachio pudding mix, 3.4 ounces (96 g) each
- 2 cups (480 ml) cold milk
- 1 cup (60 g) whipped topping, thawed
- 2 cups (120 g) whipped topping, thawed
- 1/4 cup red and green candies
- 1 tablespoon red, green, and white sprinkles
Instructions
Step 1 Set out a 9 x 13-inch clear glass baking dish. In a medium bowl, combine 2 cups graham cracker crumbs, 1/2 cup unsalted butter, melted, and 2 tablespoons granulated sugar. Stir until every crumb looks moistened. Tip the mixture into the dish and press it into an even, compact layer across the entire base, especially the corners. Chill for 20 minutes while you make the first filling. The chilled crust should feel firm enough to spread over without dragging crumbs into the white layer.
Step 2 Place 8 ounces cream cheese, softened, in a mixing bowl and beat until smooth. Beat in 1/2 cup powdered sugar and 1 teaspoon vanilla extract. Scrape the bowl and beat briefly again to remove any lumps. Fold in 1 cup whipped topping, thawed, with a rubber spatula. Spoon this mixture over the chilled crust and spread it gently and evenly to the edges. Cover and refrigerate for at least 30 minutes so the surface firms before the red layer is added.
Step 3 Empty 1 package strawberry gelatin, 3 ounces, into a heatproof bowl. Add 1 cup boiling water and stir until the powder is completely dissolved. Stir in 1 cup cold water. Let the mixture cool, then refrigerate briefly, checking often, until it is cool and slightly thickened but still flows from a spoon. Do not pour warm gelatin over the cream cheese and do not wait until the gelatin is fully set in the bowl.
Step 4 Take the chilled dish from the refrigerator. Slowly spoon or pour the cooled, lightly thickened strawberry gelatin over the back of a spoon held close to the white layer. Work across the surface so the liquid spreads without digging into the cream. Return the dish to the refrigerator and chill until the red gelatin is completely set, usually 2 to 3 hours depending on the refrigerator and dish depth. It should not ripple when the dish is moved gently.
Step 5 When the red layer is set, whisk 2 packages instant pistachio pudding mix with 2 cups cold milk for about 2 minutes, until thick. Let it stand briefly if needed to finish thickening. Fold in the separate 1 cup whipped topping, thawed. Place small spoonfuls of the pale green mixture across the set red surface and smooth gently with a spatula. Avoid pressing into the gelatin. Chill the dish for at least 30 minutes so the green layer firms.
Step 6 Spread the reserved 2 cups whipped topping, thawed, over the chilled pistachio layer in soft swirls. Cover the dish without letting the wrap touch the top and refrigerate for at least 1 more hour, or until the layers feel well chilled and hold a clean edge when a square is lifted. Keep the dessert in the refrigerator until serving.
Step 7 Shortly before serving, scatter 1/4 cup red and green candies and 1 tablespoon red, green, and white sprinkles over the white top. Use a sharp knife, wiping it between cuts, to divide the dessert into about 15 squares. Lift each portion with a broad spatula to show the graham crust, white cream cheese, red strawberry, green pistachio, and white topping. The clear glass dish displays the striped layers like the supplied reference image.
Notes
Use exactly three distinct WebP images; reuse the featured media ID for the Tasty card. Cover the assembled dessert and refrigerate it for up to three days. It is best within the first two days, when the crust is still relatively firm and the whipped topping looks fresh. The graham layer gradually absorbs moisture, which is normal for a no-bake lush dessert. Keep cut portions covered so the exposed edges do not dry out or pick up refrigerator odors. Add candies and sprinkles just before serving if possible. For make-ahead planning, finish the layers and chill the pan overnight, then decorate the next day. This gives the gelatin time to set and allows neat slices. Do not leave the dessert unrefrigerated for a long party service; the cream cheese, pudding, milk, and whipped topping all belong in the refrigerator. Use a chilled carrier or cooler for travel, and avoid stacking other dishes on the pan's cover. Freezing the completed dessert is not recommended. Gelatin and pudding can weep after thawing, the whipped topping may lose its smooth look, and the crumb crust can become soggy. The refrigerator provides the set texture this dessert needs. If you want to work ahead without storing the entire assembled dish, measure the dry crust crumbs and pudding packets in advance, then make and chill the layers in sequence.